The Foolproof Beginner Sourdough Loaf (Step-by-Step)
What is the easiest reliable first sourdough loaf recipe?
On this page
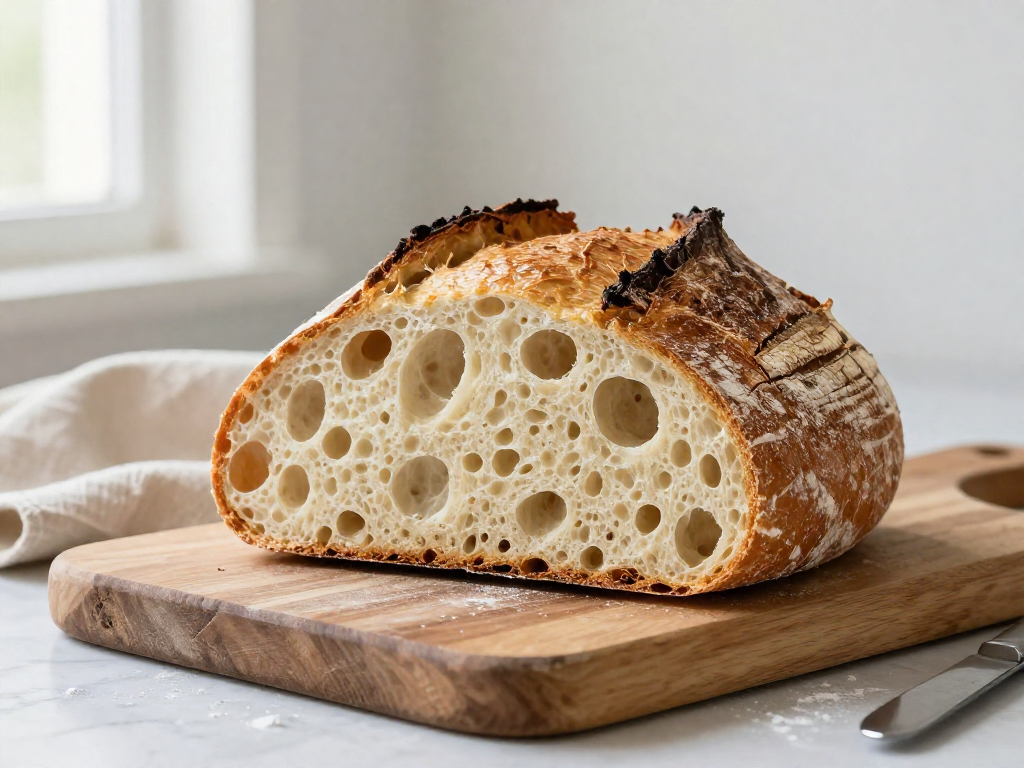
Open by naming the exact frustration: you followed a recipe and still got a flat, gummy brick. Promise one forgiving master recipe that uses visual cues instead of perfect timing or math, so a beginner can succeed on the first real attempt. Set expectations honestly (you need an active starter and roughly 24 hours mostly hands-off) and tell them this single loaf is the one to repeat until it's muscle memory.
Before You Start: What You Actually Need
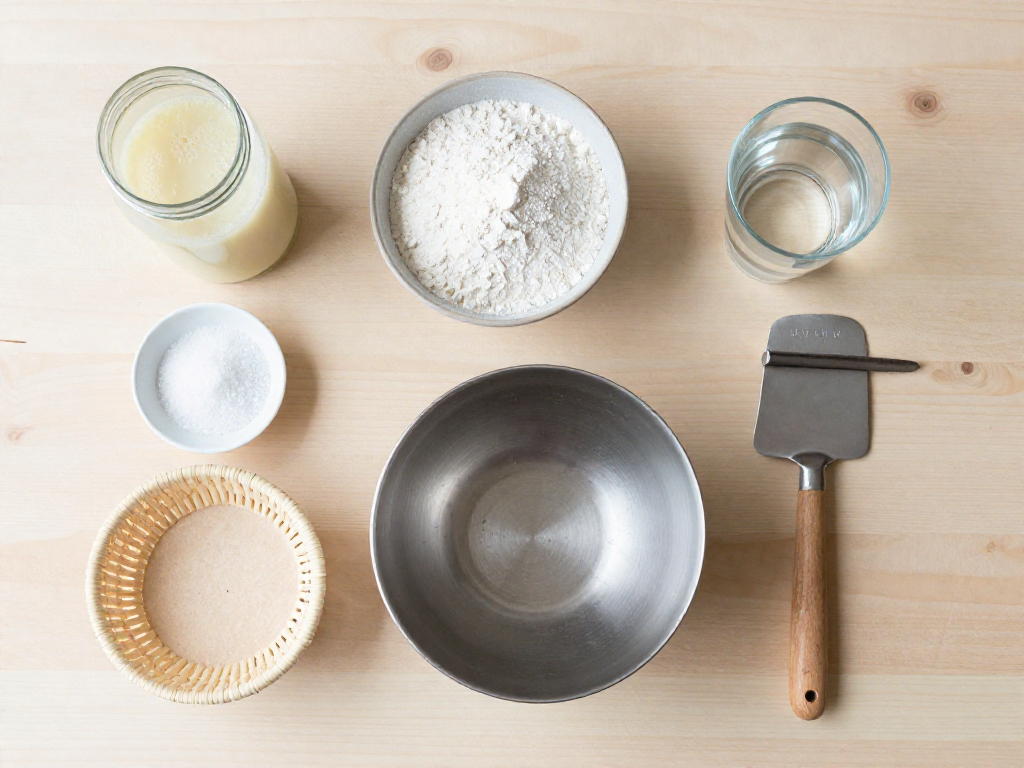
Good news: you don't need a fancy mixer, a proofing cabinet, or a wall of gadgets. Here's the short list that actually matters for your first loaf.
The Equipment (Minimal Version)
- Dutch oven (cast iron with a lid) — traps steam so your loaf rises and gets a crisp crust. This is the one item worth having.
- Banneton (proofing basket) OR a bowl + clean kitchen towel — holds the dough's shape while it rests. A towel-lined bowl works perfectly.
- Digital kitchen scale — non-negotiable (more on this below).
- Instant-read thermometer — optional, nice for checking water temperature.
Why the Scale Is Non-Negotiable
Measuring flour by the cup is wildly inconsistent: one person's "cup" can weigh 120g, another's 150g. That 30g swing changes your hydration (the ratio of water to flour, written as a percentage) and is a top cause of dense or gummy loaves. A scale costs little and removes the single biggest source of beginner error. We'll still give you cup estimates, but weigh in grams for your first bake.
The Most Important Check: Is Your Starter Actually Ready?
Your sourdough starter is a living mix of flour and water full of wild yeast that makes bread rise. A weak, sluggish starter is the #1 reason first loaves fail—so confirm it's active before you mix anything.
Run these two checks 4–6 hours after feeding it:
- The "doubles" check: A ready starter roughly doubles in volume within 4–6 hours of feeding and looks bubbly and domed on top. Mark the jar with a rubber band so you can see the rise.
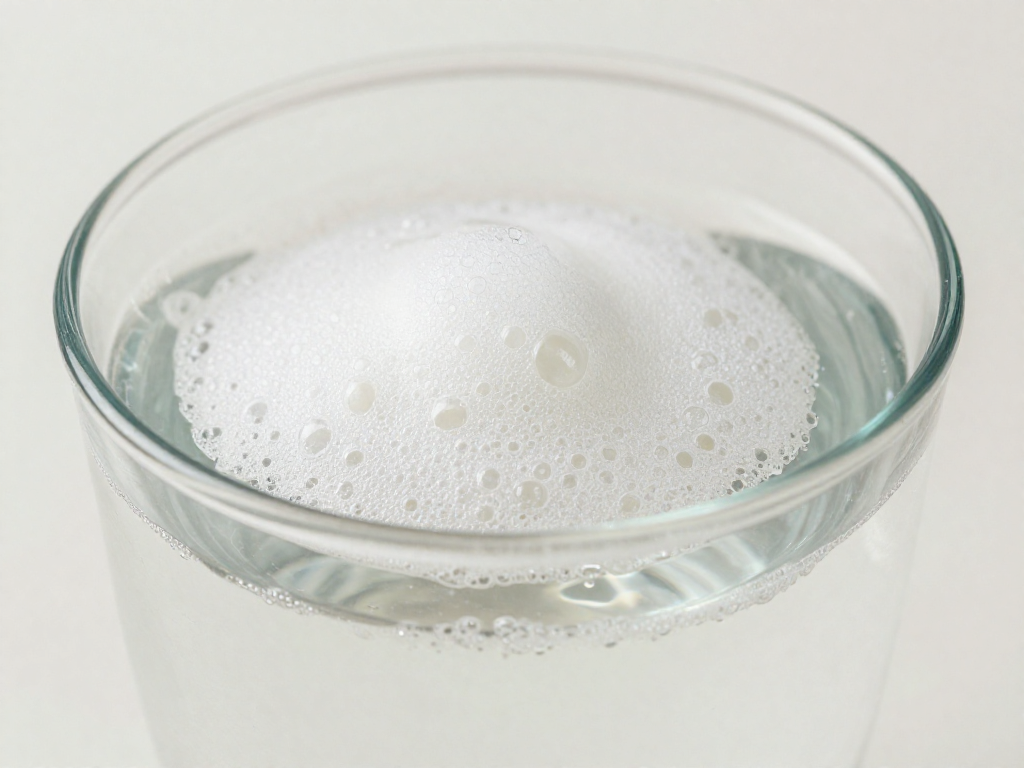
- The float test: Drop a small spoonful into a glass of water. If it floats, it's full of gas and ready to bake with. If it sinks, it needs more time.
If your starter isn't passing these tests, stop here. Don't proceed—you'll waste a day on a loaf that won't rise. Instead, feed it (equal parts starter, flour, and water by weight), keep it somewhere warm, and try again in a day or two until it doubles reliably.
The Ingredients
- Bread flour — its higher protein builds more gluten, giving beginners a more forgiving, better-rising dough than all-purpose. Use it for your first loaf.
- Water — filtered or tap, ideally room temperature.
- Active starter — see the checks above.
- Salt — fine sea salt; it controls fermentation and adds flavor.
Once your starter passes both checks and your ingredients are ready, you're set to begin.
The Master Recipe at a Glance
Here's the entire recipe in one place. Bookmark this—everything in the steps below just explains how to do each line well.
Ingredients
| Ingredient | Weight | Cups (approx.) |
|---|---|---|
| Bread flour | 500g | 4 cups |
| Water (room temp) | 350g | 1½ cups |
| Active starter | 100g | ½ cup |
| Fine salt | 10g | 1¾ tsp |
A kitchen scale is strongly recommended. Cup measurements vary a lot, and in sourdough small differences add up to dense or gummy loaves.
Why 350g water? That's 70% hydration—the weight of water as a percentage of the weight of flour (350 ÷ 500 = 0.70). For beginners this is the sweet spot: wet enough for an open, airy crumb, but firm enough that the dough still feels like dough instead of soup you can't shape.
Timeline at a Glance
| Stage | What happens | Time |
|---|---|---|
| Feed starter | Wake it up until bubbly and doubled | 4–6 hrs (hands-off) |
| Mix | Combine flour, water, starter, salt | 10 min (hands-on) |
| Bulk ferment | Dough rises at room temp with a few stretch-and-folds | 4–6 hrs (mostly hands-off) |
| Shape | Form the loaf and rest | 20 min (hands-on) |
| Cold proof | Slow rise in the fridge for flavor and easier scoring | 12–16 hrs (hands-off) |
| Bake | In a covered Dutch oven, then uncovered | ~45 min |
Bulk ferment = the first, longest rise where the dough develops its structure and flavor. Cold proof = a slow finishing rise in the fridge.
Realistic Time
Plan on roughly 24 hours start to finish, but only about 40 minutes is hands-on. The rest is the dough quietly doing its job while you live your life. Most bakers mix in the late afternoon, bulk ferment into the evening, shape before bed, and bake the next morning.
Times are ranges on purpose—a warm kitchen ferments faster, a cool one slower. The steps below give you visual and sensory cues (not just the clock) so you know when each stage is actually done.
Step-by-Step: Mixing and Autolyse
Start here once your starter is bubbly and active. This stage sets up everything that follows, so move slowly and watch the dough, not the clock.
1. Mix flour and water first (the autolyse)
Autolyse simply means resting a mix of flour and water before adding anything else. It lets the flour fully absorb the water and starts building gluten on its own, with no kneading. The payoff: a smoother dough that's easier to handle and a more open crumb.
In a large bowl, combine:
- 500 g (about 4 cups) bread flour
- 350 g (about 1½ cups) water, room temperature
Mix with your hand or a spatula just until no dry flour remains. It will look rough and lumpy — that's fine. Cover the bowl and rest 30–60 minutes.
Why 350 g water for 500 g flour? That's 70% hydration — the weight of water as a percentage of flour. Higher numbers mean wetter, stickier dough. 70% is forgiving for beginners.
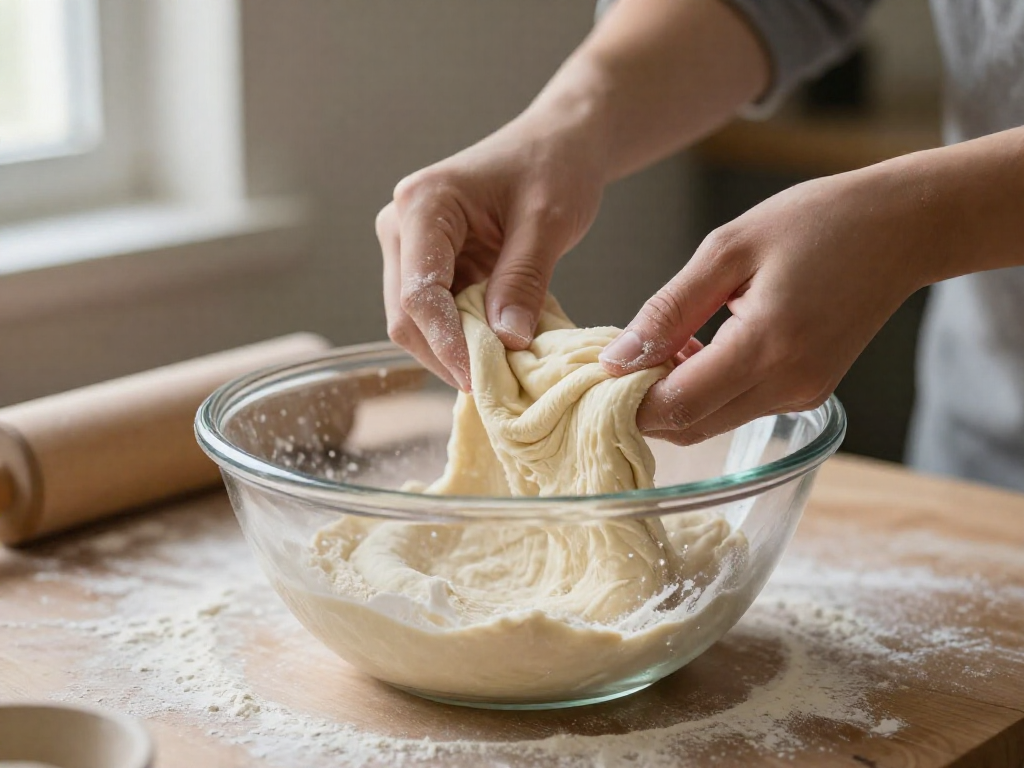
2. Add starter and salt
After the rest, add:
- 100 g (about ½ cup) active sourdough starter
- 10 g (about 1¾ tsp) fine salt
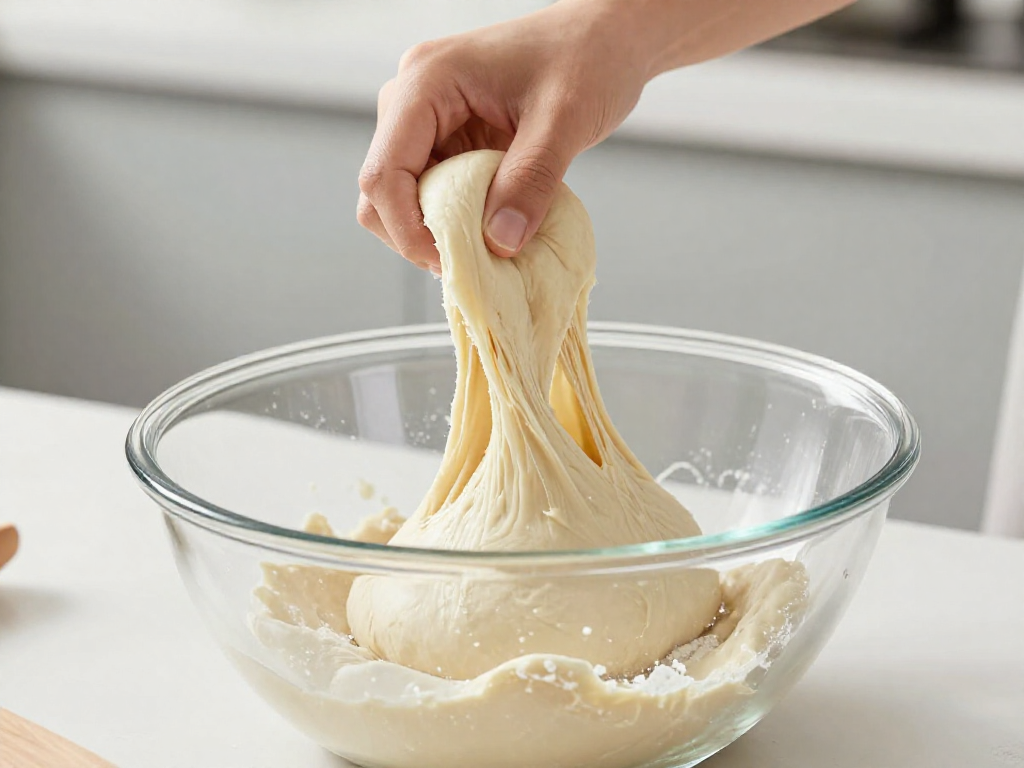
Wet your hand to stop sticking. Pinch and squeeze the dough repeatedly, then fold it over itself, rotating the bowl as you go. Work for 2–3 minutes until the starter and salt disappear into the dough and it feels uniform.
3. Know when it's mixed right
Properly mixed dough is shaggy but cohesive — it holds together as one mass, feels tacky (slightly sticky but releases from your fingers), and shows no dry streaks or grainy patches of salt.
Common mistake
Don't skip the rest, and don't add salt too early. Salt added before the autolyse tightens the dough and slows water absorption, leaving you with a stiffer, harder-to-work loaf. Flour and water first — always.
Results vary with your flour, kitchen temperature, and starter, so use the look-and-feel cues above as your real guide.
Step-by-Step: Bulk Fermentation and Stretch-and-Folds
Bulk fermentation (often shortened to "bulk ferment") is the first rise, when your whole batch of dough sits in one bowl and the starter does its work. This is the single most important stage—and where most flat, dense loaves are decided. The trick: read the dough, not the clock.
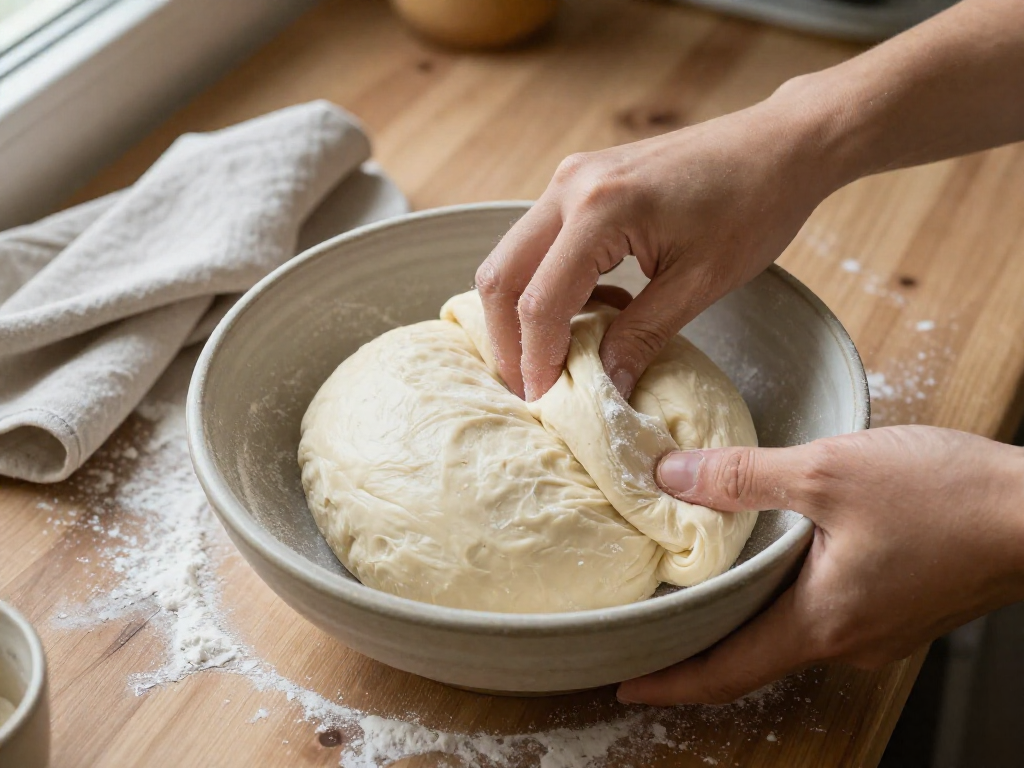
How to do a stretch-and-fold
Instead of kneading, you'll build strength with gentle folds. With wet hands:
- Grab one edge of the dough, stretch it up, and fold it over to the opposite side.
- Rotate the bowl a quarter turn and repeat.
- Do this 4 times total (all four "sides")—that's one set.
Schedule: Do one set every 30–45 minutes, for 3–4 sets total. After the last set, leave the dough alone to finish rising. With each set the dough should feel smoother, tighter, and less sticky.
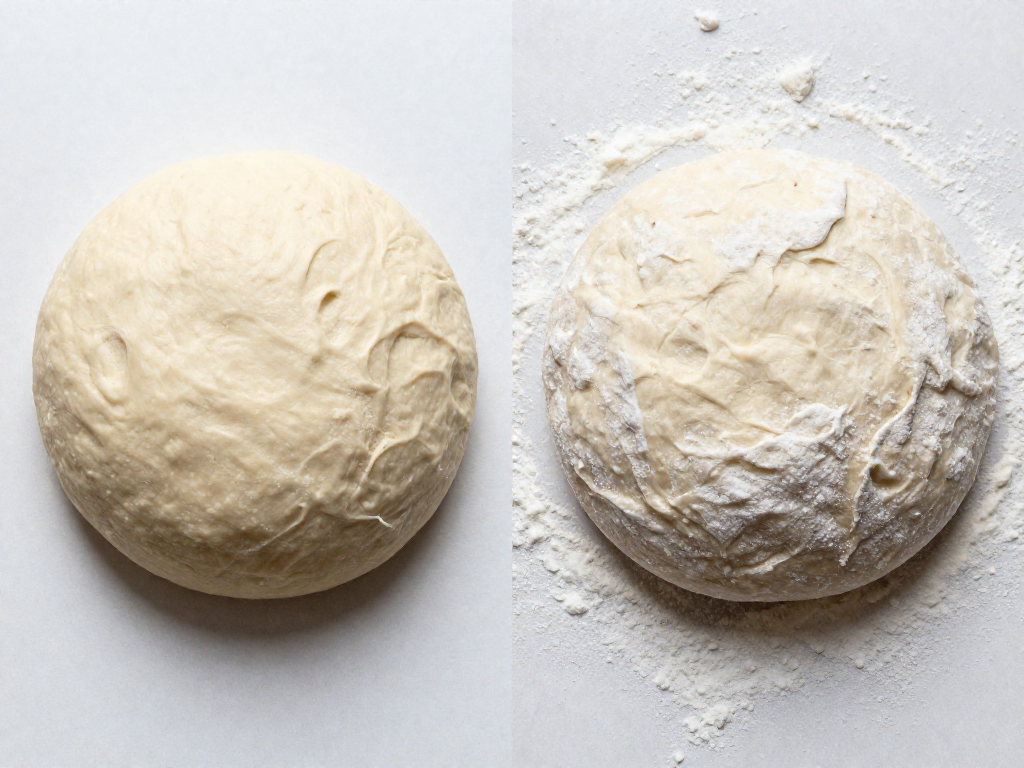
The real goal (this surprises everyone)
You are not waiting for the dough to double. For beginners, end bulk when the dough has risen about 30–50% and is:
- Jiggly — wobbles like set jelly when you nudge the bowl
- Puffy and domed — the surface looks smooth and inflated, not flat
- Dotted with a few bubbles on top and along the sides
Mark the starting height on your bowl or container with a piece of tape so you can actually see the rise. Eyeballing "it looks bigger" is how loaves go wrong.
Temperature changes everything
Yeast activity roughly doubles for every ~8°C (about 15°F) increase, so a warm kitchen finishes bulk much faster than a cool one.
- Warm kitchen (~25–27°C / 78–80°F): roughly 4–6 hours
- Cool kitchen (~20°C / 68°F): roughly 7–10+ hours
Treat these as rough windows, not rules. Use the poke + aeration cue instead: when you do your last fold, the dough should feel airy and alive—lightly press a fingertip in and the dent should spring back slowly, not instantly.
Under-proofed vs over-proofed (check before shaping)
| Under-proofed | Just right | Over-proofed | |
|---|---|---|---|
| Look | Flat, tight, few bubbles | Domed, jiggly, some bubbles | Very bubbly, slumping, possibly deflating |
| Poke test | Springs back fast | Springs back slowly | Doesn't spring back; stays dented |
| Likely result | Dense, gummy crumb | Open, soft crumb | Flat, sour, fragile loaf |
The #1 beginner mistake: ending bulk too early because the timer went off. Watching the clock instead of the dough is the leading cause of a dense crumb. If your kitchen is cool, give it more time—the dough is in charge, not the recipe's hours.
Results vary by kitchen and climate, so expect your first loaf to teach you what "jiggly and puffy" looks like in your space.
Step-by-Step: Shaping and the Cold Proof
By now your dough has finished its bulk ferment (the first long rise at room temperature, where the dough roughly doubles and gets puffy). Shaping is just two quick moves that build surface tension—a tight outer "skin" that helps your loaf rise up instead of spreading flat.
1. Pre-shape (build a loose ball)
- Lightly flour your counter—a thin dusting, not a thick layer.
- Scrape the dough out and fold the edges into the center, flipping it seam-side down.
- Using your hands or a bench scraper, gently drag the ball toward you a few times to tighten the surface.
Visual cue: a rounded mound that holds its shape for a moment before slowly relaxing.
2. Bench rest
Cover and leave it 20–30 minutes. This relaxes the gluten so the final shape doesn't tear.
3. Final shape (add tension)
- Flip the ball seam-side up.
- Fold the top down, the two sides into the middle, then roll it up from the bottom into a tight package.
- Flip seam-side down and do a few more gentle drags to tighten.
Visual cue: a taut, smooth surface that feels firm and holds its shape—no spreading puddle.
⚠️ Common mistake: Over-flouring the dough (flour blocks the surface from gripping itself) or leaving a slack, untensioned ball. Both cause a loaf that spreads flat instead of rising.
4. Into the banneton + cold proof
Place the dough seam-side up into a floured banneton (a proofing basket—a flour-dusted bowl lined with a tea towel works too). Cover and put it straight into the fridge for a cold proof: a slow, cold final rise of 8–16 hours.
Why cold proofing is the beginner's secret weapon:
- Flexible timing — bake anytime within that window, so it fits your schedule.
- Easier scoring — cold, firm dough is far easier to slash cleanly.
- Better flavor — the slow chill develops a deeper, mild tang.
No need to bring it back to room temperature—bake it straight from the fridge (next section).
Results vary by kitchen temperature and starter activity, so use the visual cues as your guide, not the clock alone.
Step-by-Step: Scoring and Baking
This is the payoff. Here's exactly what to do.
1. Preheat the Dutch oven (45–60 minutes)
Place your Dutch oven (lid on) in the oven and heat to 475°F (245°C). Anywhere from 450–500°F works, but give it a full 45–60 minutes. A screaming-hot pot is what drives oven spring—the dramatic rise that happens in the first few minutes of baking. A pot that isn't fully heated is the #1 reason for a flat loaf.
2. Score the cold dough (10 seconds)
Take your dough straight from the fridge—cold dough is firm and far easier to cut cleanly. Lift it onto a square of parchment paper.
Using a sharp blade (a razor or a serrated knife), make one confident cut about ½ inch (1 cm) deep, slightly off-center, holding the blade at a slight angle. Don't saw or hesitate—one fast, decisive slash. This cut tells the loaf where to expand so it opens up instead of bursting at a random seam.
3. Bake covered, then uncovered
Carefully lower the dough (on its parchment) into the hot pot and put the lid on.
| Stage | Time | What it does |
|---|---|---|
| Covered | 20–25 min | Traps steam |
| Uncovered | 20–25 min | Browns the crust |
Total: about 45 minutes.
The covered stage matters most. As the dough heats, it releases moisture that gets trapped under the lid, creating steam. Steam keeps the crust soft just long enough for the loaf to expand fully, then sets into that thin, crackly shell. Without it, the crust hardens too early and chokes the rise.
After 20–25 minutes, remove the lid. Bake uncovered until the crust is deep golden brown—darker than feels comfortable. Tap the bottom: a hollow sound means it's done.
Don't open the oven early
The most common beginner mistake: peeking during the covered stage or pulling the loaf too soon.
Opening the lid early lets the steam escape and stalls the oven spring. Under-baking leaves a gummy, dense interior that looks raw even when the crust looks fine. When in doubt, bake longer and go darker—a deep crust almost always means a properly set crumb.
Then wait
Cool the loaf on a wire rack for at least 1–2 hours before slicing. Cutting hot bread releases steam and gums up the inside. Results vary by oven and climate, so use the visual cues—deep brown, hollow tap—over the clock.
Cooling, Slicing, and Quick Troubleshooting
Cooling, Slicing, and Quick Troubleshooting
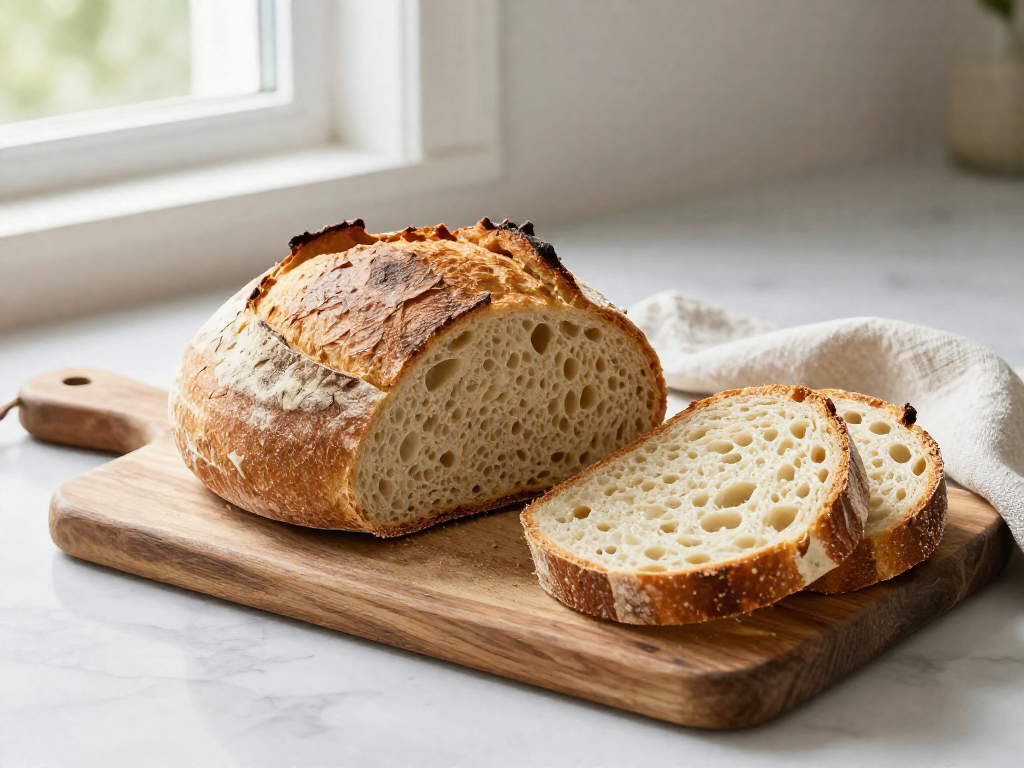
Wait before you cut. Let the loaf cool on a wire rack for at least 1–2 hours before slicing. This is the single most common last-minute mistake. When bread comes out of the oven, the inside is still finishing cooking—the starches are "setting" as the loaf cools. Slice too early and the warm, unset crumb (the soft interior of the bread) smears into a damp, gummy texture, even when the loaf was baked perfectly. Patience here turns a "ruined" loaf into a great one.
Slicing tip: use a serrated bread knife and a gentle sawing motion. Place the loaf on its side if the crust is very hard.
Quick Troubleshooting Map
Match your symptom to the most likely stage, then adjust that one thing next time.
| Symptom | Likely cause | Stage to revisit |
|---|---|---|
| Flat, spread-out loaf | Weak starter or over-fermented dough (bulk went too long) | Starter strength; bulk ferment |
| Dense, tight crumb | Starter not active enough, or under-fermented dough | Starter; bulk ferment (give it more time) |
| Gummy interior | Cut too soon, OR underbaked, OR over-fermented | Cooling time; bake; bulk ferment |
| No oven spring (no rise in the oven) | Weak starter, under-proofed, or oven not hot enough | Starter; proof; bake |
| Very sour but flat | Dough fermented too long (over-proofed) | Bulk ferment; cold proof (shorten next time) |
Note: "Oven spring" is the burst of rising that happens in the first 10–15 minutes of baking. "Over-fermented" means the dough sat too long and lost its strength; "under-proofed" means it didn't have enough time to rise.
One last thing: change only one variable at a time
Resist the urge to overhaul everything after a disappointing loaf. Bake this exact recipe two or three times before adjusting anything. Sourdough varies with your kitchen's temperature, your flour, and your starter—so results will differ, and that's normal. Once you see the same result twice, you'll know which single stage to tweak. That's how beginners turn flat, gummy first attempts into a reliable everyday loaf.
FAQ
Can I make this sourdough loaf without a Dutch oven?
Yes. The Dutch oven just traps steam for a good rise and crisp crust, so you only need to recreate that steam another way. Bake on a preheated baking sheet or pizza stone, and put an oven-safe metal pan on the bottom rack while the oven preheats. Right after loading your loaf, pour about 1 cup (240 g) of boiling water into that pan and quickly close the door. Keep the steam going for the first 20 minutes, then remove the water pan and finish baking until the crust is deep golden brown and the internal temperature reads about 205–210°F (96–99°C). An overturned stainless steel bowl placed over the loaf for the first 20 minutes also works as a makeshift lid.
How do I know when bulk fermentation is done?
Bulk fermentation (the first long rise, when the dough ferments as one mass before shaping) is finished when the dough has grown by roughly 50–75% in volume, looks puffy and domed, and shows a few small bubbles on the surface and sides. It should feel airy and jiggly rather than dense, and the edges where it meets the bowl will look slightly bubbly. Watch the dough, not the clock: in a warm kitchen (around 78°F/25°C) this can take 4–6 hours, but a cool kitchen can take much longer. Use a straight-sided container so the rise is easy to judge. If you go too far, the dough turns slack, very loose, and overly bubbly—a sign of over-fermentation.
Why is my sourdough gummy on the inside?
Gummy crumb (a wet, sticky, paste-like interior) almost always comes from one of three causes. First and most common: slicing too soon—the loaf is still cooking and setting inside as it cools, so wait at least 2 hours, ideally 3–4, before cutting. Second: underbaking—bake until the crust is deep brown and the internal temperature hits about 205–210°F (96–99°C). Third: under- or over-fermentation—dough that didn't ferment enough lacks structure, while over-fermented dough collapses, and both can bake up dense and gummy. Start by simply waiting longer to slice; if that doesn't fix it, bake a few minutes longer and double-check your fermentation cues.
Can I skip the overnight cold proof and bake the same day?
Yes, you can bake the same day—the overnight cold proof (resting the shaped loaf in the fridge) is helpful but optional. The cold proof develops more tangy flavor, makes the dough easier to score, and lets you bake on your own schedule, but it isn't required for a good loaf. To bake same-day, let the shaped dough proof at room temperature until it's puffy and passes the poke test: gently press a floured finger about ½ inch into the dough, and it should spring back slowly and leave a slight indent (roughly 1–2 hours in a warm kitchen). Expect a milder flavor and a slightly softer dough that can be a bit trickier to score than a chilled one.
What if my starter isn't doubling—can I still bake?
Hold off if your starter isn't showing real activity, because a sluggish starter is the number one cause of dense, flat loaves for beginners. Before baking, your starter should reliably double in volume within about 4–8 hours of feeding, look bubbly throughout, and smell pleasantly tangy or yeasty. The quickest test: drop a spoonful into water—if it floats, it's gassy enough to bake with (the "float test"). If it's not doubling, give it a few days of consistent feeding (equal weights of starter, flour, and water) at warm room temperature, ideally with bread flour, and discard down to a small amount before each feed. A young or recently neglected starter often just needs patience, not replacing.
Can I use all-purpose flour instead of bread flour?
Yes, all-purpose flour works, with a few small adjustments. Bread flour has more protein, which builds more gluten (the stretchy network that traps gas and gives bread its rise and chew), so it produces a taller, chewier loaf with more structure. All-purpose flour has less protein, so expect a slightly softer crumb and a bit less oven spring—still a very good loaf for beginners. Because all-purpose absorbs less water, reduce your water by about 5%—for example, on a recipe calling for 350 g water, start with around 330 g and add more only if the dough feels too stiff. Handle the dough gently and don't be alarmed if it feels a touch slacker than a bread-flour dough.
See also
- How to Make and Maintain a Sourdough Starter
- Sourdough Troubleshooting: Why Is My Loaf Flat or Dense?
- Beginner Sourdough Equipment: What You Actually Need
- Understanding Hydration in Sourdough (Beginner Guide)
- Same-Day Sourdough: A No-Overnight Schedule
Related articles
Sourdough Pizza Dough for Beginners: A Forgiving Way to Practice Shaping
Can I use my sourdough starter to make pizza dough, and is it easier than a loaf?
Jul 20, 2026 · 9 min read
The Hardest Loaf to Mess Up: A 60% Hydration Sourdough for Absolute Beginners
What is the easiest sourdough bread recipe that minimizes handling and hydration issues?
Jul 20, 2026 · 8 min read
How to Store Sourdough Bread So It Stays Fresh
Learn how to store sourdough bread so it stays fresh for days, how to freeze loaves and slices, and how to revive a stale crust. Simple beginner steps.
Jun 29, 2026 · 9 min read