Why Your Sourdough Timeline Is Always Off (and How to Fix It)
Why does my sourdough take longer than recipes say it should?
On this page
Instead of another timeline you can’t trust, I’ll explain why your schedules keep breaking—and give you a simple system for reading your dough so you can plan baking that fits your real life.
The Real Reason Your Sourdough Timeline Is Always Off

Your sourdough timeline is off for one simple reason: the recipe you're following was almost certainly developed in a warmer kitchen with a more vigorous starter than what's living on your counter. Sourdough is not a clock-watching exercise—it's a biological process driven by temperature, microbial activity, and flour type. Blindly following a timetable when these variables are different in your kitchen is a fast track to dense, under-proofed loaves. The good news? Once you understand the three hidden variables that sabotage your schedule, you can stop chasing the clock and start reading your dough instead.
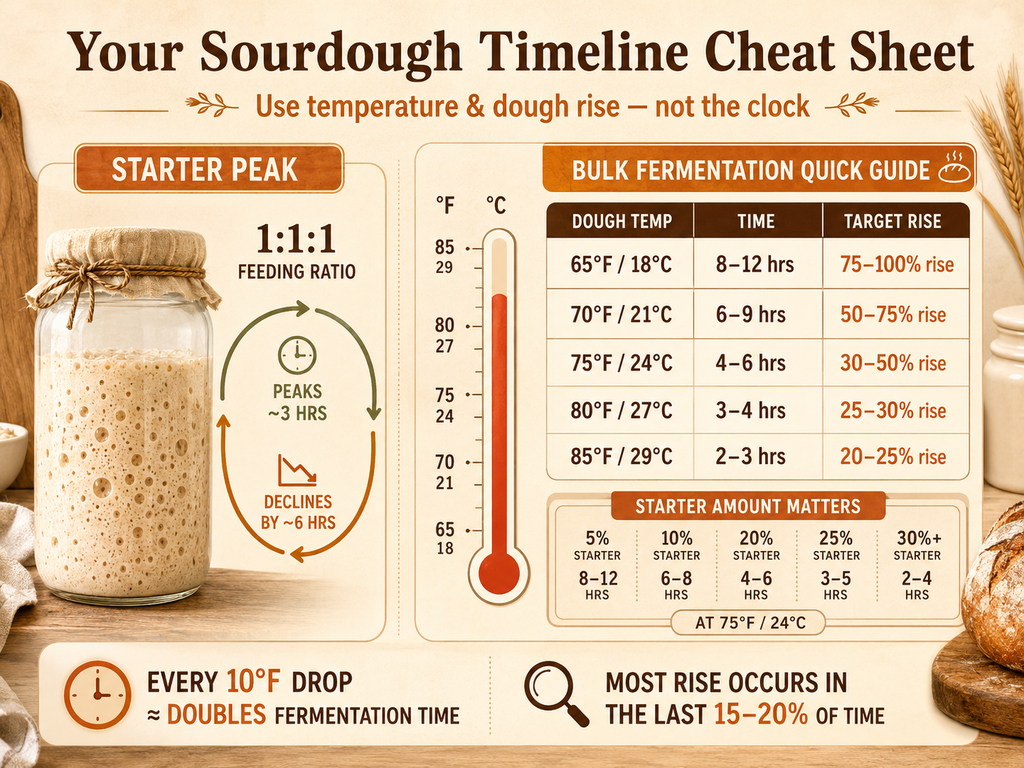
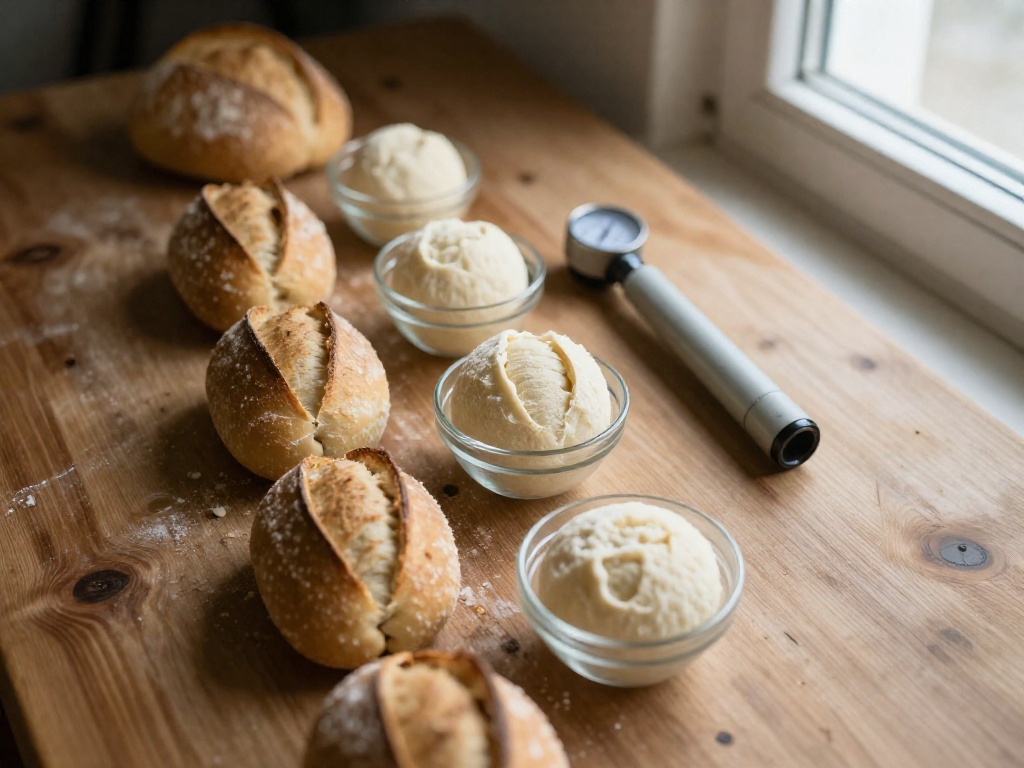
Temperature is the silent schedule-breaker. Bulk fermentation, the first rise after mixing your dough and before you shape it, is exquisitely sensitive to heat. Every 10°F (5.5°C) drop in dough temperature roughly doubles fermentation time (Sourdough Archive). A recipe that promises a 4-hour bulk rise is likely assuming a cozy dough temperature in the 78–82°F range. In a 70°F kitchen—perfectly normal for many homes—that same dough could take anywhere from 6 to 9 hours. If your kitchen sits at 65°F, you’re looking at 8 to 12 hours. The dough thermometer is your most powerful tool here; when you mix your dough, take its temperature, and adjust your expectations accordingly. Even seemingly minor things like using cold water or a starter straight from the fridge can drop the dough temperature by several degrees and add hours to your wait.
The second hidden variable is your starter's vigor. A mature starter fed at a 1:1:1 ratio (equal parts starter, flour, and water by weight) might hit its peak and be ready to use in as little as 3 hours or as long as 8 hours, depending on its particular microbial profile and your room temperature. Recipes assume you're using a starter at its peak of activity—bubbly, doubled, and just beginning to dome. If your starter is sluggish, fed too recently, or past its peak, it will ferment your dough more slowly. The amount of starter in the recipe also changes the math. A dough built with 20% starter (baker's percentage) at 75°F might finish bulk fermentation in 4–6 hours, while one with just 5% starter could take 8–12 hours at the same temperature. If you're used to recipes that call for a hefty portion of starter, switching to a leaner one will throw your whole timeline.
Flour type is the third culprit. Whole grain and rye flours ferment faster than white bread flour because they contain more of the enzymes and minerals that yeast and bacteria thrive on. In controlled comparisons, starters fed with sprouted wheat or rye flour fermented dough significantly faster than those maintained on bread flour alone, and whole grain doughs tend to progress more rapidly during bulk fermentation. So if a recipe was written for all-purpose flour and you substitute whole wheat or rye, you'll likely hit your rise targets sooner—sometimes much sooner—than the schedule says.
Here's the bottom line: the next time a recipe tells you to bulk ferment for “4 hours,” ignore the number and watch what the dough tells you. Look for a specific rise in volume (the target percentage changes with temperature—warm doughs need less rise, cool doughs more) and feel for a puffy, jiggly texture with a few scattered bubbles on the surface. Learn your kitchen’s baseline, measure your dough temperature, and adapt. Your timeline will finally stop being off when you stop letting a clock dictate a process that nature never intended to run on schedule.
How to Read Your Dough Instead of the Clock
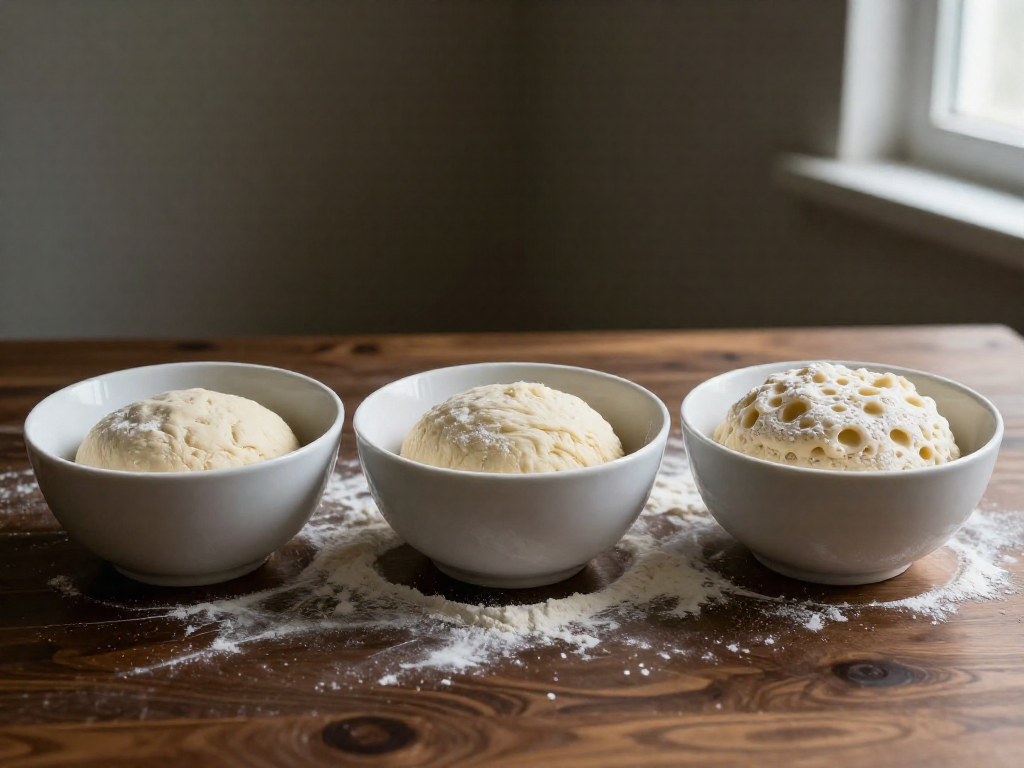
Recipes that say “bulk ferment for 4 hours” are guessing. Your kitchen isn’t their kitchen, and your dough doesn’t wear a watch. The true driver of fermentation speed is dough temperature, and the only reliable way to know when bulk fermentation is done is to measure how much the dough has risen—not how long it’s been sitting.
The key insight: warmer dough ferments faster and needs a smaller percentage rise before shaping; cooler dough ferments slower and needs a bigger rise. A 30% increase might be perfect for an 80°F (27°C) dough, but underproofed for a 70°F (21°C) dough. That’s why a single rise target (like “double in size”) fails across kitchens.
Instead, use this chart based on dough temperature. The times shown assume a 20% ripe starter (the most common amount in beginner recipes) and a refrigerator cold retard after shaping:
| Dough Temperature | Target Rise | Approximate Time |
|---|---|---|
| 65°F (18°C) | 75–100% | 8–12 hours |
| 70°F (21°C) | 50–75% | 6–9 hours |
| 75°F (24°C) | 30–50% | 4–6 hours |
| 80°F (27°C) | 25–30% | 3–4 hours |
| 85°F (29°C) | 20–25% | 2–3 hours |
These numbers come from extensive testing by The Sourdough Archive, and they map beautifully to other bakers’ data. If your kitchen sits in between—say, 78°F—aim for a 30% rise and start checking around the 4‑hour mark.
A second critical truth: most of the volume expansion happens in the final 15–20% of bulk time. For a 5‑hour bulk, that means the first four hours can look quiet—then the dough takes off in the last hour. Don’t be fooled by early inactivity. Wait for the right percentage rise, not an arbitrary clock reading, and you’ll avoid underfermented, dense loaves.
To measure rise accurately, place your dough in a clear, straight-sided container right after mixing and mark the starting level. Check periodically: a 30% rise means the dough has increased its height by about a third. (An aliquot jar—a tiny sample of dough kept in a small jar—can make this even easier.)
Beyond numbers, learn to trust visual and sensory cues. A properly fermented dough will look domed on top, not flat. It will jiggle like jelly when you gently shake the bowl. You’ll see bubbles on the surface and along the sides. If you’re still unsure, do a gentle poke test: a slightly fermented dough will feel puffy and spring back slowly, leaving a faint indentation.
Every kitchen is unique, so start keeping a simple log. Note the dough temperature, the percentage rise you achieved, and how the final loaf turned out. Within a few bakes, you’ll develop an instinct that’s far more reliable than any timer—and you’ll never again panic that your dough is “off schedule.”
Building a Timeline That Works for Your Kitchen
The secret to a sourdough timeline that actually works isn't a single recipe—it's three variables you control: dough temperature, starter amount, and your target rise. Nail these, and you'll turn that vague 4–6 hour range into a reliable plan.
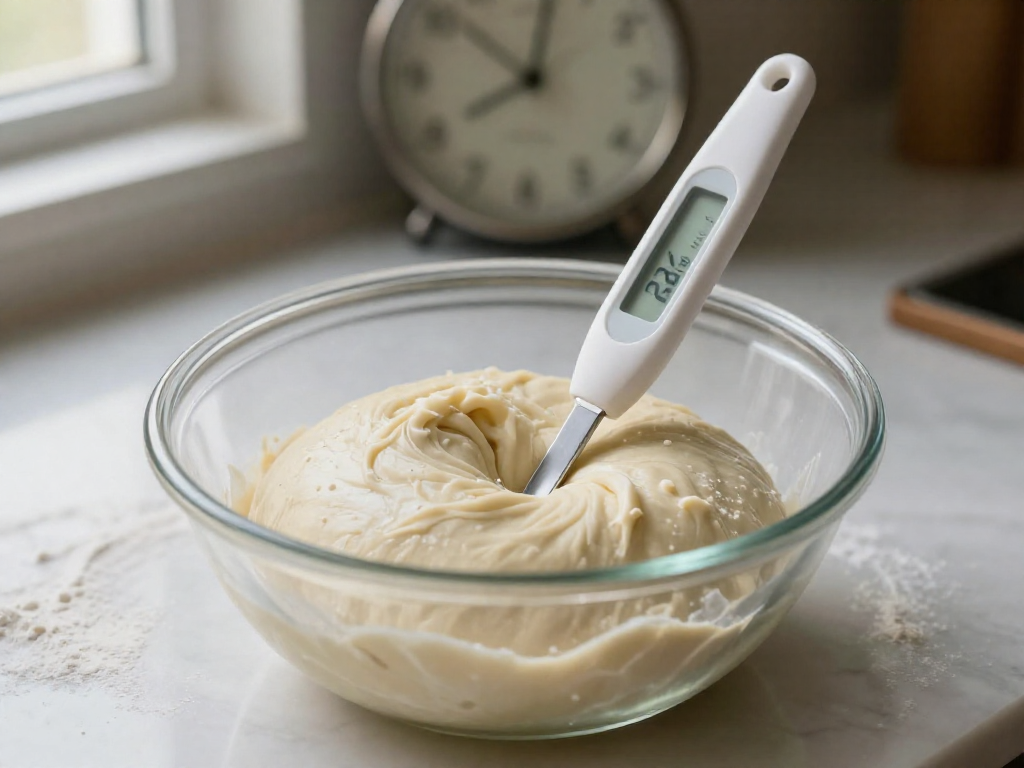
Start by getting a number you can trust. Stick an instant-read thermometer into the center of your dough right after mixing. That temperature—not your kitchen's air temp—drives fermentation speed. For example, at 75°F (24°C) you're looking at 4–6 hours for bulk fermentation (the first rise after mixing), while at 70°F (21°C) that jumps to 6–9 hours. Warmer dough also needs less visible expansion before shaping because the yeast is so active that much of the rise will keep happening after you divide it. At 80°F (27°C), stop bulk when the dough has risen just 25–30%; at 70°F, let it go to 50–75%. This relationship is mapped out beautifully in a Sourdough Archive bulk fermentation chart that also accounts for whether you'll do a cold retard (a long, slow rise in the fridge) after shaping.
Next, tweak your starter percentage to fit your schedule. This is the amount of levain relative to total flour—typically somewhere between 10% and 30%. At a common 75°F dough temperature, using only 5% starter stretches bulk to a leisurely 8–12 hours, perfect for an overnight rest. Bump it to 20% and you'll finish in 4–6 hours; push to 30%+ and you're looking at a speedy 2–4 hours. So if your kitchen runs cool and you're tired of 12-hour ferments, increasing starter from 10% to 20% can halve the time without sacrificing flavor.
Lastly, factor in your flour. Whole-grain doughs (rye, sprouted wheat, or high-extraction loaves) ferment noticeably faster than all-white bread flour doughs. They also often show a weaker windowpane and a less dramatic percentage rise, so don't panic if a 50% whole wheat loaf looks less puffed than you expect at the 4-hour mark—it may already be ready. The same timing rules apply, but you'll want to check sooner.
To build your own timeline: measure dough temperature, decide on a starter percentage that fits your day, then look up the target rise % for that combination (factoring in whether you'll refrigerate). Set a timer for the early end of the range and watch for visual signs—a domed surface, slight jiggle, and the actual percentage rise you're aiming for. This beats crossing your fingers and trusting a random recipe's guess every time.
Emergency Fixes When Timing Goes Wrong
When your sourdough timeline goes sideways, don’t toss the dough—just course-correct. Most problems are momentary, and a quick temperature shift or a repurpose can save the day.
Dough rising too fast? Slow it down by moving to a cooler corner of the kitchen or popping it into the fridge. At 80°F (27°C) a typical bulk fermentation finishes in 3–4 hours, but dropping to 70°F (21°C) stretches that to 6–9 hours, buying you plenty of breathing room (Sourdough Archive). Even a 10°F drop can double the timeline—so a quick chill buys you hours.
Dough taking forever? It needs a warm hug. Turn your oven light on, no heat, and let the dough rise inside—that often gives you a steady 80°F (27°C) ambient. A dough struggling at 65°F (18°C) might need 8–12 hours to finish; lifting it to 75°F (24°C) shrinks that to 4–6 hours. Check every 30 minutes and don’t wait for it to double—watch for a 30–50% rise at warm temps.
Over-fermented and starting to collapse? Shape it immediately, handle gently, and get it into the oven. The loaf will be a bit flatter but still delicious. If the structure is toast, stretch it out on a sheet pan for focaccia or turn it into pizza dough—no waste, just a tasty pivot.
Under-fermented and already shaped? If the dough feels dense and refuses to puff during its final proof, move it to a warmer spot (oven with light on) and give it an extra hour—often that’s all it takes. You’re looking for a slow spring-back when poked and a subtle jiggle in the basket. Next time, extend the bulk rise and aim for the higher end of the rise percentages for your temperature.
Flour Type: The Silent Accelerator
Most beginners don’t realize that swapping bread flour for whole wheat can slash your bulk fermentation time by hours. Whole grain flours pack more nutrients for the yeast and bacteria, so they ferment the dough faster. In head-to-head tests, starters fed on sprouted wheat or rye flour fermented dough noticeably quicker than those fed on plain bread flour (Breadtopia). The result? A whole-grain dough often hits its target rise sooner and can produce a weaker windowpane—that’s the stretchy gluten sheet you check for strength. If your recipe uses a blend, expect the whole grain to nudge the timeline forward. Don’t wait for the clock. When the dough is puffy, jiggly, and roughly at the rise cue for your temperature, it’s time to shape—even if the recipe says you’ve got another hour.
Sources
- When Is Sourdough Starter Ready to Use? Easy Signs to Look For - Amy Bakes Bread — amybakesbread.com
- Sourdough Starter Guide | — thebrewedpalate.com
- Sourdough Starter Master Plan | America's Test Kitchen — americastestkitchen.com
- The Ultimate Guide to Bread Dough Bulk Fermentation | The Perfect Loaf — theperfectloaf.com
- Bulk Fermentation for Sourdough: Using Temperature Not Time - British Sourdough — britishsourdough.com
- Sourdough Bulk Fermentation Chart: Stop Guessing, Start Shaping — sourdougharchive.com
- Sourdough Bulk Fermentation Guide: Times & Temperatures Explained — youtube.com
- [PDF] The SECRET of Bulk Fermentation - The Sourdough Journey — thesourdoughjourney.com
- Experimenting with Different Flours in Sourdough Starter — breadtopia.com
- [PDF] A Guide to Sourdough Bulk Fermentation using The Bulk-O-Matic ... — thesourdoughjourney.com
See also
- How to strengthen your sourdough starter
- Beginner‘s guide to dough temperature
- Simple sourdough recipe with flexible timing
Related articles
Help! My Sourdough Collapsed When I Turned It Out of the Banneton
Why does my dough deflate when I flip it out of the proofing basket? Quick troubleshooting guide covering over-proofing, weak gluten, and poor shaping, with immediate fixes.
Jul 28, 2026 · 6 min read

The Float Test Lie: Why Your Starter Might Be Ready Even If It Sinks
Is the float test a reliable way to tell if my sourdough starter is ready to use? Learn why this common test lies—and what to check instead for perfect bread every time.
Jul 20, 2026 · 8 min read
Sourdough in Summer vs. Winter: How to Adjust for Temperature Extremes
How do you adapt your sourdough baking process for very hot or cold weather?
Jul 20, 2026 · 9 min read