Help! My Sourdough Collapsed When I Turned It Out of the Banneton
Why does my dough deflate when I flip it out of the proofing basket?
On this page
Directly address the baker's panic and frustration, reassure them it’s a common problem, and preview the three main causes (over-proofing, weak gluten, poor shaping) and immediate salvage methods.
You’re Not Alone: Why Dough Collapses
Watching your dough collapse as it leaves the banneton is a shock that hits most beginners. It almost always boils down to over-proofing (where sourdough’s acidity gradually breaks down gluten — King Arthur Baking explains this is a common pitfall), underdeveloped gluten, or a rushed shaping. The good news: a deflated dough isn’t a lost cause — you can reshape it, bake it in a pan, or turn it into focaccia.
The #1 Reason: Over-Proofed Dough
When your dough collapses pathetically as you tip it out of the banneton, the most likely culprit is over-proofing. Over-proofing simply means the dough has fermented too long. The wild yeast has eaten through most of the available food, the gluten network—the web of proteins that gives dough structure—has started to break down, and the trapped gas that was holding everything up escapes. The result? A weak, sticky, deflated mess.
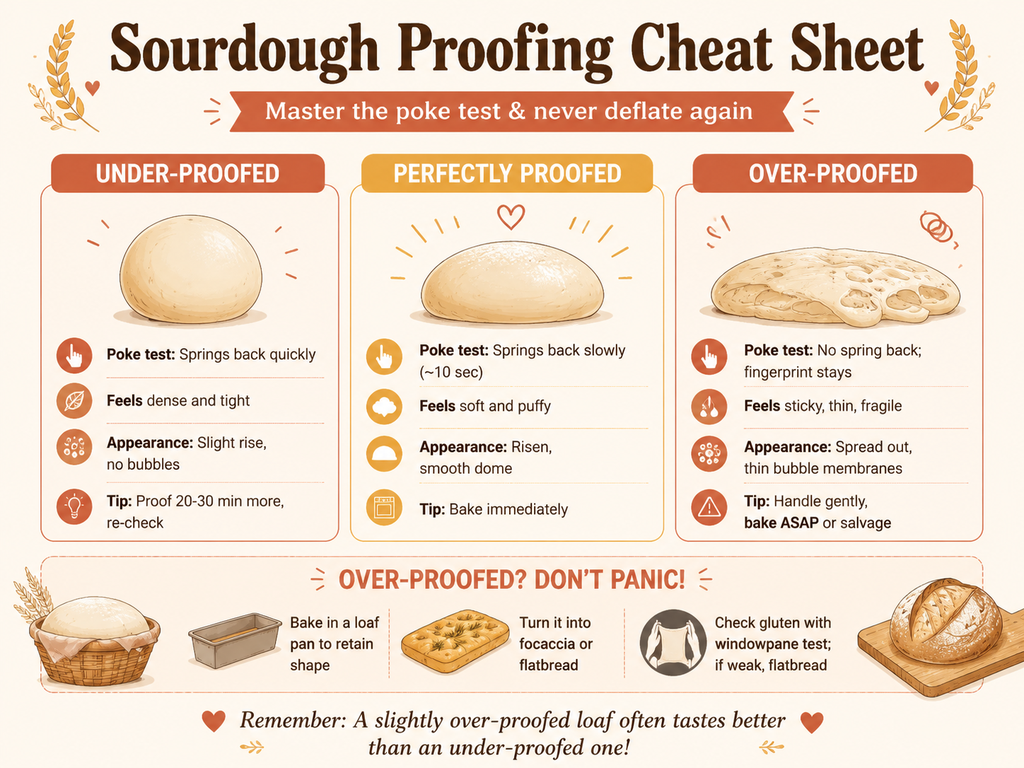
The best way to catch this before it’s too late is the poke test. Wash a finger, dust it with flour, and press it about half an inch into the dough. If the dough is over-proofed, it will hold a deep fingerprint and not spring back at all. The surface may even sigh and deflate slightly under your touch. Properly proofed dough, on the other hand, springs back slowly—the indent should refill in about 10 seconds (Challenger Breadware). Under-proofed dough bounces right back immediately and feels dense.
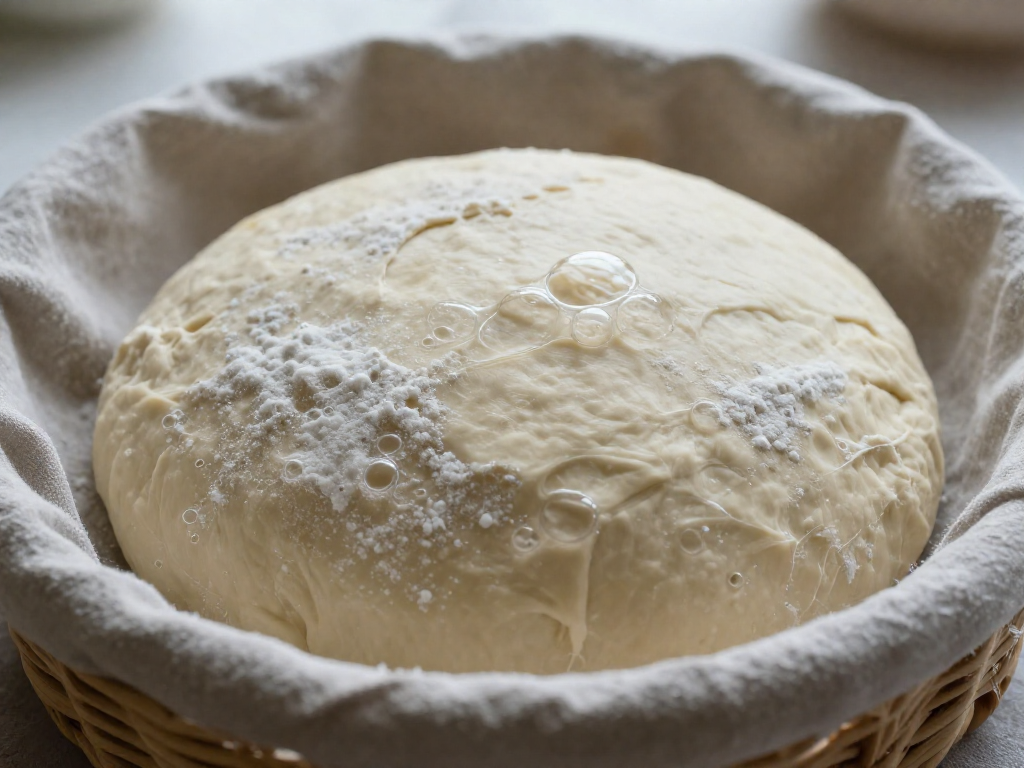
Over-proofed dough gives you other visual clues before the poke test. It spreads excessively in the basket, looking flat and puddled rather than nicely domed. Bubbles, if visible, have thin, stretched membranes that look ready to pop. The texture becomes extremely aerated, almost foamy, and sticky. When you handle it, it feels fragile and may tear just from the weight of the dough.
This fragility explains the collapse. An over-proofed loaf sticks to the banneton because the wet, broken-down structure clings to the fabric. When you invert it, the dough can’t support its own height and flattens instantly. Scoring becomes a nightmare: the blade snags instead of slicing cleanly, dragging the skin and further deflating the loaf. The lack of oven spring is the final insult—the exhausted yeast has little lift left.
If you recognize these signs early enough, you can sometimes rescue the dough by baking it immediately in a well-preheated Dutch oven, but expect a flatter loaf. Next time, dial back your proofing time or temperature. Start checking with the poke test 15–20 minutes earlier, and remember: it’s much easier to let an under-proofed dough catch up later than to fix an over-proofed one.
Is It Weak Gluten or Poor Shaping?
If your dough collapses when it hits the board but wasn’t over-proofed, weak gluten or a shaky shape could be the culprit. Sourdough acidity can gradually break down gluten, especially after a long cold ferment—if your dough has been in the fridge for three days, do the windowpane test before shaping. If it doesn’t stretch thin without tearing, skip the boule and make flatbread instead (King Arthur Baking). Poor shaping also causes collapse; too much flour on your work surface kills surface tension, and skipping a 5- to 10-minute rest after pre-shaping makes the dough fight you.
Immediate Fixes: What to Do with a Deflated Dough
When your dough collapses on the counter, don’t throw it away. That puddle still holds great sourdough flavor and can be salvaged into something delicious.
If the dough is sticky, extremely aerated, and won’t spring back at all when poked, it’s over-proofed. Your best move is to bake it immediately in a loaf pan. Gently coax the dough into a greased 9x5-inch pan, let it relax for a few minutes, then bake. You’ll get a respectable sandwich bread with an open crumb and a tangy kick.
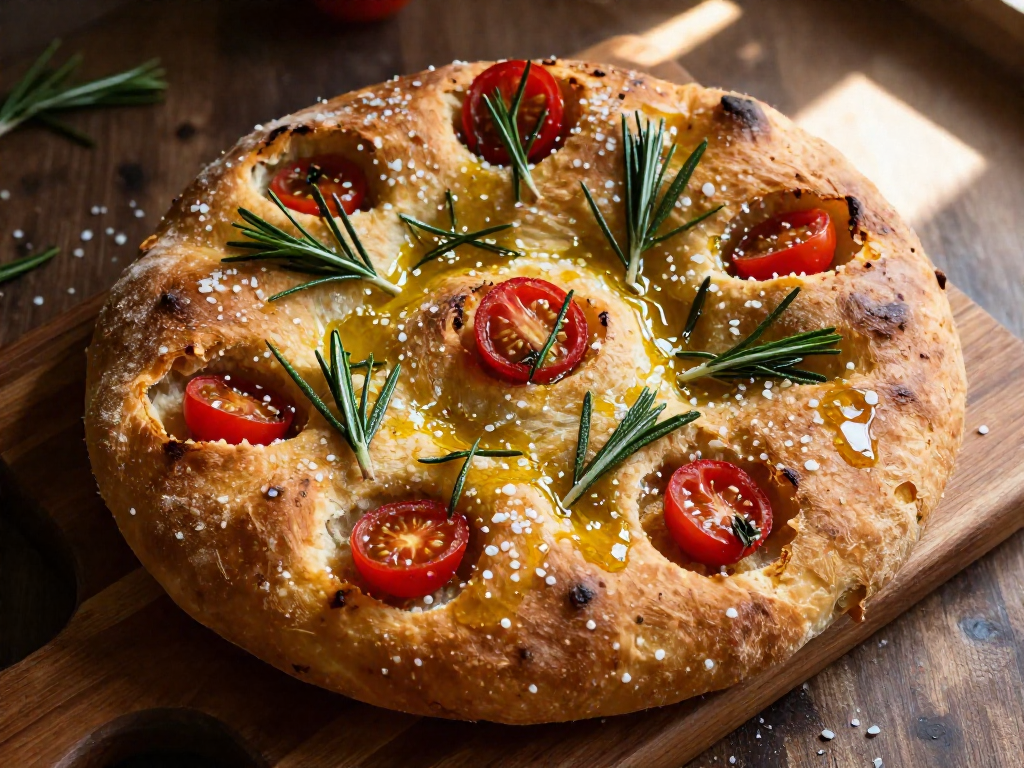
For a truly foolproof rescue, turn it into focaccia. Dump the dough onto a well-oiled sheet pan, dimple it with your fingers, drizzle with olive oil, and sprinkle with salt and rosemary. Bake until golden. The high hydration that led to the collapse now becomes a virtue, giving you a crisp, airy flatbread. If the dough feels so weak it’s tearing when you handle it, skip the loaf pan and go straight to flatbread—as King Arthur Baking notes, a dough that fails the windowpane test is a perfect candidate for flatbread.
If the dough is only slightly over-proofed—still holding some shape but spreading—you can reshape it, let it rest briefly on the counter, then score quickly and bake. Even a deflated loaf tastes terrific, often with a deeper, more complex sourness.
How to Prevent Collapse Next Time
Next time, give your dough a quick strength check before it ever reaches the basket. The windowpane test tells you if the gluten network is strong enough to hold shape during proofing. Stretch a small piece of dough gently—if it doesn’t tear and you can see light through a thin, translucent membrane, you’re good. If it rips immediately, your dough needs more kneading or folding. Sourdough’s natural acidity can slowly weaken gluten over long cold ferments, so always check again right before shaping (King Arthur Baking).
During the final proof, trust your fingertips more than a timer. Press a floured finger gently into the dough: if the indentation springs back quickly and feels dense, it’s under-proofed—keep waiting and recheck every 20–30 minutes. If it stays depressed, deflates easily, or sticks to the banneton, you’ve pushed it too far and should bake immediately. For dough coming straight from the fridge, a tight, dense feel means it still needs warmth and time; a loose, sticky, spreading dough signals over-proofing.
Shaping builds the surface tension that keeps your loaf from slumping. If your dough slides around on a floured counter, wipe the area lightly with water and try again—too much flour prevents it from gripping. After pre-shaping, rest the dough for 5–10 minutes to relax the gluten, then shape firmly without tearing the outer skin.
The Silver Lining: Over-Proofed Tastes Better
The silver lining? A slightly over-proofed loaf often tastes better than an under-proofed one, with a deeper sourdough tang (Reddit).
Sources
- Identifying Proofing Levels in Dough - Challenger Breadware — challengerbreadware.com
- Use the poke test to STOP overproofing your dough! — youtube.com
- What is the windowpane test for bread dough? | King Arthur Baking — kingarthurbaking.com
- Gluten Development vs. Dough Development (Instagram Recap # 7 + Commentary) - Trevor Jay Wilson — trevorjaywilson.com
- How to Shape a Round Sourdough Boule — theclevercarrot.com
- Underproofed, right? Passed the poke test - but bulk fermented for only 3.5 hours. — reddit.com
FAQ
How do I know if my dough is over-proofed or under-proofed?
The easiest way is the poke test: press a floured finger into the dough. If it springs back immediately and feels dense, it's under-proofed. If it doesn't spring back at all and holds a deep fingerprint, it's over-proofed. Over-proofed dough also feels extremely aerated and may deflate when touched, and often sticks to the banneton.
My dough stuck to the banneton—what went wrong?
Sticking is usually a sign of over-proofing. Over-proofed dough becomes weak and sticky, and it can cling to the banneton instead of releasing cleanly. If you're sure your dough wasn't over-proofed, make sure you coat your banneton generously with rice flour to prevent sticking.
Can I save over-proofed sourdough?
Yes, you can often salvage over-proofed sourdough. If the dough is slightly over-proofed, bake it immediately in a loaf pan to help it hold its shape, or turn it into focaccia or flatbread. Even a slightly over-proofed loaf will taste better than an under-proofed one.
What does proper proofing look like with the poke test?
Properly proofed dough will slowly spring back when poked, refilling the indent from your finger in about 10 seconds. That slow rebound tells you the gluten is relaxed but still strong enough to hold shape and expand in the oven.
Why does my dough spread after I turn it out?
Spreading happens when the dough has lost its gluten strength, usually from over-proofing. Over-proofed dough becomes overly acidic and the gluten network weakens, so it can't hold its shape once it's out of the banneton. To avoid this, make sure your dough passes the windowpane test before shaping, indicating well-developed gluten.
See also
- Ultimate guide to sourdough proofing times and temperatures
- How to shape a round boule step-by-step
- Common sourdough mistakes and how to fix them
Related articles
Why Your Sourdough Timeline Is Always Off (and How to Fix It)
Why does my sourdough take longer than recipes say it should?
Jul 28, 2026 · 9 min read

The Float Test Lie: Why Your Starter Might Be Ready Even If It Sinks
Is the float test a reliable way to tell if my sourdough starter is ready to use? Learn why this common test lies—and what to check instead for perfect bread every time.
Jul 20, 2026 · 8 min read
Sourdough in Summer vs. Winter: How to Adjust for Temperature Extremes
How do you adapt your sourdough baking process for very hot or cold weather?
Jul 20, 2026 · 9 min read