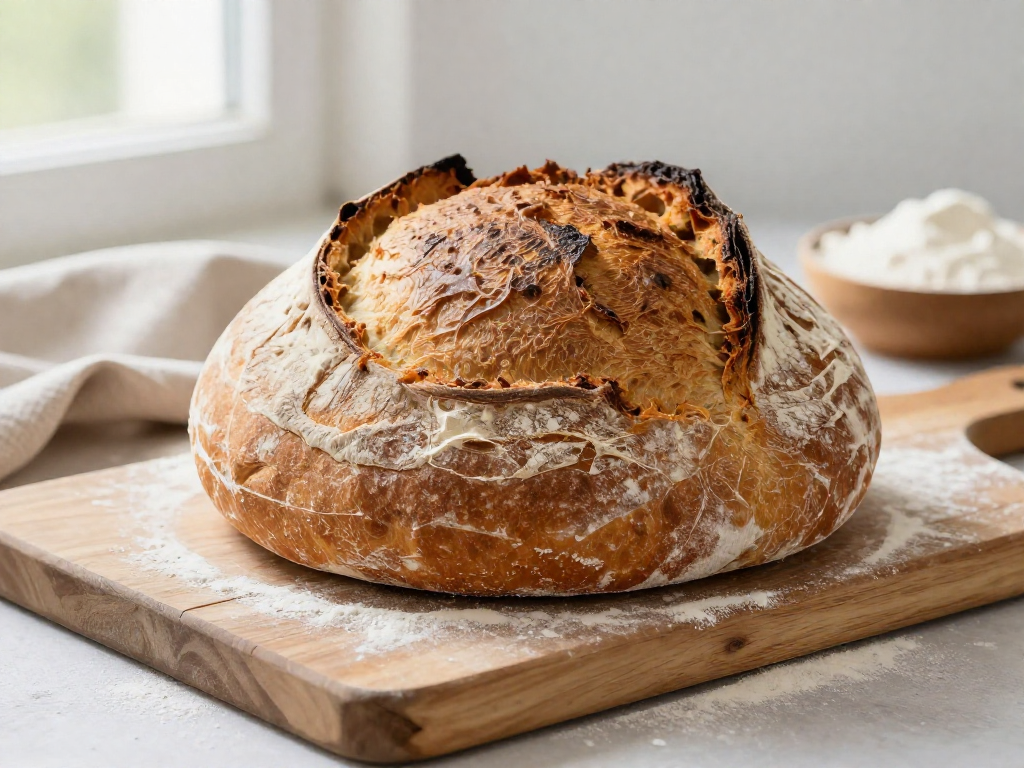
Easy No-Knead Sourdough Bread for Total Beginners
How do I make sourdough without kneading?
On this page
Open by naming the reader's fear—that sourdough requires strong hands, perfect timing, and years of practice—then flip it: the no-knead method lets time and a wet dough do the work for you. Promise one reliable loaf they can make this weekend with an active starter and a Dutch oven, and reassure them that "no-knead" genuinely means no kneading, not a trick.
Why No-Knead Sourdough Works (and Why It's Perfect for Beginners)
Short answer: you don't knead because time does the work for you. Kneading exists to build gluten—the stretchy protein network that traps gas and gives bread its chew. With no-knead sourdough, a long, slow rest (called the bulk ferment—the first long rise after mixing) develops that same gluten on its own. You just wait.
Here's why the hands-off method is actually easier, not lazier:
- Time replaces kneading. During the long fermentation, the flour and water quietly form gluten without any effort from you.
- The dough is too wet to knead anyway. Beginner sourdough is high hydration (hydration just means the weight of water compared to flour—more water makes a softer, more open crumb). A wet dough can't be kneaded by hand, and that's the point.
- Wild yeast does the slow lifting overnight. The natural yeast in your starter rises the dough gradually while you sleep—no rushing, no precise timing windows to babysit.
- Fewer steps means fewer ways to go wrong. Mix, rest, shape, bake. Each step you remove is one less chance for a dense or flat loaf.
You don't need strong hands, special equipment, or perfect timing. You need flour, water, salt, an active starter, and patience.
Want the science? Gluten strands align and strengthen as enzymes and fermentation acids relax the dough over hours—the same result kneading forces in minutes. Results vary by kitchen temperature and climate, so use the sensory cues in each step rather than the clock alone.
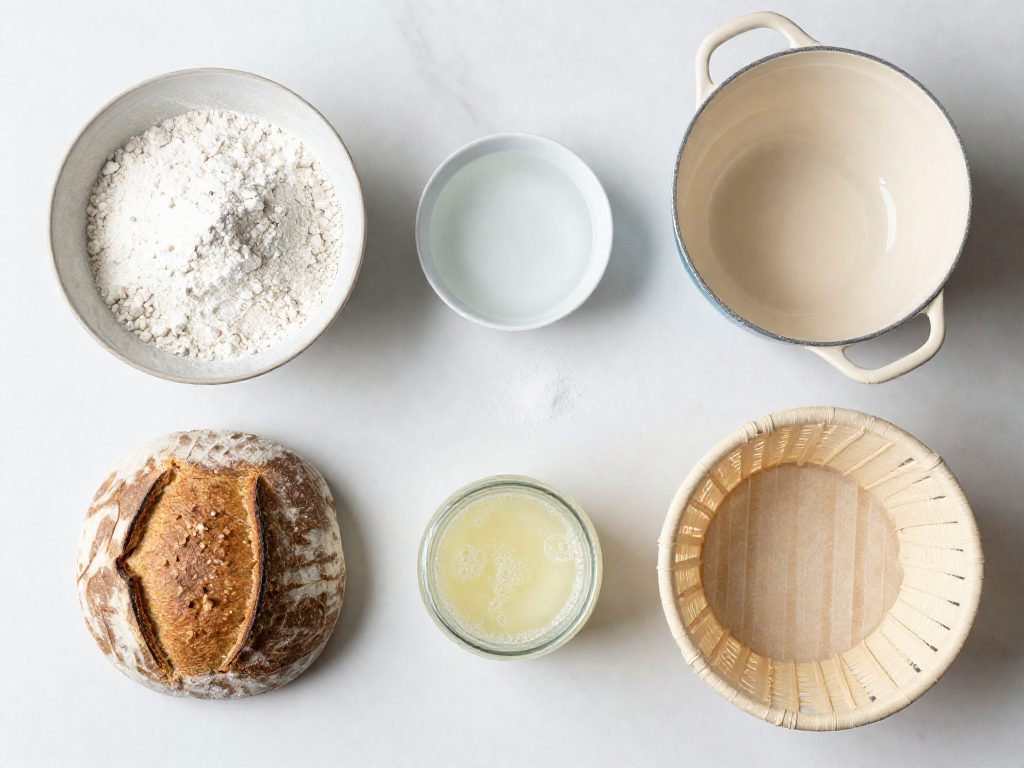
What You Need: Ingredients and Equipment
Good news: this loaf needs just four ingredients and one essential pot. Here's the full list, with backups for anything you don't own.
Ingredients (makes one round loaf)
| Ingredient | Grams | Cups (approx.) |
|---|---|---|
| Bread flour | 500 g | ~4 cups |
| Water (lukewarm) | 350 g | ~1½ cups |
| Active sourdough starter | 100 g | ~½ cup |
| Fine salt | 10 g | ~2 tsp |
- Flour: Bread flour gives the best rise, but all-purpose works for a slightly softer loaf.
- Water: Lukewarm (around 80°F/27°C) keeps fermentation steady. Filtered is nice but tap is fine.
- Salt: Any non-iodized salt. Weigh it if you can—too much slows the rise.
Why your starter must be "active"
An active starter is one that's bubbly, has roughly doubled in size, and passes the float test (a spoonful dropped in water floats instead of sinking). This is the single biggest factor in whether your bread rises. A flat, sluggish starter is the most common cause of dense loaves, so feed it 4–8 hours before mixing and wait for those signs.
Equipment
- Dutch oven (essential): The lid traps steam for a crackly crust and tall rise. No Dutch oven? Use any heavy, oven-safe lidded pot, or bake on a tray with a metal bowl inverted over the dough for the first 20 minutes.
- Kitchen scale (highly recommended): Grams are far more reliable than cups. If you only have cups, spoon and level the flour rather than scooping.
- Banneton: A proofing basket gives a pretty shape—but a bowl lined with a floured towel works just as well.
- Parchment paper: Makes lifting dough into a hot pot safe and easy.
Results vary by kitchen and climate, so treat these as starting points and watch the dough, not just the clock.
The Beginner-Friendly Timeline at a Glance
Here's the good news: you don't babysit this dough. Most of the work happens while you sleep. Here's a realistic schedule built around a normal work-and-sleep day.
| Time | What you do | Hands-on time |
|---|---|---|
| 8:00 PM | Feed your starter (mix it with flour and water so the wild yeast wakes up and gets bubbly) | 2 minutes |
| 10:00 PM | Mix the dough, then cover it | 5 minutes |
| 10:00 PM–7:00 AM | Bulk ferment (the long rise where the dough doubles and fills with gas) — happens overnight while you sleep | 0 minutes |
| 7:00 AM | Shape, rest, and bake | 15 minutes + baking |
Why temperature matters more than the clock. Fermentation is just yeast eating sugar and burping out gas. Warmth speeds them up; cold slows them down. In a warm kitchen (~24°C / 75°F) the overnight rise may finish faster; in a cool kitchen (~18°C / 65°F) it takes longer. So watch the dough, not the timer.
Why the timing is forgiving. Unlike fussy recipes, this method gives you a wide window. An hour early or late won't ruin your loaf.
Read the dough, not the clock. Bulk fermentation is done when the dough has roughly doubled, looks puffy, and shows a few bubbles on top.
Fitting it around real life. Want to bake after work instead? Mix in the morning before you leave, let it ferment all day, and bake in the evening. The schedule flexes to your life — not the other way around.
Step-by-Step: How to Make No-Knead Sourdough Bread
You can make sourdough without kneading by letting time do the work the dough would normally get from your hands. Follow these steps in order, and watch the dough—not just the clock.
What you'll need (one loaf):
| Ingredient | Grams | Cups (approx.) |
|---|---|---|
| Bread flour | 500 g | 4 cups |
| Water (lukewarm) | 350 g | 1½ cups |
| Active sourdough starter | 100 g | ½ cup |
| Fine salt | 10 g | 1¾ tsp |
This makes a roughly 70% hydration dough (the weight of water as a percentage of the weight of flour, here 350 ÷ 500). Higher hydration = wetter, stickier dough.
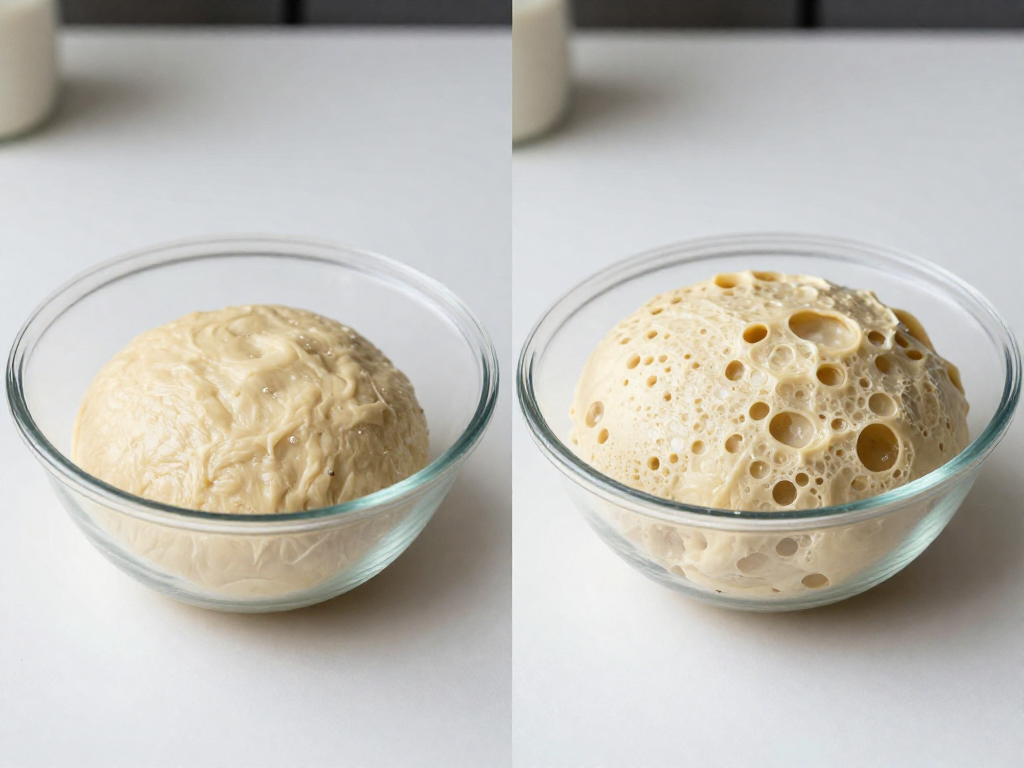
1. Mix and rest (autolyse) — 30 min to 1 hr
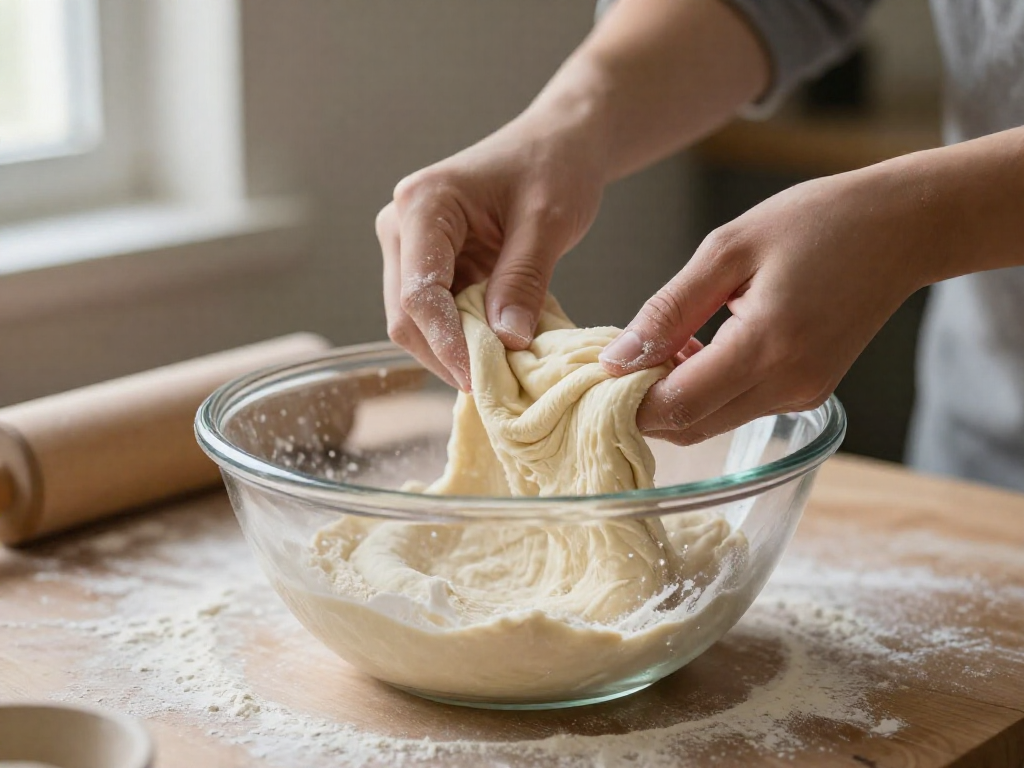
In a large bowl, stir the flour, water, starter, and salt with a spoon or wet hand until no dry flour remains. It will look rough and shaggy, not smooth. Cover and let it sit. This rest is called the autolyse: the flour absorbs the water and starts building gluten on its own, so you don't have to knead.
Cue: dough goes from clumpy to slightly stretchy and easier to handle.
2. Bulk ferment — 4 to 8 hrs (judge by sight)
Bulk ferment is the first long rise, where the whole batch of dough ferments together. Cover the bowl and leave it at room temperature.
Don't trust the clock alone—a warm kitchen (24–26°C / 75–80°F) ferments faster, a cool one slower. It's ready when the dough has risen by about 50%, looks puffy and domed, and shows a few small bubbles on the surface and sides. Underproofed dough bakes dense; overproofed dough goes slack and flat.
3. Optional stretch-and-folds (not kneading)
For better structure, during the first 2 hours of bulk fermentation do 2–3 sets of stretch-and-folds. With a wet hand, grab one side of the dough, stretch it up, and fold it over the center; rotate the bowl and repeat 4 times. That's one set. Space sets about 30 minutes apart. This is gentle—you're folding, not working the dough hard.
Cue: dough feels tighter and smoother after each set.
4. Shape and cold-proof — 12 to 16 hrs
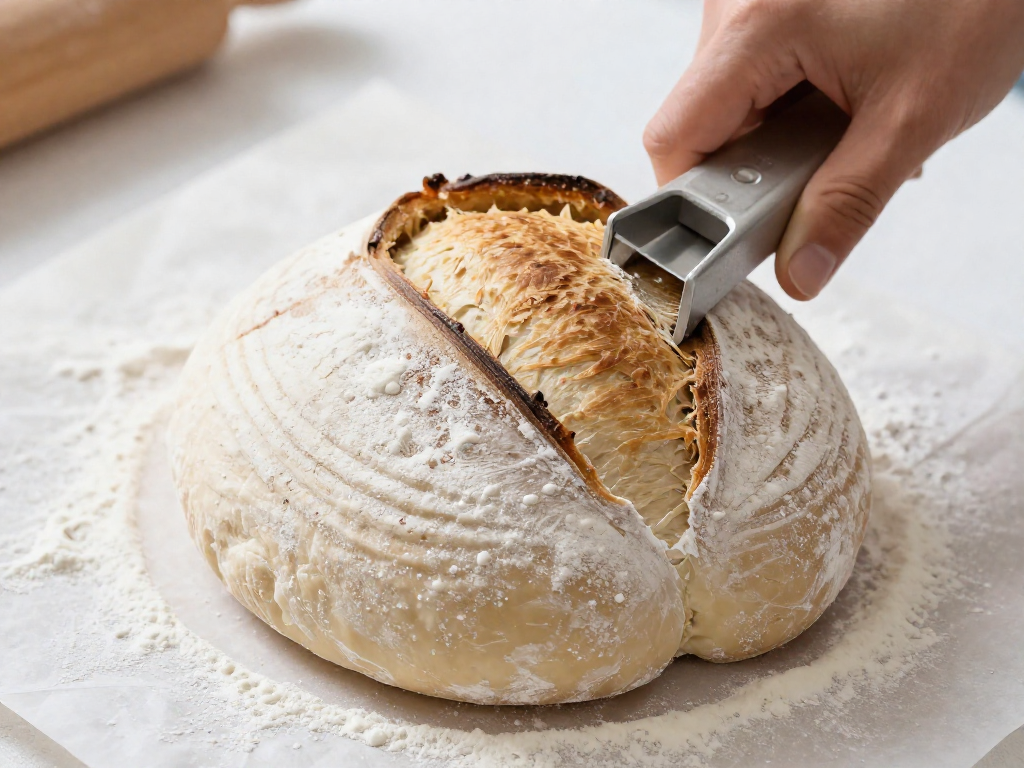
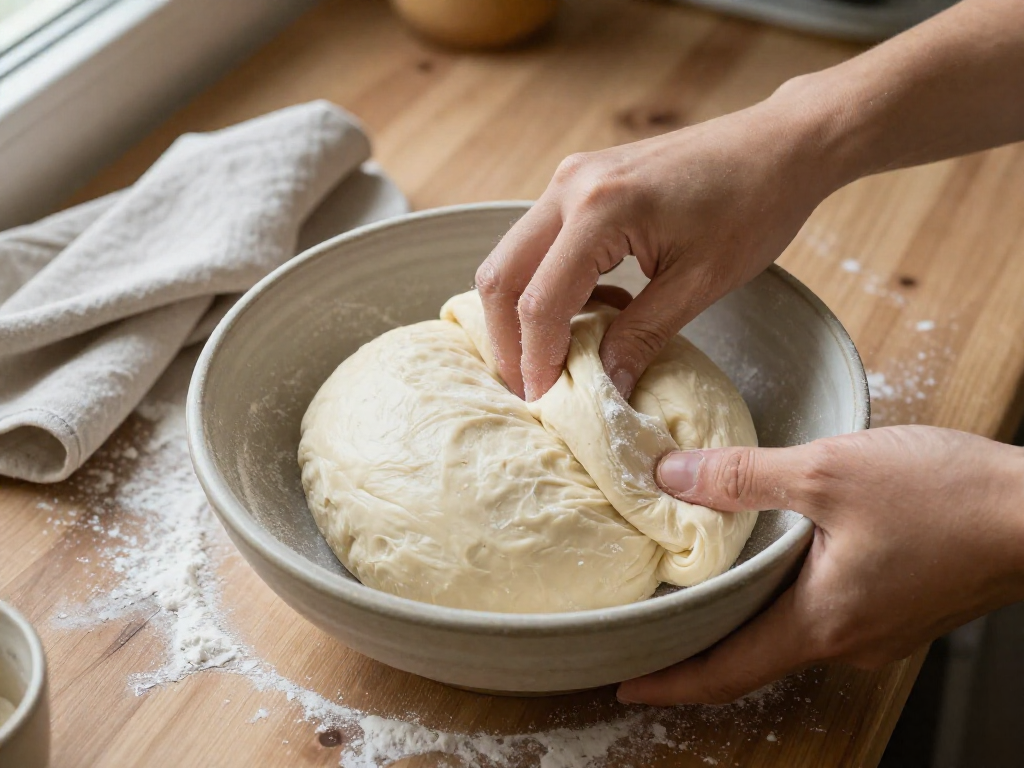
Tip the dough onto a lightly floured counter. Fold the edges into the middle to form a ball, flip it seam-side down, and gently drag it toward you a few times to build surface tension. Place it seam-side up in a flour-dusted bowl lined with a tea towel (or a proofing basket). Cover and refrigerate overnight. This slow cold rise develops flavor and makes the dough easy to score (slash the top so it can expand in the oven).
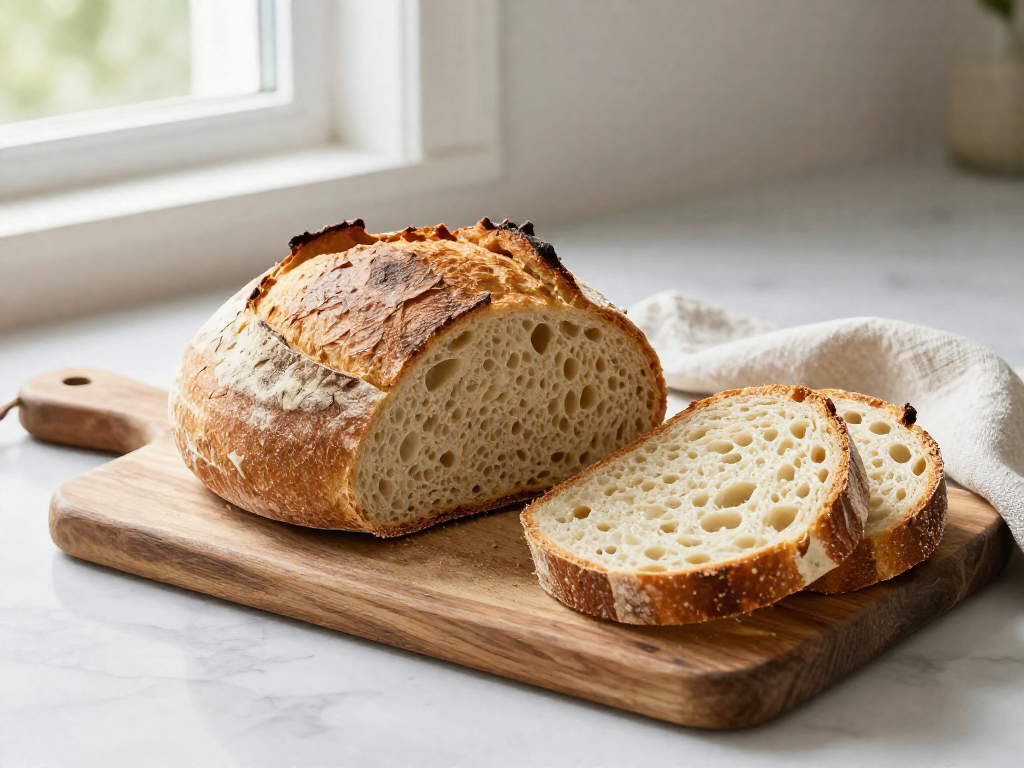
5. Bake in a preheated Dutch oven
Put a Dutch oven (lid on) in the oven and preheat to 245°C / 475°F for 30 minutes. Turn the cold dough onto parchment, score it ½ inch deep with a sharp blade, lower it in, and cover.
- Covered: 20 minutes (the trapped steam helps it rise)
- Uncovered: 20–25 minutes, until deep golden brown
6. Cool fully before slicing — at least 1 hr
The loaf is still cooking inside when it comes out. Cool it completely on a wire rack (1–2 hours). Slicing early releases steam and leaves the crumb gummy and pasty. Patience here is the difference between a clean, open crumb and a wet center.
Results vary by flour, kitchen temperature, and starter strength—expect to adjust timings to your own setup.
Troubleshooting Dense, Flat, or Gummy Loaves
Don't toss that imperfect loaf—almost every problem traces back to one of four causes. Use this quick diagnostic to find your symptom, understand why it happened, and fix it next time.
Dense and heavy loaf
Most likely cause: Underproofing (not enough rise time) or a weak starter. The bulk ferment—the first long rise after mixing, when the dough roughly doubles—was cut short, so the dough never trapped enough gas.
Fix it:
- Make sure your starter passes the float test: drop a spoonful in water; if it floats, it's active and full of gas.
- Extend the bulk ferment until the dough has grown by 50–75% and looks puffy and jiggly, not tight. In a cool kitchen (around 68°F / 20°C) this can take 8–12 hours.
- Feed your starter and bake when it's at peak—usually 4–8 hours after feeding, when it's doubled and domed.
Flat and spread out
Most likely cause: Overproofing (left to rise too long) or weak shaping. Overproofed dough exhausts its structure; under-shaped dough has no surface tension to hold a tall shape.
Fix it:
- Catch the dough before it collapses—if it's more than doubled and very slack, it's gone too far.
- Shape with tension: drag the dough across the counter to tighten the surface into a taut ball before its final rest.
Gummy crumb
Most likely cause: Sliced too soon or underbaked. The inside keeps cooking as it cools, so cutting early traps moisture.
Fix it:
- Wait at least 1–2 hours after baking before slicing—yes, even though it's hard.
- Bake until the internal temperature reaches 205–210°F (96–99°C), or the bottom sounds hollow when tapped.
No oven spring
Oven spring is the dramatic rise a loaf gets in the first 10 minutes of baking.
Most likely cause: An inactive starter or an oven that isn't hot enough.
Fix it:
- Preheat your Dutch oven for a full 45 minutes at 475°F (245°C).
- Only bake when your starter is bubbly and at peak activity.
Results vary by kitchen and climate, so treat each bake as a small experiment—jot down your times and tweak from there.
Tips to Make It Even Easier Next Time
You've baked one loaf—now make the next one even simpler. These small tweaks save time and build confidence without adding complexity.
- Keep a quick baking log. Jot down your kitchen temperature, how long the dough rose, and how the loaf turned out. After two or three bakes, you'll spot your kitchen's rhythm—warm rooms ferment faster, cool ones slower—and stop guessing.
- Let the fridge work for you. After mixing, instead of baking the same day, cover the dough and refrigerate it for 12–24 hours (this slow, cold rise is called a cold ferment). It deepens flavor and lets you bake whenever suits you, not the dough.
- Add flavor and crust over time. Once comfortable, stir in a handful (about 50g) of chopped walnuts or dried cranberries. For a crispier crust, leave the loaf in the turned-off oven, door cracked, for 5 extra minutes after baking.
- Store and refresh leftovers. Keep bread cut-side down on a board for 2–3 days, or slice and freeze it. Revive a stale slice by toasting, or sprinkle a whole loaf with water and warm it at 180°C (350°F) for 5–10 minutes.
Results vary by kitchen and climate, so treat each bake as one more data point.
FAQ
Can I make sourdough without kneading at all?
Yes. Instead of kneading, you let time do the work. Mix the dough until no dry flour remains, then over the first few hours give it 3-4 sets of "stretch and folds" (grab one edge, stretch it up, fold it over the center; rotate the bowl and repeat 4 times). This builds the gluten—the stretchy protein network that traps gas and gives bread structure—without any traditional kneading. The long bulk ferment (the main rise) develops flavor and strength while the dough rests.
How long does no-knead sourdough need to ferment?
Plan for two stages. The bulk ferment (first rise at room temperature, around 70°F/21°C) typically takes 4-8 hours, and is done when the dough has grown by about 50-75%, looks puffy and domed, shows a few bubbles on the surface, and jiggles like set jelly. The second rise (proofing the shaped loaf) usually takes 1-2 hours at room temperature, or 8-16 hours in the fridge. Warmer kitchens ferment faster, cooler ones slower, so watch the dough, not the clock.
Why is my no-knead sourdough dense or gummy?
Dense loaves usually mean under-fermentation (dough didn't rise enough) or a weak, sluggish starter—fix by using a starter at its peak and letting the dough grow 50-75% before shaping. Gummy crumb (sticky, undercooked-feeling inside) usually means the loaf was underbaked or sliced too soon—bake until the internal temperature reaches 205-210°F (96-99°C) and let it cool completely (at least 2 hours) before cutting, since the crumb sets as it cools. Over-fermentation can also cause gumminess, so don't let the dough collapse or smell sharply sour.
Do I need a Dutch oven to bake sourdough?
No, but it helps a lot. A Dutch oven traps the steam the dough releases, which keeps the crust soft long enough for the loaf to expand and gives you a tall, crisp result—so it's the easiest path for beginners. If you don't have one, bake on a preheated baking sheet or stone and create steam another way: place a metal pan on the bottom rack and pour in about 1 cup (240 ml) of boiling water as you load the bread, or mist the oven walls. Results may be a bit flatter, but it still works.
How do I know when my starter is active enough to bake?
Feed your starter and watch it: it's ready when it reliably doubles in size within 4-8 hours, looks bubbly throughout, and smells pleasantly tangy (like yogurt), not flat or like nail polish. A quick test is the "float test"—drop a small spoonful into a glass of water; if it floats, it's full of gas and ready to bake. Use it at or near its peak height, right before it starts to fall, for the strongest rise.
Can I leave the dough overnight on the counter or in the fridge?
The fridge is the safer overnight choice for beginners. After shaping, cover the loaf and refrigerate it for 8-16 hours; the cold slows fermentation, deepens flavor, and makes the chilled dough easier to score and bake straight from the fridge. Leaving shaped dough on the counter overnight is risky unless your kitchen is cool (below about 68°F/20°C), because a warm room can over-ferment it, leaving the loaf flat, sticky, or gummy. If your counter is warm, refrigerate instead.
See also
- How to Make and Feed a Sourdough Starter for Beginners
- Sourdough Starter Not Rising? Troubleshooting Guide
- Beginner's Guide to Sourdough Hydration Explained Simply
- Best Dutch Ovens and Tools for Sourdough Baking
- Easy Sourdough Discard Recipes for Beginners
Related articles
Sourdough Pizza Dough for Beginners: A Forgiving Way to Practice Shaping
Can I use my sourdough starter to make pizza dough, and is it easier than a loaf?
Jul 20, 2026 · 9 min read
The Hardest Loaf to Mess Up: A 60% Hydration Sourdough for Absolute Beginners
What is the easiest sourdough bread recipe that minimizes handling and hydration issues?
Jul 20, 2026 · 8 min read
How to Store Sourdough Bread So It Stays Fresh
Learn how to store sourdough bread so it stays fresh for days, how to freeze loaves and slices, and how to revive a stale crust. Simple beginner steps.
Jun 29, 2026 · 9 min read