Sourdough Discard Flatbreads: Ready in Under an Hour
What's a quick savory way to use my sourdough discard?
On this page
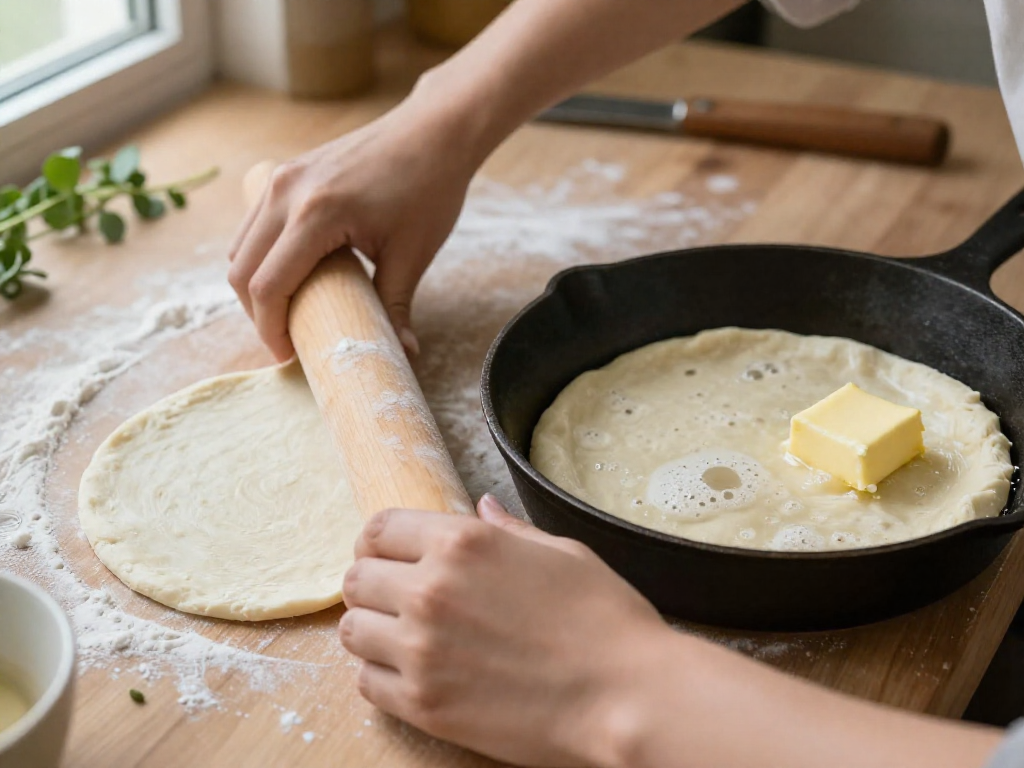
Frustrated by tossing that beautiful sourdough discard? Turn it into the quickest, most satisfying meal—soft, savory flatbreads that hit the table in under an hour, no starter-feeding gymnastics required.
Why Sourdough Discard Flatbreads Are Your New Go-To
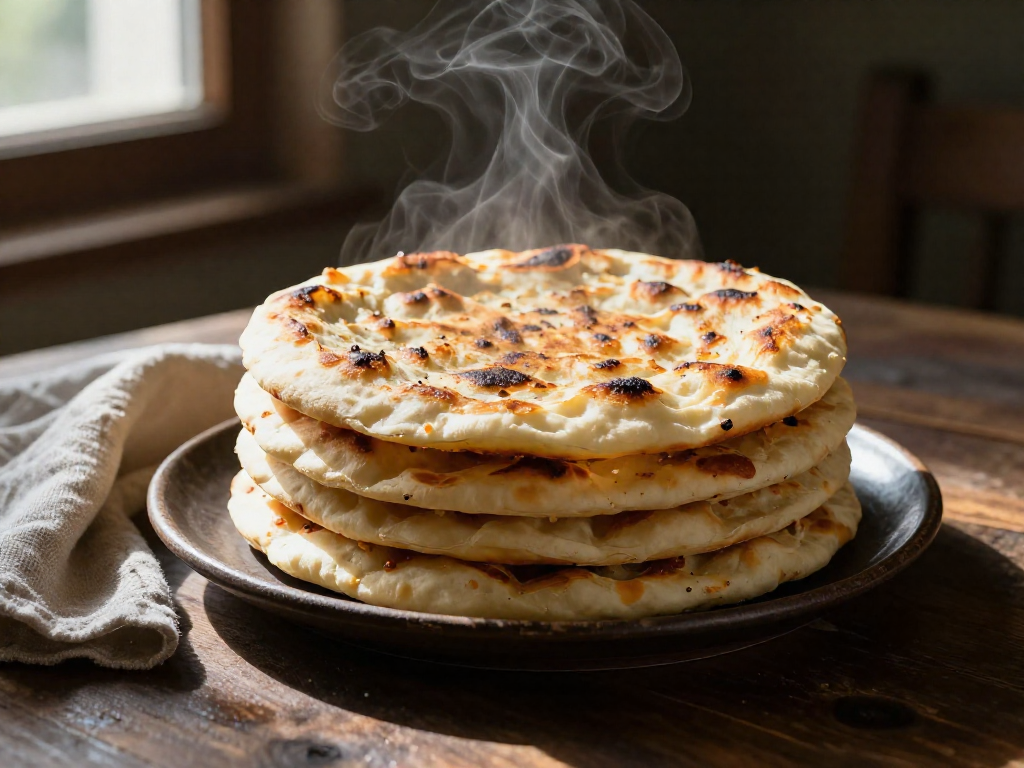
Sourdough discard flatbreads are the quick savory answer—ready in under an hour, start to finish. The discard brings a tangy depth that normally takes hours of fermentation, but here you get it without the wait. No oven needed: just roll the dough, rest it for 30 minutes, then cook each flatbread a minute or two per side in a hot skillet (Raspberries and Kohlrabi). That’s it. Perfect for last-minute wraps, dipping into hummus, or scooping up curry. Even better, you’re putting discard to delicious use instead of pouring it down the drain. (Your exact timing may shift a few seconds depending on your pan and stove, but you’ll nail it quickly.)
The Easiest 30-Minute Sourdough Discard Flatbread Recipe
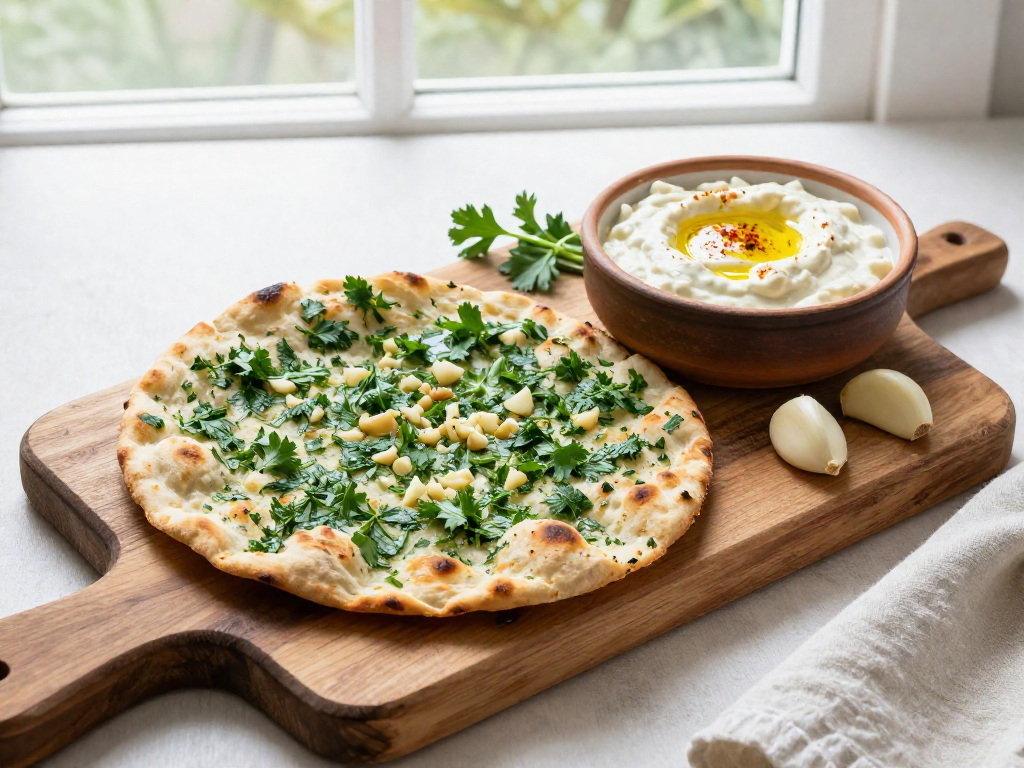
This recipe is about getting hot, tender flatbreads on the table fast—no yeast, no long rise, and no guesswork. In about 30 minutes (most of it hands-off resting), you can turn that jar of discard into something that tastes like it came from a bakery.
The combination of milk and olive oil gives these flatbreads a soft, slightly chewy texture with crisp, golden edges, a method borrowed from Raspberries and Kohlrabi. Here’s exactly what you need and what to do.
Ingredients (yields 6–8 flatbreads)
- 240 g (1 cup) sourdough discard, unfed, straight from the fridge is fine
- 240 g (2 cups) all-purpose flour, plus more for dusting
- 120 g (½ cup) whole milk, at room temperature (or plain yogurt for extra tang and tenderness)
- 30 g (2 tablespoons) olive oil or melted butter
- 6 g (1½ teaspoons) fine sea salt
- Optional: 4 g (1 teaspoon) baking powder for extra lift; 1 tablespoon dried herbs (thyme, rosemary, or oregano)
Method
1. Mix the dough. In a large bowl, whisk together the flour, salt, and baking powder (if using) with any dried herbs. Add the sourdough discard, milk, and olive oil. Stir with a wooden spoon or your hands until a shaggy, slightly sticky dough forms—no need to knead. If the dough feels too dry and won’t come together, add milk a teaspoon at a time. If it’s overly sticky, dust in a little extra flour.
2. Hydrate and relax. Cover the bowl with a plate or plastic wrap and let it rest at room temperature for 30 minutes. This short rest lets the flour absorb the liquid, making the dough much easier to roll. If you’re in a real hurry, 15 minutes will still work, but the dough will be a bit springier.
3. Portion and roll. Turn the dough out onto a lightly floured surface and divide it into 6–8 equal pieces (about 70–90 g each). Roll each piece into a round about ⅛ to ¼ inch (3–6 mm) thick. No need for perfect circles; rustic shapes cook beautifully. Keep the rolled-out discs separate so they don’t stick together.
4. Cook. Place a cast-iron or nonstick skillet over medium-high heat. You want the pan hot but not smoking—a flick of water should sizzle and evaporate immediately. Do not add oil; a dry pan gives the flatbread its characteristic charred spots. Cook one round at a time: wait until the top surface begins to look dry and small bubbles appear, about 1–2 minutes. When the underside is golden with darker brown spots, flip it and cook the second side for another 1–2 minutes until puffed and cooked through. Adjust the heat if the spot color is too dark too quickly.
5. Finish and serve. Transfer each flatbread to a plate and cover with a clean towel to keep soft. If you want to take it over the top, brush the hot flatbreads immediately with garlic butter (melted butter, minced garlic, and a pinch of salt) or a drizzle of good olive oil and a sprinkle of flaky salt. Serve warm alongside soups, dips, or as a wrap for grilled veggies and meats.
Troubleshooting: If the flatbreads puff up unevenly, gently press them with a spatula while cooking. If they crack when folded, roll them slightly thicker. And if the center stays doughy, lower the heat a notch and cook a little longer—every stovetop behaves differently.
Mastering Texture: 3 Pro Tips for Soft, Tearable Flatbreads
Getting that soft, pliable, tear-from-the-stack texture right comes down to three small tricks—none of them complicated, all of them game-changing.
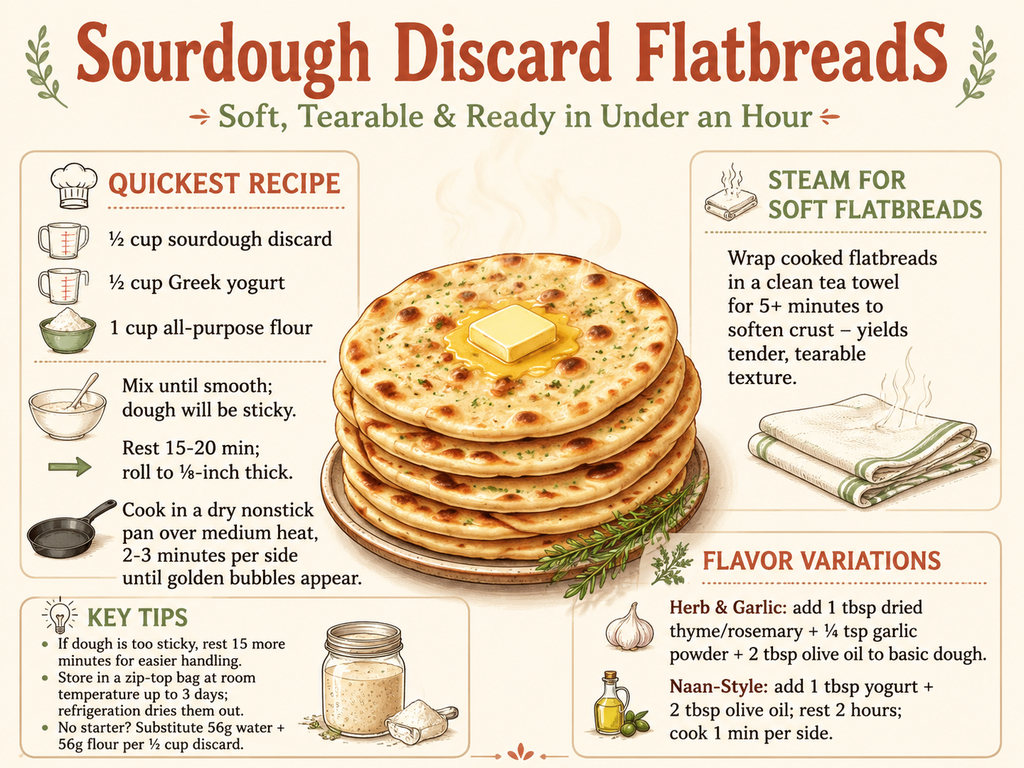
First, don’t fight sticky dough. If the dough clings to your fingers right after mixing, resist the urge to flour the counter. Scrape it back into the bowl, cover it, and let it rest for just 15 minutes. That short pause lets the flour fully hydrate and the gluten bonds start to form, and when you come back the dough will feel noticeably less tacky and much easier to handle—without a speck of extra flour. (Extra flour now just makes tough flatbreads later.)
Second, match your pan and heat to the job. A dry cast iron skillet set over medium-high heat gives you the classic blistered surface and a light chew. If you want a softer bite, film the pan with a little oil before each flatbread goes in. The key is a pan that’s properly hot—too cool and the flatbread steams instead of searing, turning pale and leathery. Aim for 1–2 minutes on the first side, until bubbles puff and the edges look dry, then a quick minute on the second. Roll the dough to about ⅛ inch thick so it cooks through evenly without burning.
Third, steam for softness. As soon as a flatbread comes off the heat, tuck it into a clean tea towel folded over itself. Let them sit like that for at least 5 minutes. Make It Dough points out that this gentle steam bath relaxes the crust just enough to turn what could be a stiff disk into something pillowy and tearable. It’s the difference between flatbread that cracks when you bend it and flatbread that drapes.
Storage that actually works. If you’ve made extras (or you’re meal-prepping), stash them at room temperature inside a zip-top bag for up to 3 days. Refrigeration is the enemy here—it pulls moisture out and leaves you with cardboard. When it’s time to eat, a quick reheat in a dry pan revives that just-cooked softness.
Easy Flavor Variations: Herbs, Garlic, and Beyond
Once you’ve got the base recipe dialed in, you can turn the same dough into multiple different flatbreads just by swapping a few ingredients. Here are the variations worth trying first.
The simplest upgrade is an herby, garlicky dough. Mix ½ cup (140 g) sourdough discard, 1½ cups (187 g) all-purpose flour, 1 tablespoon dried rosemary or thyme, ¼ teaspoon garlic powder, and 2 tablespoons olive oil. Cover it and let the dough rest for 30 minutes, then roll and cook the rounds in a hot cast-iron pan: 2 to 3 minutes on the first side, 1 to 2 minutes on the second. The herbs toast as they cook, and the garlic powder adds a gentle savory backbone that works with soup, dips, or just butter. (My Culinary Fix tested this exact ratio and found the 30-minute rest makes the dough far easier to handle.)
If you want something closer to pillowy naan, stir in 1 tablespoon of Greek yogurt and 2 tablespoons of olive oil to your discard and flour (try ¼ cup discard and 1¼ cups flour as a starting batch). Let that dough rest for a full 2 hours—the yogurt tenderizes the crumb and the longer rest gives a softer, richer flatbread. Cook it in a slick of oil for roughly a minute per side.
For a super-quick, tangy version that needs only three ingredients, combine ½ cup discard, ½ cup plain yogurt, and 1 cup flour. Roll thin and dry-fry—it's ready in about 20 minutes.
Finish any of these with a brush of melted butter mixed with za’atar or a pinch of dried oregano and flaky salt. Sprinkle sesame seeds into the dough before rolling, or swap in some whole wheat flour for a nuttier flavor. The idea is to treat the discard dough as a blank canvas that takes almost anything you scatter on it.
How to Serve and Store Your Discard Flatbreads
Pile them high as dippers for hummus or baba ganoush, fold them around grilled chicken or roasted vegetables for an instant wrap, or top with sauce and cheese for personal pizzas that crisp up in minutes. For breakfast, a warm flatbread topped with a fried egg and a pinch of flaky salt is hard to beat.
Leftovers stay soft at room temperature in a zip-top bag for up to 3 days — the fridge actually dries them out (Make It Dough). To bring back crisp edges, just reheat in a dry skillet over medium heat for about 30 seconds per side. Freeze extras in a single stack with parchment between each one; they go straight from freezer to pan.
Sources
- Sourdough Discard Flatbread Recipe (No Yeast & No Rise Time) — makeitdough.com
- Easy 5-Minute Sourdough Discard Flatbread — chasingtheseasons.com
- Sourdough Discard Flatbread — fifteenspatulas.com
- Chewy Sourdough Discard Flatbread Recipe | Eryn Whalen Online — erynwhalenonline.com
- Sourdough Discard Flatbread {No Yeast} — raspberriesandkohlrabi.com
- Sourdough Rosemary and Garlic Flatbread — My Culinary Fix — myculinaryfix.com
- Sourdough Flatbread Recipe (With Active Starter or Discard) - Simplicity and a Starter — simplicityandastarter.com
- Sourdough Naan (Sourdough Discard Flatbread) — milkandpop.com
- Instagram — instagram.com
- Tasty Trails - 3-Ingredient Sourdough Discard Flatbread A... — facebook.com
FAQ
Can I use active starter instead of discard?
Yes, you can use active starter instead of discard. Simplicity and a Starter's recipe works with either 240g of active starter or discard, so they're interchangeable.
Why is my flatbread tough?
Tough flatbread is often due to lack of moisture, but a key fix is steaming after baking. Make It Dough notes that wrapping hot flatbreads in a towel for at least 5 minutes softens the crust, yielding tender results.
Can I make these gluten-free?
The provided evidence doesn't include gluten-free flatbread recipes, so I can't offer guidance from these sources.
How long does the dough last in the fridge?
The dough shouldn't be refrigerated because it dries out the flatbread. Make It Dough recommends storing cooked flatbreads in a zip-top bag at room temperature for up to 3 days.
Can I cook these on an outdoor grill?
The evidence doesn't mention outdoor grilling, so I can't confirm if it works from these sources.
See also
- How to Make a Sourdough Starter from Scratch
- Sourdough Discard Crackers: Crispy, Zero-Waste Snack
- Beginner’s Guide to Sourdough Hydration and Dough Handling
- The Best Sourdough Discard Pancakes (Weekend Favorite)
Related articles
Soft Sourdough Dinner Rolls: A Forgiving Recipe for Beginners
Make soft, fluffy sourdough dinner rolls with this forgiving beginner recipe. No special pans needed—just a skillet. Includes tangzhong for incredible softness.
Jul 28, 2026 · 7 min read
Sourdough Pizza Dough for Beginners: A Forgiving Way to Practice Shaping
Can I use my sourdough starter to make pizza dough, and is it easier than a loaf?
Jul 20, 2026 · 9 min read
The Hardest Loaf to Mess Up: A 60% Hydration Sourdough for Absolute Beginners
What is the easiest sourdough bread recipe that minimizes handling and hydration issues?
Jul 20, 2026 · 8 min read