What Is Cold Retard (Fridge Proofing) and Should Beginners Use It?
What does putting dough in the fridge do for sourdough?
On this page
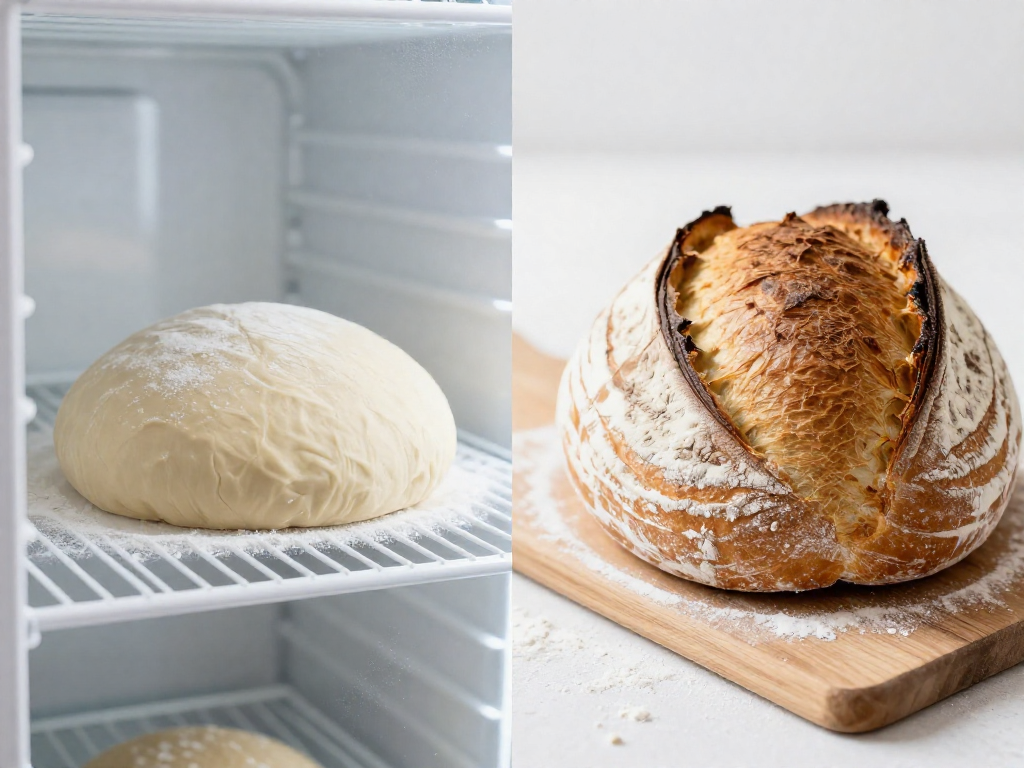
What Cold Retard (Fridge Proofing) Actually Means
Quick answer: Cold retard means putting your shaped dough in the fridge to slow down fermentation. That's it. Putting dough in the fridge gives the flavor more time to develop while making your timing flexible — and it usually makes the dough easier to score and bake.
Here's what each part means in plain terms:
-
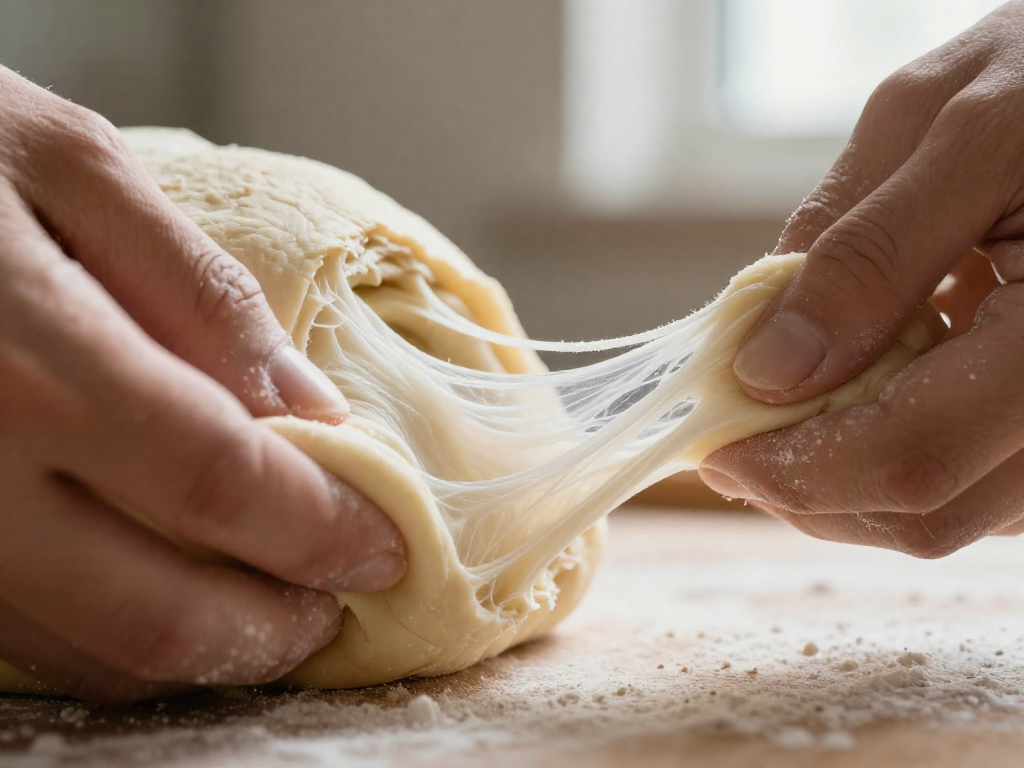
"Retard" just means "slow down." It's a baking word borrowed from French, not a fancy technique. Cold temperatures slow the yeast and bacteria way down, so fermentation (the process where the dough rises and develops flavor) crawls along instead of racing.
-
It happens after shaping, during the final proof. Your dough goes through two main rises. The first is the bulk ferment (the long rise after mixing, while the dough is still one big mass). The second is the final proof (the shorter rise after you've shaped the dough into its final form). Cold retard happens during that second rise — you shape the dough, then put it in the fridge instead of leaving it on the counter.
-
Fridge temps pause, not stop, the yeast. A home fridge runs around 35–40°F (2–4°C). At that temperature the yeast doesn't die — it just gets sluggish. Fermentation keeps inching forward, which is why dough can sit in the fridge overnight (and often longer) without over-proofing as fast as it would at room temperature.
So when someone says "cold retard" or "fridge proofing," they simply mean: chill the shaped dough to slow it down. No special equipment, no jargon required.
What Putting Dough in the Fridge Does for Your Sourdough
Short answer: parking your shaped dough in the fridge slows fermentation way down, which buys you better flavor, easier handling, and a more forgiving schedule. Here's what that actually gets you as a beginner.
1. Deeper, tangier flavor. Cold temperatures slow the yeast and bacteria in your starter without stopping them. Over 12–48 hours in the fridge, the bacteria keep producing the acids that give sourdough its signature tang. A loaf retarded (chilled) overnight tastes noticeably more complex than one baked the same day.
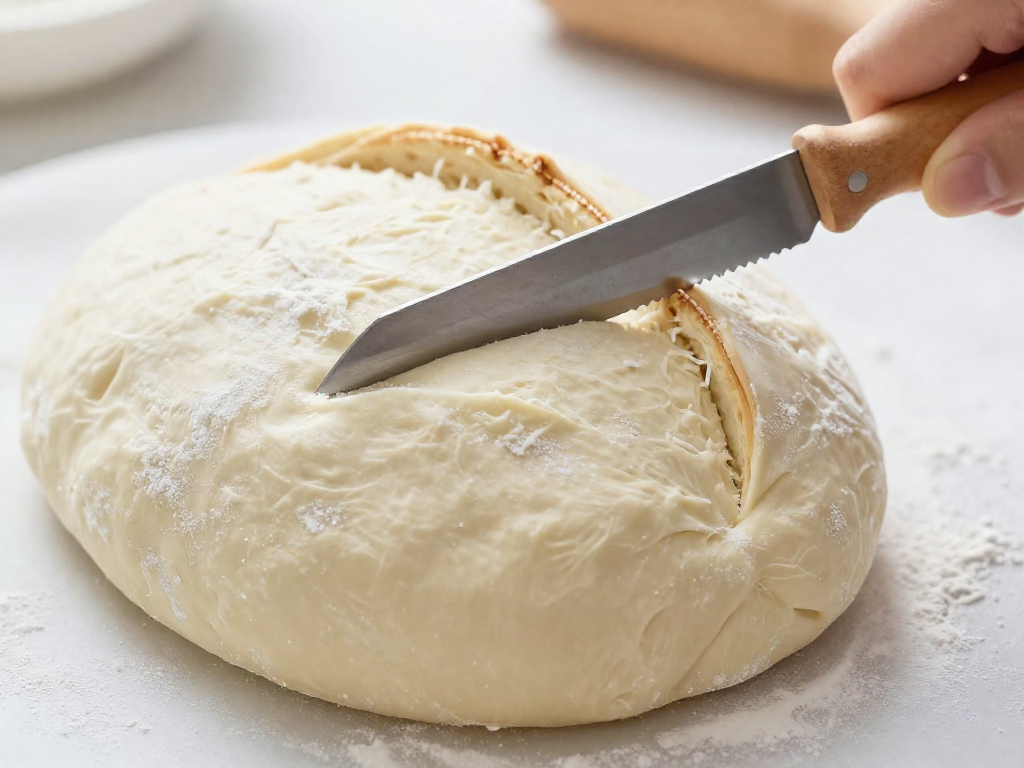
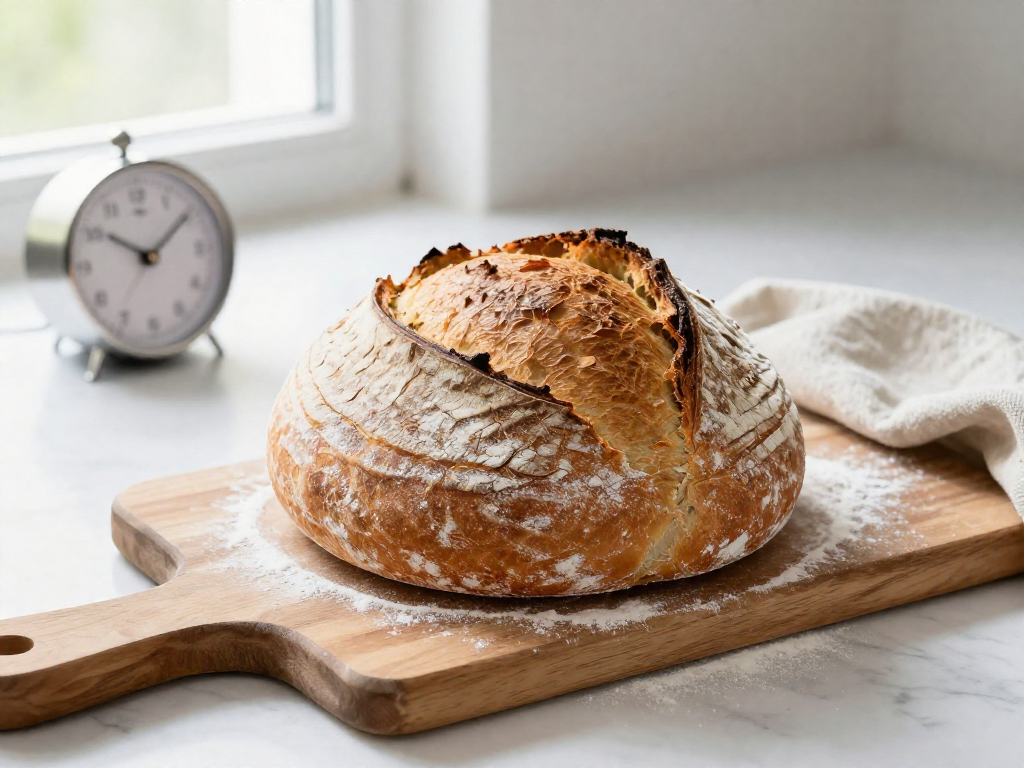
2. Firmer, colder dough that's far easier to score. Scoring means slashing the top of the dough with a blade just before baking so it expands in a controlled way. Warm, slack dough drags and sticks to the blade. Cold dough is firm and tacky-but-not-sticky, so your blade glides through and you get a clean "ear" — that raised, crispy flap along the cut.
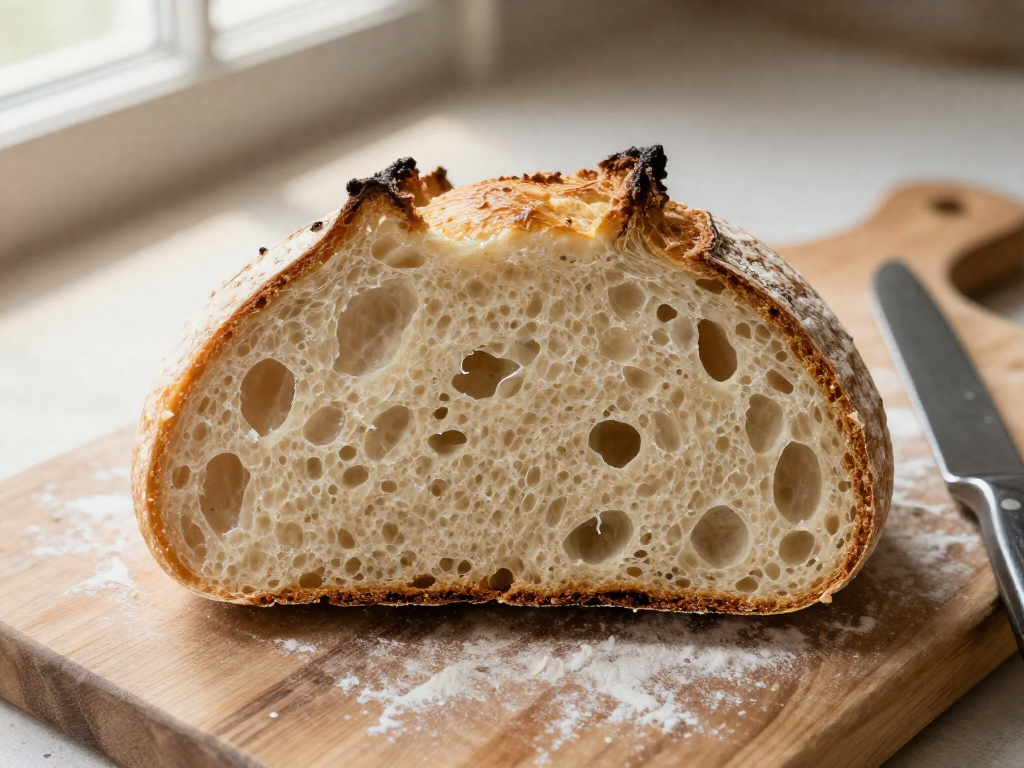
3. Better oven spring and a more open crumb. Oven spring is the burst of rise your loaf gets in the first 10–15 minutes of baking. Crumb is the inside texture — the holes. Because chilled dough holds its shape and structure, it tends to rise taller in the oven and trap more gas, giving you an airier inside (when everything else is done right — results vary by kitchen and climate).
4. Forgiveness — a much wider window. This is the big one for beginners. At room temperature, dough can swing from under-proofed to over-proofed in under an hour, and missing that window is the #1 cause of dense or flat loaves. In the fridge, fermentation crawls, so the "ready to bake" window stretches to many hours. You can pull and bake whenever it fits your schedule instead of babysitting a bowl.
Quick definitions
- Proofing: the final rise after shaping, before baking.
- Cold retard / fridge proofing: doing that final rise slowly in the refrigerator instead of on the counter.
Bottom line: the fridge trades a little time for more flavor, easier scoring, and a lot less timing stress — which is exactly why it's so beginner-friendly.
The Real Reason Beginners Love It: Scheduling Flexibility

Here's the payoff that wins most beginners over: cold retard (slowing dough fermentation in the fridge) lets you split one exhausting baking day into two relaxed halves. You no longer have to block out 8+ hours to babysit dough.
The simple two-day rhythm:
- Evening (Day 1): Mix, do your stretch-and-folds (gently pulling the dough up and over itself to build strength), let the dough finish its bulk ferment (the first big rise where the dough roughly doubles), then shape it and put it in the fridge.
- Morning (Day 2): Take the cold dough straight from the fridge, score it, and bake. No waiting around.
That's it. The fridge does the slow work overnight while you sleep.
How long can dough safely stay in the fridge?
For most beginner recipes, plan on 8 to 48 hours. Here's a rough guide:
- Overnight (8–14 hours): The sweet spot for beginners. Mild tang, easy to handle.
- 24 hours: More sour flavor, still very forgiving.
- 36–48 hours: Tangiest result. Push past 48 hours and the dough can start to over-ferment (the gluten weakens and the loaf may bake up flat or gummy).
Note: Exact timing shifts with your fridge temperature and how active your starter is, so treat these as starting points and watch the dough, not just the clock.
Why this matters for your life: You can mix on a busy weeknight after dinner and bake fresh bread before work or on a slow weekend morning. No more being trapped at home all day, checking timers every 30 minutes. The dough waits on your schedule instead of the other way around — which is exactly why fridge proofing turns sourdough from an all-day commitment into something that fits real life.
How to Cold Retard Your Dough: Step by Step
Here's the whole method in five moves. Cold retard just means slowing fermentation by chilling shaped dough in the fridge.
-
Bulk ferment as usual. Let your dough rise at room temperature after mixing until it looks puffy, has grown by roughly 50%, and jiggles like set jelly when you nudge the bowl. (Bulk ferment = the first rise, before shaping.) This usually takes 4–6 hours at 70–75°F (21–24°C), but watch the dough, not the clock.
-
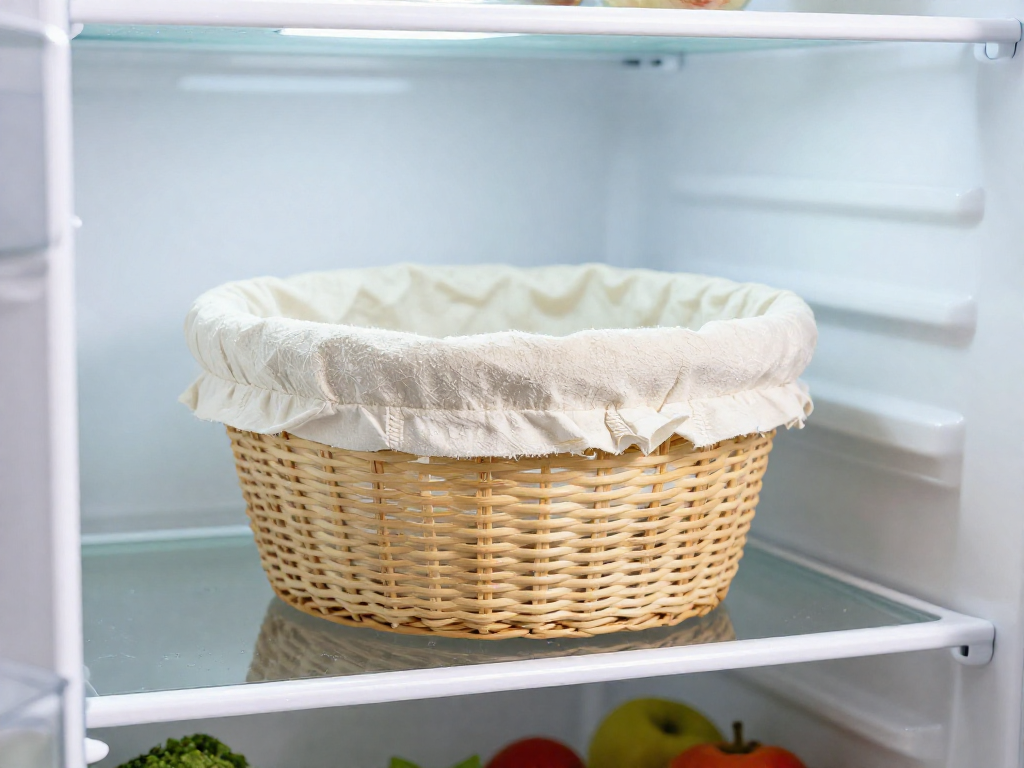
Shape and place in a banneton. Pre-shape, rest 20 minutes, then shape into a tight round or oval. Set it seam-side up in a floured banneton (a proofing basket) or a bowl lined with a floured kitchen towel. Dust with extra flour so it won't stick.
-
Cover well, then refrigerate. Slip the basket into a plastic bag or cover with a shower cap. A tight cover stops the surface from drying into a tough skin. Move it to the back of the fridge (35–39°F / 2–4°C), the coldest, most stable spot.
-
Bake straight from the fridge. Cold dough scores more cleanly and holds its shape, so there's no need to warm it up first. Preheat your Dutch oven, tip the chilled loaf out, score, and bake.
Quick overnight timing example
| Time | Step |
|---|---|
| 4:00 PM | Mix dough |
| 4:00–9:00 PM | Bulk ferment (until puffy and jiggly) |
| 9:00 PM | Shape, place in banneton, cover |
| 9:15 PM | Refrigerate overnight |
| 7:00 AM next day | Preheat oven, bake cold |
A retard of 12–18 hours works well for beginners. Results vary by kitchen temperature and starter strength, so treat these times as a starting point.
Should Beginners Use Cold Retard? (Yes—Here's Why)
Short answer: yes. For most beginners, cold retard (also called fridge proofing—slowing the dough's final rise by chilling it in the refrigerator) makes baking easier, not harder. It buys you time, sharpens flavor, and—most importantly—lets you score and bake a cold, firm dough that holds its shape better than a soft room-temperature one.
The reason it helps beginners isn't magic. It removes pressure. Instead of nervously watching dough and trying to nail the exact moment it's ready, you simply shape your loaf, put it in the fridge overnight, and bake when you wake up. The fridge gives you a wide window—roughly 8 to 16 hours—so there's no precise timing to miss.
When it's fine to skip it:
- No fridge space. A bulky banneton (the round proofing basket) or bowl won't always fit. That's okay—you can bake the same day.
- A fast schedule in a warm kitchen. If your kitchen is warm (75°F / 24°C or above) and you want a loaf in a few hours, a same-day bake works well.
Try this: Bake your next loaf with a single overnight retard and compare it side by side with a same-day loaf. Most beginners notice an easier-to-score dough, a slightly more open crumb, and a tangier flavor. Results vary by kitchen and climate, so treat it as your own little experiment—not a guarantee.
Common Cold Retard Mistakes to Avoid
Most cold retard failures trace back to four mistakes. Here's how to spot and fix each one.
1. Chilling before the bulk ferment is done. The bulk ferment (the dough's main rise at room temperature, before shaping) must be nearly complete before the dough goes in the fridge. Cold slows fermentation way down, so a dough that wasn't ready won't "catch up" overnight.
- Symptom: dense, tight loaf with little oven spring.
- Fix: wait until the dough has risen 50–75% and looks puffy with a few bubbles on the surface before chilling.
2. Leaving the dough uncovered. An exposed surface dries out in the fridge and forms a tough skin.
- Symptom: dry, crusty, cracked top that won't expand.
- Fix: cover the bowl or banneton (proofing basket) tightly with a lid, plastic, or a bag.
3. Retarding too long. Even cold dough keeps fermenting slowly. Push past your dough's limit and it overproofs (ferments too far and loses its structure).
- Symptom: flat, spread-out loaf that collapses when scored.
- Fix: for beginners, keep cold retard to 12–18 hours. Cap it at 24–36 hours once you know your kitchen.
4. Expecting a room-temp rise in the fridge. The fridge holds dough steady—it does not produce a big visible rise.
- Symptom: frustration and waiting days for growth that won't come.
- Fix: judge readiness before chilling, then bake straight from the fridge.
Results vary by your fridge temperature and starter strength, so treat these as starting points and adjust.
See also
- Bulk fermentation explained for beginners
- How to shape a sourdough boule
- How to score sourdough bread
- Sourdough troubleshooting: why is my loaf dense or gummy
- Beginner sourdough starter guide
- Easy beginner sourdough bread recipe
Related articles
Sourdough Lingo You Don’t Need: Simple Words Instead of ‘Autolyse’ and ‘Crumb’
Why do sourdough bakers use so much jargon, and what simple substitutions can I use?
Jul 20, 2026 · 4 min read
The Beginner’s Guide to Sourdough Gluten Development: Why Stretch and Folds Work
How does gluten development work in sourdough, and why are stretch and folds so effective for beginners?
Jul 20, 2026 · 9 min read
How Long Does It Really Take to Bake Your First Sourdough?
Wondering how long sourdough really takes? See the realistic active vs. passive time for your first loaf, hour by hour, so you can plan with confidence.
Jun 29, 2026 · 8 min read