Stretch and Folds vs. Kneading: What Beginners Should Know
What do stretch and folds do and do I need to knead?
On this page
The Short Answer: Do You Need to Knead Sourdough?
No—you don't need to knead most sourdough. Traditional kneading is optional, and for beginners, skipping it often produces better results with far less effort and mess.
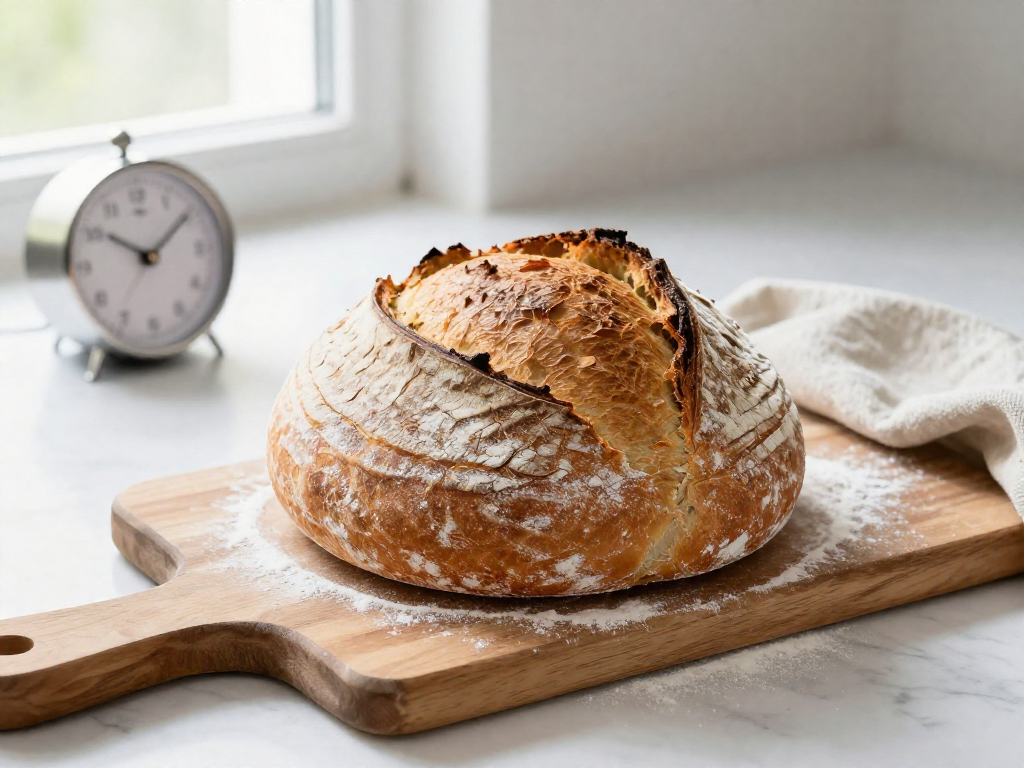
Here's why: both kneading and a gentler method called stretch and folds do the same job. They develop gluten, the stretchy protein network that forms when flour meets water. That network is what traps the gas your starter produces, holds the dough's shape, and gives you an open, airy crumb instead of a brick.
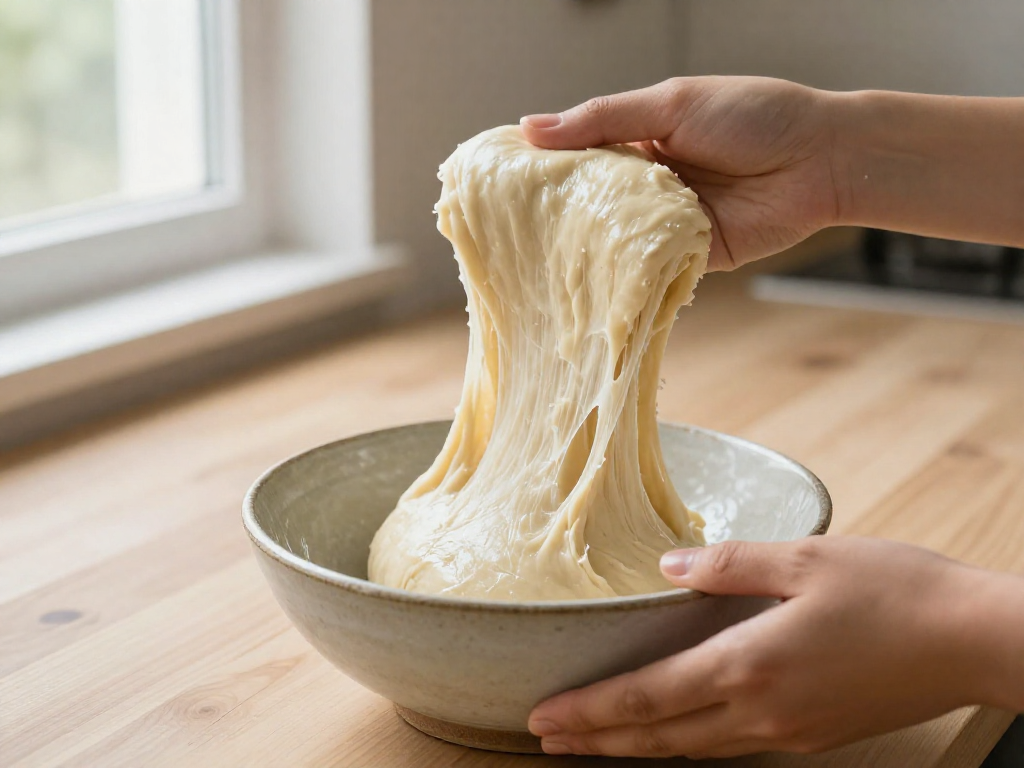
With stretch and folds, you simply grab one side of the dough, pull it up, and fold it over the top—repeating a few times every 30 minutes during the early rise. No countertop workout, no flour everywhere.
Why this matters for you: dense, flat, and gummy loaves are usually a gluten problem, not a kneading problem. Many beginners knead hard, get discouraged, and still end up with a flat loaf. Stretch and folds are easier to do correctly, which means stronger dough and a better chance at the tall, open loaf you're after.
We'll walk through both methods next.
What Gluten Actually Does (In Plain English)
Here's the one idea that makes stretch and folds (and kneading) finally click: it's all about building gluten.
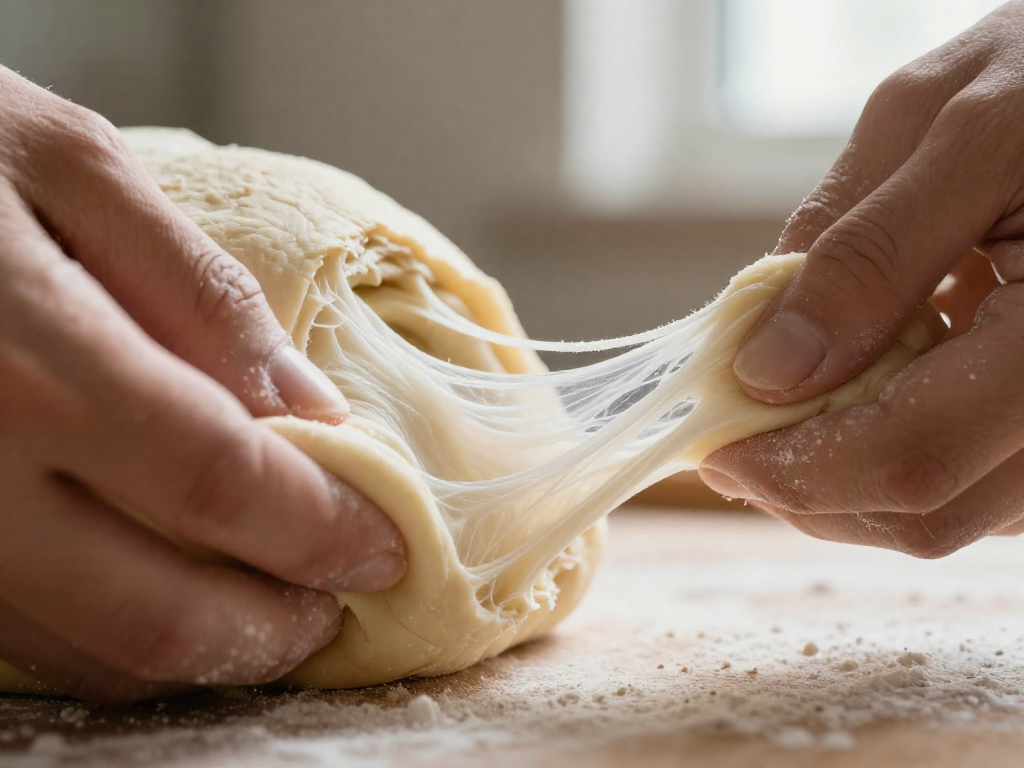
Gluten is an elastic, stretchy network that forms when the proteins in flour meet water. Think of it like a web of tiny balloons throughout your dough. When you first mix flour and water, that web is weak and disorganized. As it develops, it becomes strong and springy.
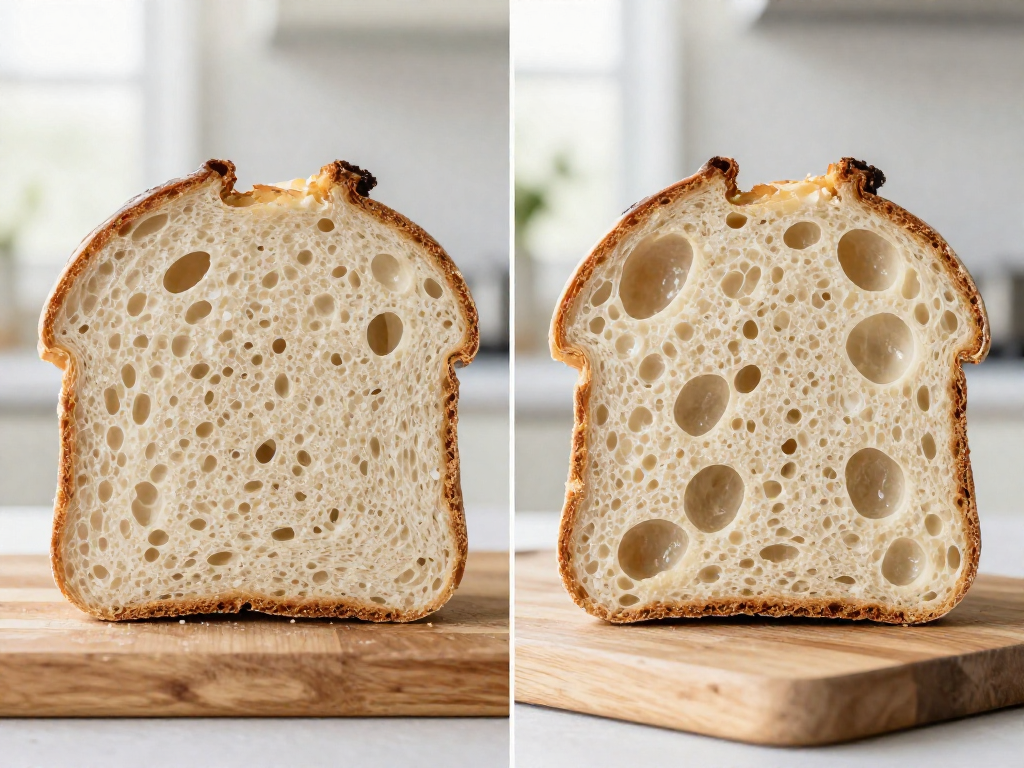
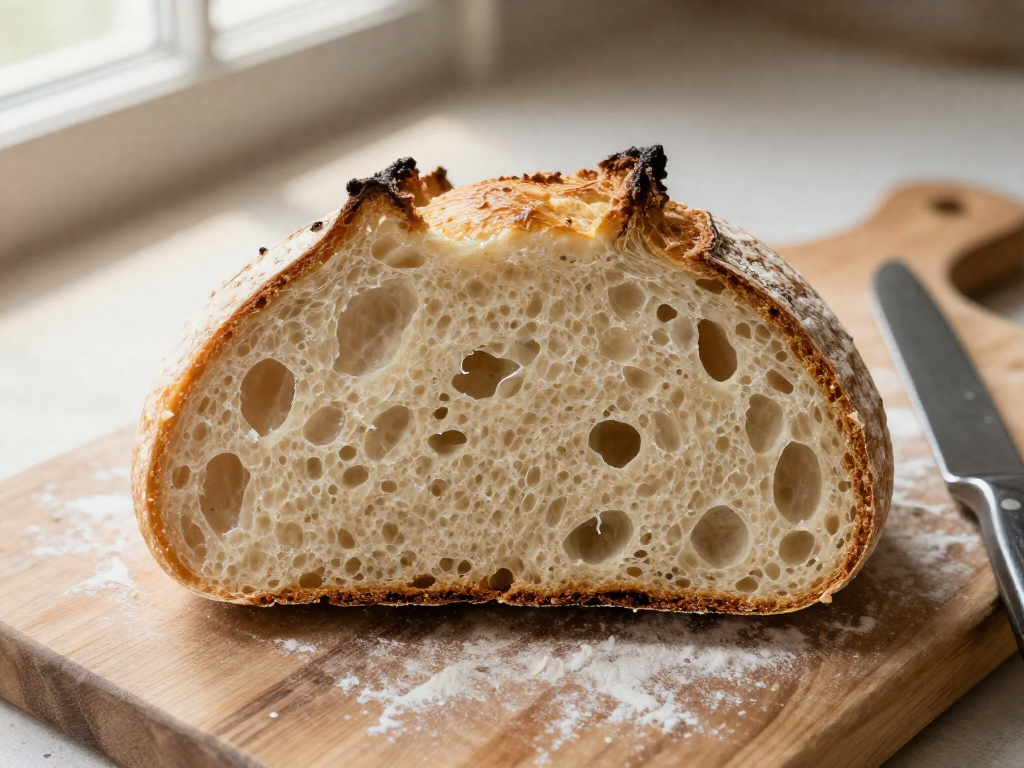
Why does this matter? Your sourdough starter (the living mix of flour, water, and wild yeast that makes your bread rise) produces carbon dioxide (CO2) gas as it ferments. A well-developed gluten network traps that gas in little pockets instead of letting it escape. Those trapped pockets are exactly what give you a tall loaf with an open, airy crumb (the holey, soft interior).
The difference shows up in the loaf:
- Weak gluten → gas escapes → flat, dense bread.
- Well-developed gluten → gas stays trapped → tall, airy bread.
So how do you develop gluten? Three things do the work:
- Water – hydrates the proteins so they can link up.
- Time – the proteins organize on their own as the dough rests.
- Agitation – kneading or stretch and folds speed the process along.
That last point is the whole debate. Kneading and stretch and folds are just two different ways to do the same job: build a gluten network strong enough to trap gas and give you a beautiful rise.
What Kneading Does
Quick answer: Kneading is the fast, hands-on way to build gluten—the stretchy protein network that traps gas and gives bread structure. You push, fold, and press the dough hard for several minutes so that gluten lines up and tightens quickly.
Here's what kneading actually accomplishes:
- It develops gluten fast. The vigorous mechanical working aligns and strengthens the gluten strands in one continuous session, usually 8–10 minutes by hand.
- It suits lower-hydration doughs. Hydration just means how much water is in the dough compared to flour. Kneading works best with firmer, drier doughs (think sandwich bread), which are easy to grip and don't stick to everything.
- It fits faster timelines. Most kneaded breads use commercial yeast and are mixed, risen, and baked in a few hours—no overnight waiting.
Pros:
- Fast, predictable gluten development
- Satisfying, hands-on, and easy to feel your progress
- Well-documented in nearly every bread recipe
Cons:
- Physically tiring, especially for larger batches
- Awkward with wet, sticky sourdough doughs, which cling to the counter
- Tempting to add extra flour to stop the stickiness—which dries out your loaf and can make it dense
This is why many beginners reach for stretch and folds instead with high-hydration sourdough, as we'll cover next. Results vary by kitchen and dough, so treat times as guides, not guarantees.
What Stretch and Folds Do
Stretch and folds build strength in your dough without kneading. Instead of working the dough all at once, you do quick folds spaced out over a few hours. Here's the simple version:
- With wet hands, grab one side of the dough, stretch it up, and fold it over the top.
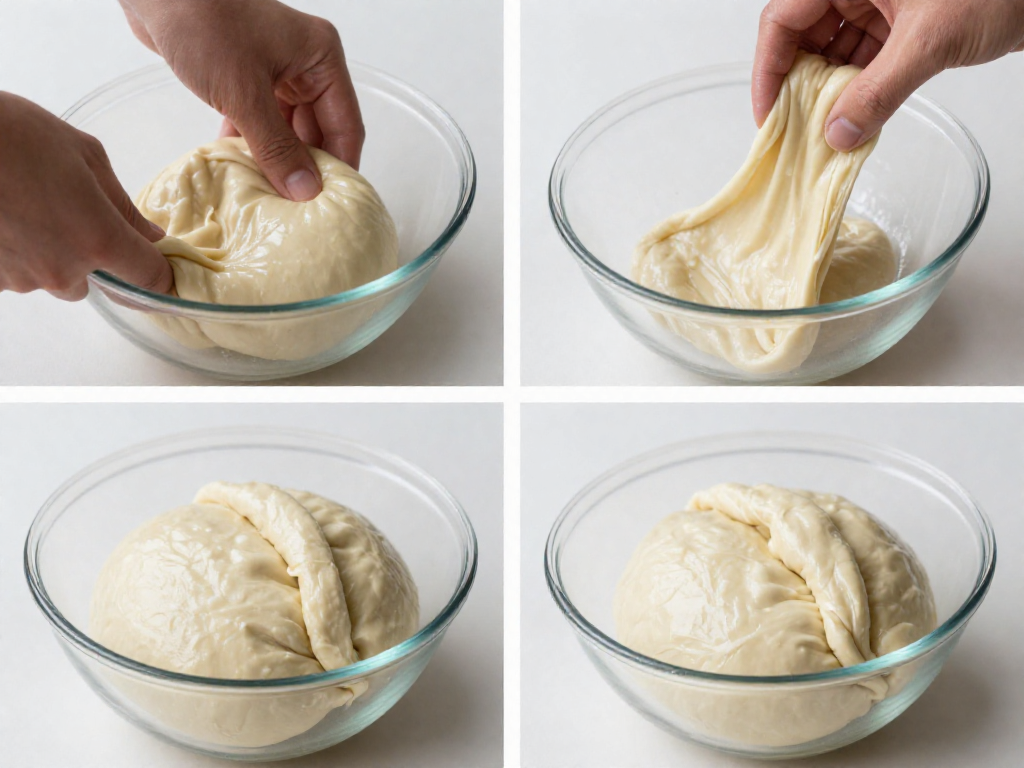
- Turn the bowl a quarter turn and repeat until you've gone all the way around (4 folds total = 1 "set").
- Cover the bowl and wait 30 minutes, then do another set.
- Repeat for 3–4 sets during bulk fermentation (the first long rise after mixing, when the dough roughly doubles and gets puffy).
Each fold stretches and layers the dough, building structure a little at a time. You'll feel it change: the first set feels loose and sticky, but by the last set the dough is smooth, tighter, and holds its shape.
The secret is that time does most of the work. During autolyse (a rest after mixing flour and water, before adding salt and starter) and during fermentation, gluten develops on its own. Your folds simply organize and strengthen what's already forming.
This method shines with wet, high-hydration dough (dough with a lot of water relative to flour, which makes it stickier but gives an open, airy crumb). Such dough is too slack to knead on a counter anyway, so folding in the bowl is the practical choice.
Best of all: minimal effort, no flour-dusted countertop battle, and just a few minutes of hands-on work between rests.
Note: Timing varies by kitchen temperature. Warmer rooms ferment faster, cooler rooms slower, so watch the dough, not just the clock.
How to Do a Stretch and Fold (Step by Step)
Here's the exact move, start to finish. A "set" means doing all four folds described below one time. You'll do several sets during the bulk ferment (the first long rise after mixing, when the dough roughly doubles and fills with gas at room temperature).
- Wet one hand. Dip your working hand in water before each fold. Wet hands slide off the dough instead of tearing it, so nothing sticks.
- Stretch and fold one side. With the dough still in its bowl, slide your fingers under one edge, lift it straight up until you feel resistance (don't rip it), then fold it over to the opposite side.
- Rotate and repeat 4 sides. Turn the bowl a quarter turn and do it again. After four lifts you've worked all sides. That's one complete set.
- Wait, then repeat. Do one set every 30–45 minutes for the first 2–3 hours of bulk. Cover the bowl between sets so the surface doesn't dry out. Most beginner doughs need 3–4 sets total.
How to know it's working (sensory cues): Early sets feel loose, slack, and a little floppy. By the last set the dough should feel smoother, tighter, and springy, hold a rounded shape instead of spreading flat, and pull back gently when stretched.
When to stop: Once the dough feels strong and holds its shape, stop folding even if you planned more sets. Over-handling isn't usually the problem for beginners, but more folds won't fix a weak starter.
Gentler option for very wet dough (coil fold): If your dough is so slack it tears, try a coil fold instead. Wet both hands, slide them under the middle, lift the whole mass until the bottom folds under itself, then set it down and let the ends tuck. Rotate 90° and repeat. It builds strength with less stress on sticky, high-hydration dough.
Results vary by flour, kitchen temperature, and how active your starter is, so use the feel of the dough—not the clock—as your final guide.
Stretch and Folds vs. Kneading: Quick Comparison
Here's the side-by-side, so you can pick the right method at a glance. (Quick definition: bulk ferment is the first rise, when the dough sits at room temperature and develops flavor and strength.)
| What matters | Stretch & Folds | Kneading |
|---|---|---|
| Effort | Low — a few seconds, several times | High — 8–10 minutes of active work |
| Best for | Wet sourdough (high hydration, meaning lots of water relative to flour) | Drier yeast doughs |
| Timing | Spread out across the bulk ferment | All at once, up front |
| Mess | Minimal — wet hands, in the bowl | A floured counter and sticky hands |
| Beginner friendliness | High — hard to overdo | Moderate — easy to under- or over-knead |
The takeaway for beginners: For typical beginner sourdough, which is wet and sticky, stretch and folds are the easier, less messy choice. They build dough strength gradually without wrestling a slack dough across your counter.
Kneading still works for sourdough, but the wetter the dough, the more frustrating it gets by hand. Start with stretch and folds, and save kneading for stiffer, drier recipes as you gain confidence.
Results vary by flour, kitchen temperature, and your starter, so treat this as a starting point — not a guarantee.
Common Mistakes Beginners Make
If your loaves keep coming out dense, flat, or gummy, one of these slip-ups is usually the culprit. Here's how to spot and fix each one.
-
Folding too aggressively. Slamming or squeezing the dough pushes out the gas bubbles you worked to build (this is called degassing). Be gentle: lift one side up, stretch it just until you feel resistance, then fold it over. Slow and calm beats forceful.
-
Skipping folds entirely. With no folds, the dough stays slack and weak, and your loaf spreads into a flat pancake instead of rising up. You need at least 3–4 folds during bulk fermentation (the first long rise after mixing, usually 4–6 hours at room temperature) to build strength.
-
Adding flour to fight stickiness. Sticky dough is normal for sourdough. Adding flour throws off your hydration (the ratio of water to flour) and gives you a dry, dense loaf. Instead, wet your hands with water before each fold and the dough won't cling.
-
Expecting a "windowpane." That stretch-thin-without-tearing test belongs to kneaded bread. With folds, the dough strengthens gradually over hours, so don't judge it the same way. Look for a smoother, jigglier, more elastic dough instead.
-
Folding too late. Do most folds in the first half of bulk fermentation while the dough can still build structure. Folding near the end just deflates an already-airy dough.
Which Should You Use for Your First Loaf?
Start with stretch and folds. For almost every beginner sourdough recipe, this is the easier, more forgiving choice. A stretch and fold simply means lifting one side of the dough up and folding it over itself, then rotating the bowl and repeating—no messy countertop, no aching arms. It builds strength gradually during the bulk ferment (the first long rise after mixing, when the dough roughly doubles).
When a little kneading still helps: lower-hydration doughs (hydration = the weight of water as a percentage of flour, so a stiffer dough has less water) and enriched doughs (those with butter, eggs, milk, or sugar) benefit from 2–3 minutes of gentle kneading to get things started.
You can combine both. A quick 1–2 minute knead right after mixing, followed by 3–4 sets of stretch and folds (spaced ~30 minutes apart), works well for most loaves.
Trust the dough, not the clock. Stop when the dough feels smooth, stretchy, and holds its shape—warm kitchens move faster, cool ones slower.
See also
- What Is Bulk Fermentation? A Beginner's Guide
- How to Tell When Sourdough Bulk Fermentation Is Done
- Understanding Hydration Percentages in Sourdough
- Why Is My Sourdough Dense and Gummy? Troubleshooting Guide
- Sourdough Autolyse Explained for Beginners
Related articles
Sourdough Lingo You Don’t Need: Simple Words Instead of ‘Autolyse’ and ‘Crumb’
Why do sourdough bakers use so much jargon, and what simple substitutions can I use?
Jul 20, 2026 · 4 min read
The Beginner’s Guide to Sourdough Gluten Development: Why Stretch and Folds Work
How does gluten development work in sourdough, and why are stretch and folds so effective for beginners?
Jul 20, 2026 · 9 min read
How Long Does It Really Take to Bake Your First Sourdough?
Wondering how long sourdough really takes? See the realistic active vs. passive time for your first loaf, hour by hour, so you can plan with confidence.
Jun 29, 2026 · 8 min read