The Complete Beginner's Guide to Sourdough (Start Here)
Where do I even start with sourdough as a complete beginner?
On this page
Open by naming the exact overwhelm a beginner feels (starter, hydration %, timing charts, failed loaves) and reassure them that sourdough is a small set of simple skills learned in order. Promise a clear roadmap: this article is the map, and each stage links to a deeper how-to. Frame the whole thing as "you don't need to understand everything at once—you need to know what comes first."
Why Sourdough Feels So Hard (And Why It Isn't)
If your loaves keep coming out dense, flat, or gummy, here's the first thing to know: it isn't a talent problem. Almost every beginner stumbles over the same handful of things, and every one of them is fixable.
The intimidation usually comes from three places:
- Starter anxiety — the worry that you'll "kill" your starter (a jar of flour and water that's home to wild yeast). You won't. It's far more forgiving than it looks.
- Hydration math — the percentages bakers throw around. Hydration just means how much water is in the dough compared to flour. For now, you don't need to calculate anything; you only need to follow a tested recipe.
- Confusing schedules — the all-day timelines with steps every 30 minutes. They look complex, but they're really just a few simple actions spaced out with long waits in between.
Here's the reframe that changes everything: sourdough isn't one giant skill you either have or don't. It's a short sequence of small, learnable skills — feeding a starter, mixing, folding, shaping, baking — and you learn them one at a time, in order. Master one, move to the next.
Most failed loaves trace back to just three or four causes: an underactive starter, underproofing, weak shaping, or oven temperature. We'll cover each of these directly later on.
One honest expectation to set now: your first loaves probably won't be bakery-perfect. That's completely normal, and results vary by kitchen and climate. The goal early on isn't perfection — it's edible bread you made yourself, and a little more confidence each time.
The Sourdough Journey at a Glance (Your Roadmap)
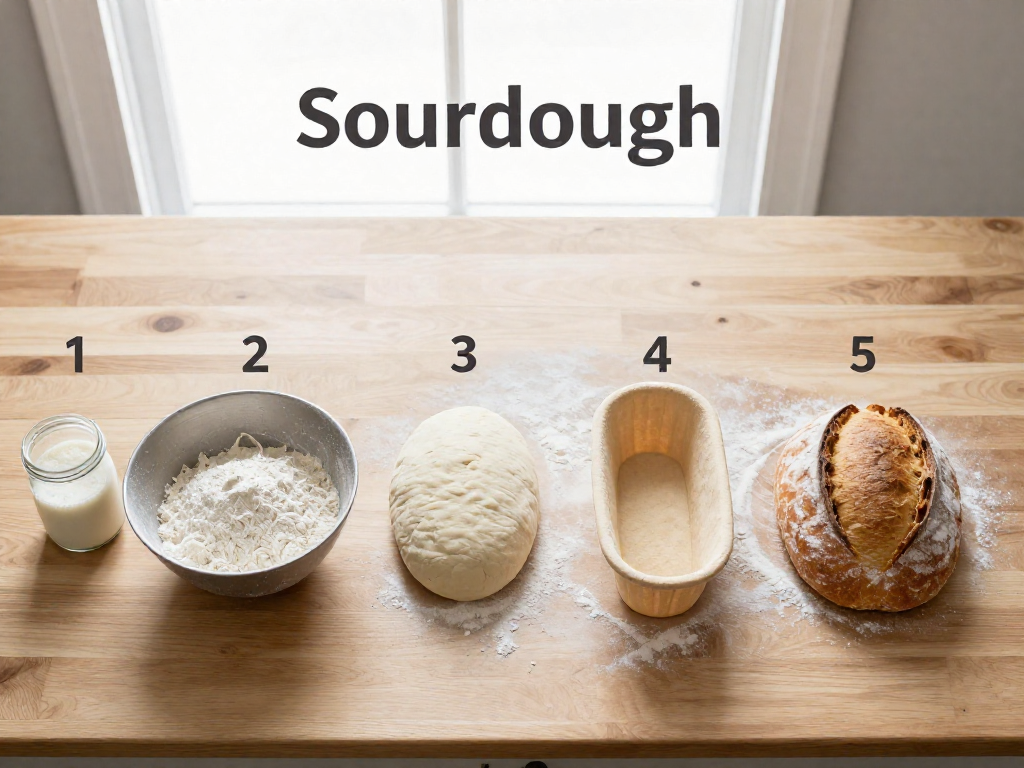
Here's the entire path, start to finish. Every recipe and tip in this guide fits into one of these five stages. Bookmark this map—when you feel lost, come back here and find where you are.
[1] Get a Starter  →  [2] Feed Until Active  →  [3] Mix & Ferment
                                                        ↓
              [5] Troubleshoot & Improve  ←  [4] Shape, Proof, Bake
Stage 1 — Get a Starter (Days 1–7, or instant)
A starter is just flour and water that has captured wild yeast and bacteria—it's your homemade replacement for packaged yeast. You have two options: make your own from scratch (mix 50g flour + 50g water daily for about a week) or get a cup from a friend or online. Either works. Beginners often get faster wins borrowing an active starter so they can skip ahead to baking.
Stage 2 — Feed Until Active
Before baking, your starter must be awake and hungry. You "feed" it fresh flour and water, then wait. Visual cue: it should roughly double in size and look bubbly within 4–8 hours. The classic test—drop a spoonful in water; if it floats, it's ready. A flat, liquidy starter isn't ready yet. This is the step most beginners rush, and it's the #1 cause of flat loaves.
Stage 3 — Mix & Ferment the Dough
Now you combine active starter, flour, water, and salt. Two terms you'll meet here:
- Hydration — the ratio of water to flour. A beginner-friendly dough is around 70% hydration (e.g., 700g water per 1000g flour). Higher = wetter and harder to handle.
- Bulk ferment — the first long rise, where the whole batch of dough rises together (usually 4–6 hours at room temperature). Cue: the dough grows about 50%, looks puffy, and shows a few bubbles on top.
(Optional: some recipes start with an autolyse—resting just flour and water for 30–60 minutes before adding starter and salt, which makes the dough easier to work. Skip it if it feels like too much for now.)
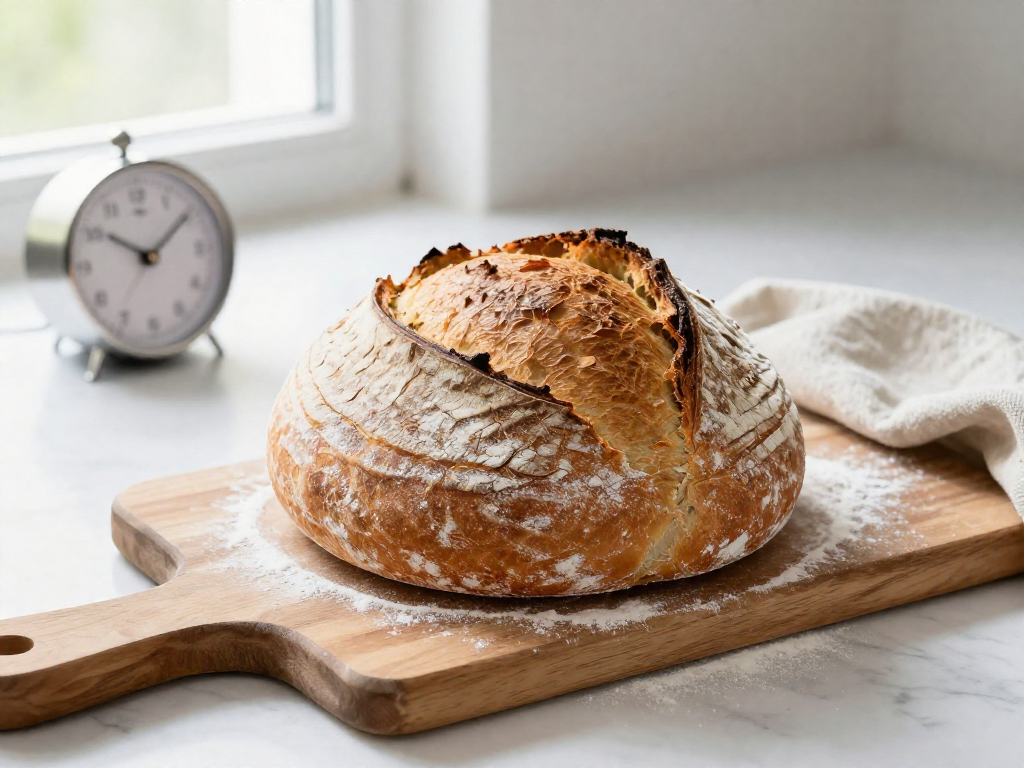
Stage 4 — Shape, Proof & Bake
You shape the dough into a tight round, then proof it (the final rise, often overnight in the fridge). Then bake hot, usually in a covered Dutch oven for steam. Cue: a deep golden crust and a hollow sound when you tap the bottom.
Stage 5 — Troubleshoot & Improve
Your first loaf may be dense, gummy, or flat—that's normal, and every one of those has a fix. Each recipe in this guide includes a troubleshooting table that maps the symptom to its cause and solution, so you improve loaf by loaf.
Where to start: if you have no starter, begin at Stage 1. If a friend gave you one, jump to Stage 2. Results vary with your kitchen's temperature and flour, so treat the timings as starting points, not guarantees.
The Only Equipment You Actually Need to Start
Good news first: you don't need a single fancy gadget to bake great sourdough. You almost certainly already own most of this.
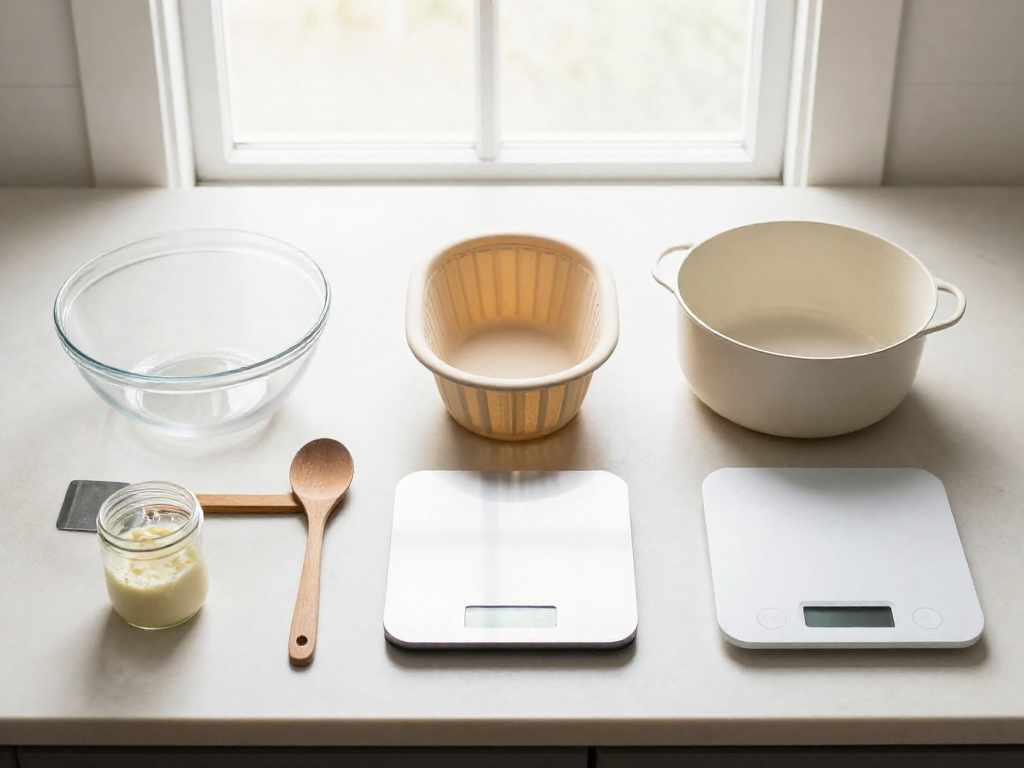
The 4 essentials
- A glass jar (about 500ml / 16oz) — for your starter, the living mix of flour and water that makes bread rise. Any clean jar with a loose-fitting lid works.
- A digital kitchen scale — the one tool worth buying if you don't have it (more on why below).
- A baking vessel with a lid — a Dutch oven (a heavy lidded pot) traps steam so your crust can rise and crisp. A 4–6 quart size is ideal.
- A proofing basket or bowl — to hold the shaped dough as it rises. A banneton (a cane proofing basket) looks nice, but a mixing bowl lined with a floured tea towel does the same job.
Why the scale matters more than anything
Sourdough lives and dies by ratios. "One cup of flour" can weigh anywhere from 120g to 150g depending on how you scoop, and that swing is enough to give you a dense or gummy loaf. Weighing in grams removes the guesswork, so a $12 scale will improve your bread more than any premium gadget. This is also how you'll later understand hydration (the ratio of water to flour, written as a percentage) — but that's optional for now.
Nice-to-have vs. skip-for-now
| Helpful, not required | Skip until you're hooked |
|---|---|
| Bench scraper (for handling sticky dough) | Stand mixer |
| Lame or sharp razor (for scoring) | Bread proofing box |
| Parchment paper (easy transfers) | Specialty flours |
Cheap substitutes
- No Dutch oven? Use any oven-safe pot with a lid, or a baking sheet with a metal bowl flipped over the loaf to trap steam.
- No banneton? A bowl + floured towel.
- No lame? A clean serrated knife or razor blade.
Start with what's in your kitchen. You can upgrade once you're baking regularly.
Step 1: Understanding Your Sourdough Starter
Your starter is the engine of every loaf. Get comfortable with it and the rest of sourdough stops feeling scary. Here's exactly what you need to know.
What a Starter Actually Is
A sourdough starter is just flour and water that has captured wild yeast (natural yeast living on flour and in the air) and friendly bacteria. The yeast makes gas that lifts your bread; the bacteria make the tangy flavor. That's it — no packet of store yeast required. Think of it as a small pet you feed flour and water, and in return it raises your bread.
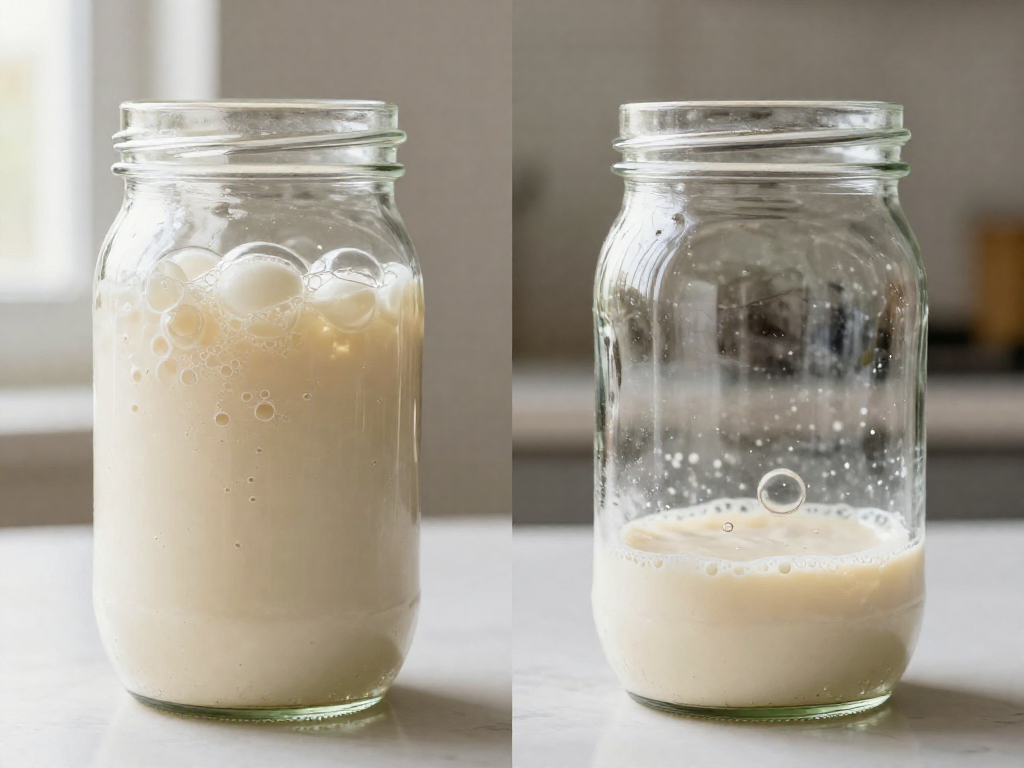
How to Tell It's Active and Ready
Feed your starter, then watch it. A ready-to-bake starter will:
- Double in size within 4–8 hours after feeding
- Show a bubbly, domed surface
- Smell pleasantly tangy or yogurt-like, not sharp
- Pass the float test: drop a small spoonful into a glass of water. If it floats, it's full of gas and ready to bake.
If it floats and has doubled, you're good to go. If it sinks, give it more time or another feeding.
A Simple Feeding Rhythm
Forget complicated math at first. Use equal weights — a 1:1:1 ratio — which just means equal parts starter, flour, and water by weight:
- 50g starter
- 50g flour (grams; about 1/3 cup)
- 50g water (grams; about 3 tablespoons, room temperature)
Stir, cover loosely, and leave at room temperature.
- Baking soon or storing at room temp: feed once a day.
- Storing in the fridge: feed once a week, and give it 1–2 feedings before you bake.
Common Starter Fears, Answered
- "There's a clear liquid on top." That's hooch — alcohol your starter makes when hungry. Harmless. Stir it in or pour it off, then feed.
- "It smells like nail polish or vinegar." Just very hungry. Feed it and the smell mellows.
- "What's discard?" The portion you remove before feeding so the jar doesn't overflow. Toss it, or save it for pancakes and crackers.
- "Is it mold?" Real mold is fuzzy and pink, orange, or green. That's rare and means starting over. Normal bubbles, hooch, and tangy smells are all healthy signs.
Results vary by kitchen temperature and flour, so use these cues — not the clock alone — to judge readiness.
Step 2: Your First Simple Loaf, Demystified
Before you follow a single recipe, it helps to see the whole journey from flour to finished loaf. Every sourdough bread you'll ever bake follows the same five stages:
- Mix — Combine flour, water, salt, and active starter into a shaggy dough.
- Bulk ferment — Bulk fermentation is the first long rise, where the dough sits at room temperature and the starter does its work, building flavor and gas. This is the most important stage for an open, airy crumb.
- Shape — Gently form the risen dough into a tight round or oval to create surface tension, which helps it hold its shape and rise upward in the oven.
- Proof — The final rise after shaping. Many beginners do this overnight in the fridge (called a cold proof), which is forgiving and improves flavor.
- Bake — Usually in a preheated Dutch oven, which traps steam for a crisp crust and tall rise.
That's it. Mix, bulk ferment, shape, proof, bake. Once this flow feels familiar, every recipe becomes easier to follow.
What "hydration" really means (kept simple)
You'll see recipes talk about hydration percentage. It sounds technical, but it's just the amount of water compared to flour, by weight.
- 500g flour + 350g water = 70% hydration (350 ÷ 500).
- Lower hydration (65–70%) = stiffer, easier-to-handle dough. Start here.
- Higher hydration (75%+) = wetter, stickier dough that's harder to shape but can give a more open crumb.
As a beginner, you don't need to calculate anything. Just pick a recipe in the 65–70% range and weigh your ingredients with a kitchen scale.
Why the clock lies (and your dough doesn't)
Here's the most freeing thing to learn early: timing is a guideline, not a rule. A recipe might say "bulk ferment for 4 hours," but a warm kitchen can finish that in 3, while a cold one might need 6.
Instead of watching the clock, watch the dough. During bulk fermentation, you're looking for the dough to grow by roughly 50%, become puffy and jiggly, and show a few bubbles on the surface. Results always vary with your kitchen's temperature and climate, so trust what you see and feel over any stated time.
Ready for exact steps? Now that you understand the flow, head to our [Beginner's First Loaf Recipe], where you'll get precise weights in grams and cups, a full timing schedule, sensory cues for every stage, and a troubleshooting guide for dense, gummy, or flat loaves.
Why Loaves Come Out Dense, Flat, or Gummy
Three problems cause most beginner heartbreak. Here's how to diagnose yours in seconds, then the fixes.
Quick diagnosis: cause and fix
| Symptom | Most likely cause | The fix |
|---|---|---|
| Dense, heavy, didn't rise | Underactive starter, or under-proofed (didn't ferment long enough) | Feed your starter until it reliably doubles in 4–6 hours; let the dough rise until it grows ~50% and looks puffy with a few bubbles |
| Gummy, sticky crumb | Underbaked, or sliced while hot | Bake until the internal temperature hits 205–210°F (96–99°C); cool on a rack for at least 2 hours before slicing |
| Flat, spread-out pancake | Over-proofed (fermented too long), or weak shaping | Cut the bulk ferment time; shape with more tension so the dough holds a tight ball |
| Dense AND gummy | Underactive starter plus underbaking | Fix the starter first, then extend the bake by 5–10 minutes |
What these terms mean
- Proofing / proof: the rise after you shape the dough, just before baking. Under-proofed = not enough rise (dense). Over-proofed = too much rise, so the structure collapses (flat).
- Bulk ferment: the first long rise of the whole batch of dough, right after mixing, before shaping.
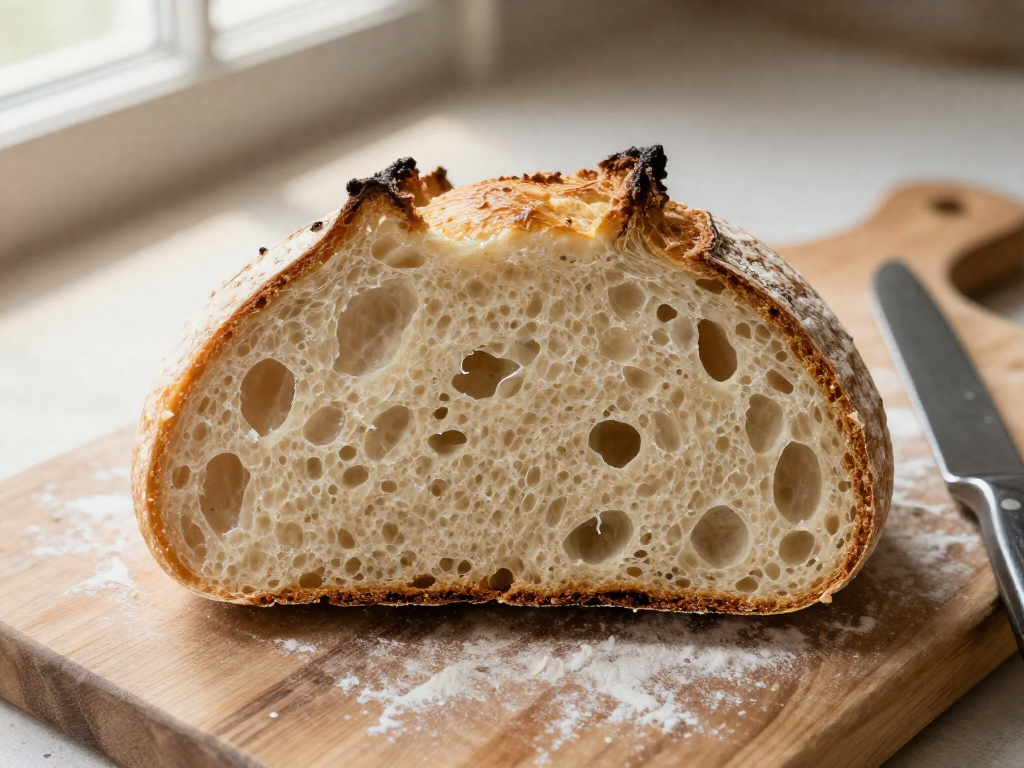
- Crumb: the inside texture of the bread — the holes and softness.
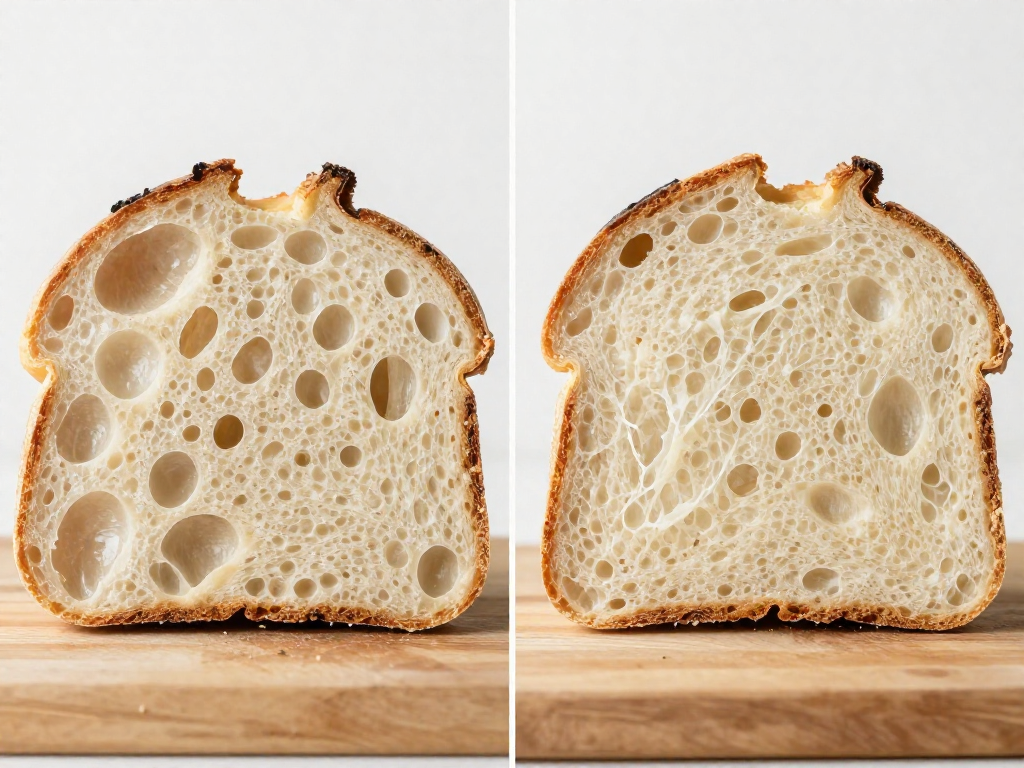
How to actually tell the difference
Dense vs. over-proofed trip up most beginners because both look "wrong," but the cause is opposite.
- A dense loaf is tight and tall-ish but heavy, with few air holes. It needed more time or a stronger starter.
- A flat, over-proofed loaf spreads sideways and may deflate when you score it. It needed less time.
Use the poke test: lightly press the proofed dough with a floured finger.
- Springs back fast → under-proofed, give it more time.
- Springs back slowly and leaves a slight dent → ready to bake.
- Doesn't spring back, dent stays → over-proofed, bake now and shorten the rise next time.
Note: Times shift with your kitchen temperature — dough ferments faster in a warm room and slower in a cold one. Watch the dough's look and feel, not just the clock. Results vary by kitchen and climate, so treat these as starting points and adjust.
Fix one variable at a time and your loaves will improve loaf by loaf.
Your First 30 Days: A Realistic Beginner Plan
You don't need to master everything at once. Here's a four-week plan that builds one skill at a time, so each step feels doable.
Week 1: Build or Revive Your Starter
Your starter is a living mix of flour and water that captures wild yeast to make bread rise. Either grow one from scratch or wake up a dried/gifted one.
- Daily task (2 minutes): Discard all but 50g, then feed with 50g flour + 50g water (a 1:1:1 ratio by weight).
- What to watch for: By day 5–7 you should see bubbles and a sour, yogurt-like smell. Slow to wake up? That's normal in cool kitchens.
Week 2: Practice Feeding and Reading Activity
This week is about confidence, not baking. Learn what a ready starter looks like.
- The float test: Drop a spoonful in water. If it floats, it's full of gas and ready.
- Track the rise: Mark the jar after feeding. A healthy starter roughly doubles in 4–8 hours at room temperature (around 21–24°C / 70–75°F).
- Goal: Predict when your starter peaks so you can time a bake.
Week 3: Bake Your First Loaf, Expect Imperfection
Follow the simple loaf recipe earlier in this guide. Your first bake teaches your hands the dough.
- Expect imperfection: A flat or slightly dense loaf still tastes great and is a normal first result.
- Take notes: Write down kitchen temperature, rise times, and how the dough felt.
Week 4: Repeat and Adjust One Variable at a Time
Bake again, changing only one thing so you can see what it does.
- Gummy crumb? Bake longer or let it cool fully before slicing.
- Dense loaf? Let the dough rise longer next time.
Change one variable per bake and you'll improve steadily. Results vary by kitchen and climate, so treat each loaf as data, not a test you pass or fail.
FAQ
How long does it take to learn sourdough as a beginner?
Most beginners bake a decent loaf within their first 2–4 attempts, but the real timeline starts with your starter. Building a new starter from scratch takes about 7–14 days before it's strong enough to bake with. After that, each loaf spans roughly 24 hours, though most of that is hands-off waiting (fermenting and proofing), not active work—plan on about 30–45 minutes of actual hands-on time. Expect your loaves to improve noticeably over the first month as you learn to read the dough rather than just follow the clock. Results vary by kitchen temperature, flour, and your starter's strength, so treat early loaves as practice, not pass/fail.
Do I need to buy a starter or can I make my own?
You can absolutely make your own—no purchase needed. A starter is simply a mix of flour and water that captures wild yeast and bacteria from your environment. To make one, combine 50g flour (about 1/4 cup) and 50g water (about 1/4 cup) in a jar, then feed it the same amount once a day for 7–14 days, discarding most of the old mixture before each feeding. You'll know it's working when it doubles in size, smells pleasantly tangy, and is full of bubbles. Buying or being gifted an established starter is a convenient shortcut that lets you bake within days instead of weeks, but it isn't required.
Why is my sourdough bread dense and gummy?
Dense, gummy bread almost always comes down to one of three fixable causes. First and most common: an underactive starter—if it isn't doubling and bubbling within a few hours of feeding, your dough can't rise properly. Fix this by feeding your starter for a few more days until it's reliably active. Second: underproofing—the dough didn't ferment long enough during bulk ferment (the first long rise after mixing). Give it more time and look for a 30–50% size increase with a domed, jiggly surface. Third: slicing too soon—cutting a warm loaf traps steam and makes the crumb gummy. Always cool loaves completely for at least 2 hours before slicing. If your loaf is also flat, that often points to overproofing instead, so adjust in the opposite direction.
What hydration should a beginner start with?
Start at around 65–70% hydration. Hydration simply means the weight of water as a percentage of the weight of flour—so 70% hydration is 700g water per 1,000g flour (roughly 3 cups water to 8 cups flour). This range gives you a dough that's soft enough to develop good structure but firm enough to shape without sticking everywhere, which is exactly what you want while you're still learning to handle dough. Higher-hydration doughs (75%+) make a more open, airy crumb but are slippery and frustrating for beginners. Once you can consistently shape a 70% dough, nudge hydration up by 2–3% at a time to see how your flour and kitchen respond.
Can I make sourdough without a Dutch oven?
Yes. A Dutch oven works well because it traps steam around the loaf for a better rise and crust, but you can recreate that steam other ways. The simplest method: bake on a preheated baking sheet or pizza stone, and place a metal pan of boiling water on the rack below for the first 20 minutes to create steam, then remove it to crisp the crust. Alternatively, cover the loaf with an oven-safe stainless steel bowl or a large oven-safe pot for the first 20 minutes, then uncover. Expect a slightly different crust than a Dutch-oven loaf, but a well-shaped, properly proofed dough will still bake up beautifully.
How do I know when my starter is ready to bake with?
Your starter is ready when it reliably doubles in size within about 4–8 hours of being fed, looks domed and full of bubbles, and smells tangy and yeasty rather than sharp or like nail polish remover. A quick confirmation is the float test: drop a small spoonful into a glass of water—if it floats, it's full of gas and ready to bake; if it sinks, feed it and wait a few more hours. For best results, bake when your starter is at its peak—just before it starts to deflate back down—since that's when it's most active. If it's still not doubling after a week or two of daily feeding, keep feeding and try warming its location slightly, as cool kitchens slow things down.
See also
- How to Make a Sourdough Starter from Scratch
- The Easiest Beginner Sourdough Bread Recipe
- Sourdough Troubleshooting: Fixing Dense and Gummy Loaves
- Understanding Hydration in Sourdough (Beginner Friendly)
- How to Feed and Maintain Your Sourdough Starter
- Sourdough Baking Equipment for Beginners
Related articles
Sourdough Lingo You Don’t Need: Simple Words Instead of ‘Autolyse’ and ‘Crumb’
Why do sourdough bakers use so much jargon, and what simple substitutions can I use?
Jul 20, 2026 · 4 min read
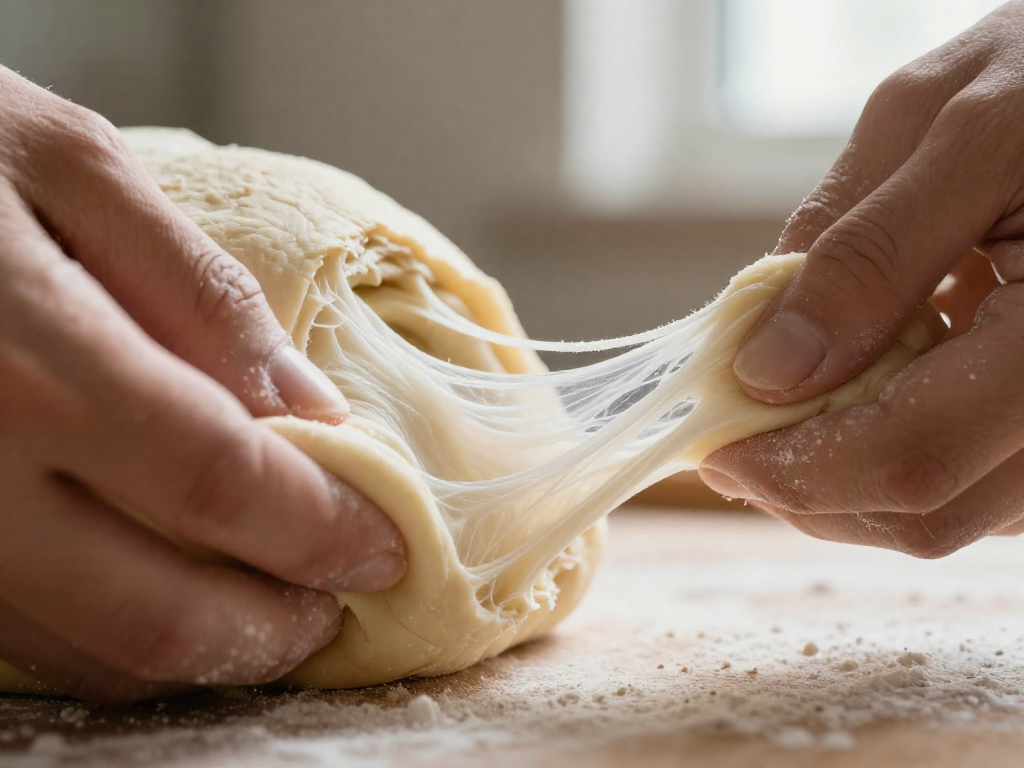
The Beginner’s Guide to Sourdough Gluten Development: Why Stretch and Folds Work
How does gluten development work in sourdough, and why are stretch and folds so effective for beginners?
Jul 20, 2026 · 9 min read
How Long Does It Really Take to Bake Your First Sourdough?
Wondering how long sourdough really takes? See the realistic active vs. passive time for your first loaf, hour by hour, so you can plan with confidence.
Jun 29, 2026 · 8 min read