Proofing vs. Bulk Fermentation: What's the Difference?
How is proofing different from bulk fermentation?
On this page
The Short Answer: Two Rises, Two Jobs
Sourdough has two separate rises, and they happen at different times for different reasons.
- Bulk fermentation is the first, big rise. It's the whole mass of dough rising together right after mixing, before you've divided or shaped anything. (When people say "bulk ferment," they just mean this first rise of the entire batch.) Its job is to build strength and flavor across the dough.
- Proofing is the second, final rise. It happens after you've shaped the dough into its loaf form, and it gets that one shaped loaf puffy and oven-ready.
So bulk fermentation works on the whole batch; proofing finishes a single shaped loaf.
Memory hook: Bulk before shaping, proof after shaping.
That's the core difference. The sections below break down exactly what to watch for at each stage—timing, dough feel, and the visual cues that tell you when each rise is done.
What Bulk Fermentation Actually Does
Bulk fermentation (often shortened to "bulk ferment") is the first long rise, after you've mixed your dough but before you shape it into a loaf. Think of it as the stage where your dough quietly transforms from a shaggy lump into a living, airy, flavorful mass.
Here's what's happening inside the bowl:
- The microbes wake up and multiply. Your starter brings wild yeast (tiny organisms that eat flour sugars and release carbon-dioxide gas) and bacteria (which produce the tangy, sour flavor). During bulk, both populations grow rapidly, filling the dough with gas bubbles and building flavor.
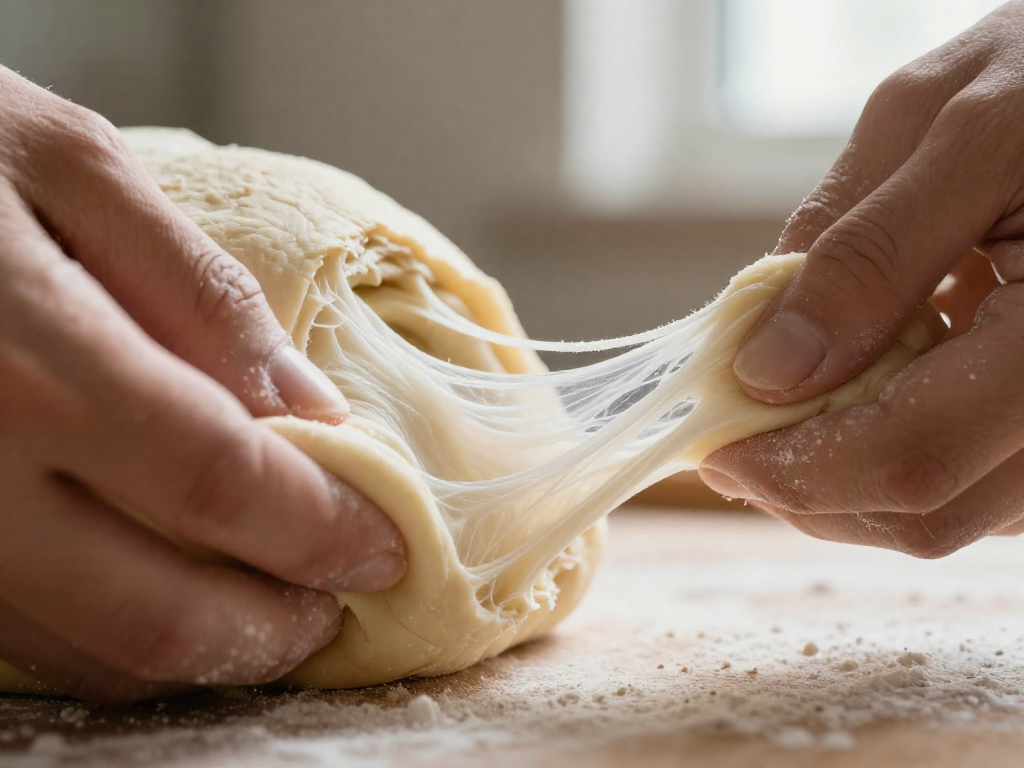
- The gluten network gets stronger. Gluten is the stretchy protein web that traps gas and gives bread its chew. This is why beginners do stretch-and-folds — gently pulling up an edge of dough and folding it over, usually 3–4 times spaced 30 minutes apart — to strengthen that web without kneading.
Why you watch the dough, not the clock
The biggest beginner trap is treating bulk like a recipe timer ("ferment 4 hours"). Fermentation speed depends almost entirely on temperature:
- At a warm 78°F (26°C), bulk might finish in 4–5 hours.
- In a cool 68°F (20°C) kitchen, the same dough can take 7–9 hours.
A few degrees changes everything, so the clock is only a rough guide. Judge by how the dough behaves instead.
Signs bulk fermentation is done
Look for several of these together, not just one:
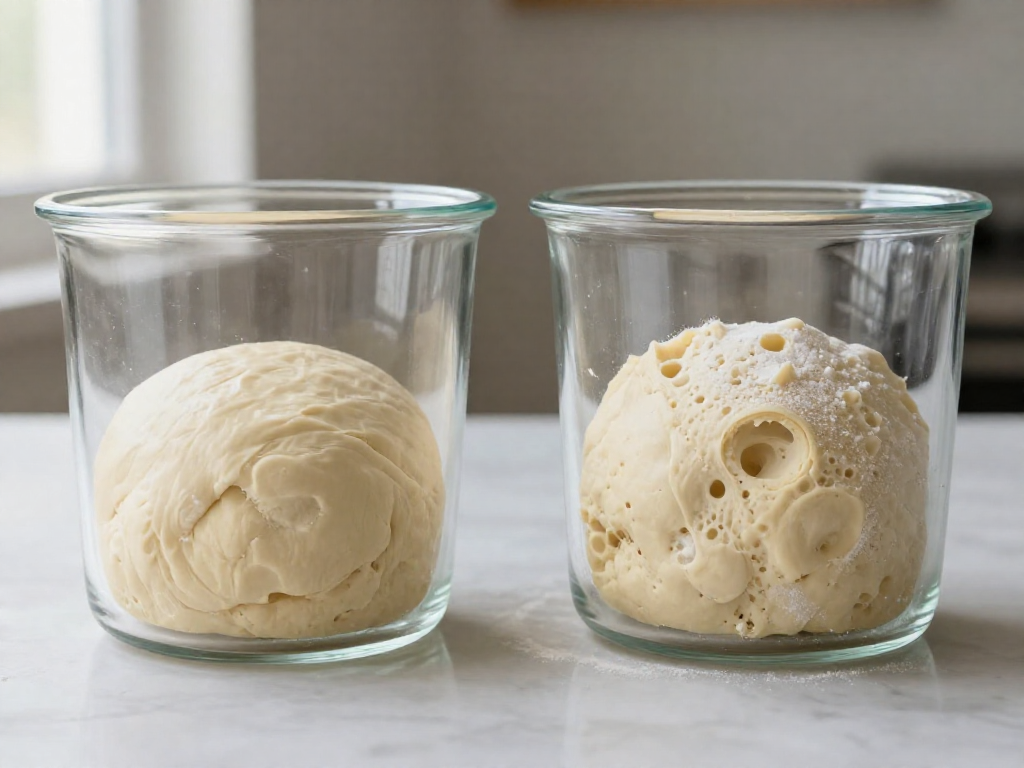
- Volume increased by about 50–75% (not fully doubled — that often means over-fermented for sourdough).
- A domed, slightly puffy surface rather than a flat top.
- Visible bubbles on the surface and along the sides of the bowl.
- A jiggly, alive feel when you gently shake the container, like a set custard.
When you see these cues, bulk is done and it's time to shape — regardless of what the clock says. Results vary by kitchen and climate, so trust your eyes and hands over any fixed time.
What Proofing Actually Does
Quick answer: Proofing (also called the final proof or second rise) is the rest your dough takes after shaping and before baking. Its only job is to get the loaf ready to spring up in a hot oven — not to build strength. That strength work already happened during bulk fermentation (the long first rise when the whole batch of dough ferments together).
Why proofing is different from bulk
During bulk fermentation you stretch and fold to develop the gluten (the protein network that traps gas and gives bread structure). By the time you shape your loaf, that structural work is done. The final proof just lets the shaped dough relax and rise one last time so it bakes tall instead of tight and dense. Think of bulk as building the engine and proofing as warming it up to launch.
Cold proof vs. room-temperature proof
- Room-temperature proof (counter): Faster, usually 1–3 hours depending on kitchen warmth. Best when you want to bake the same day.
- Cold proof (fridge), aka retarding: Slower, 8–16 hours overnight. Bakers choose this for easier scheduling, a slightly tangier flavor, and firmer dough that's simpler to score. Results vary by fridge temperature and your starter's activity.
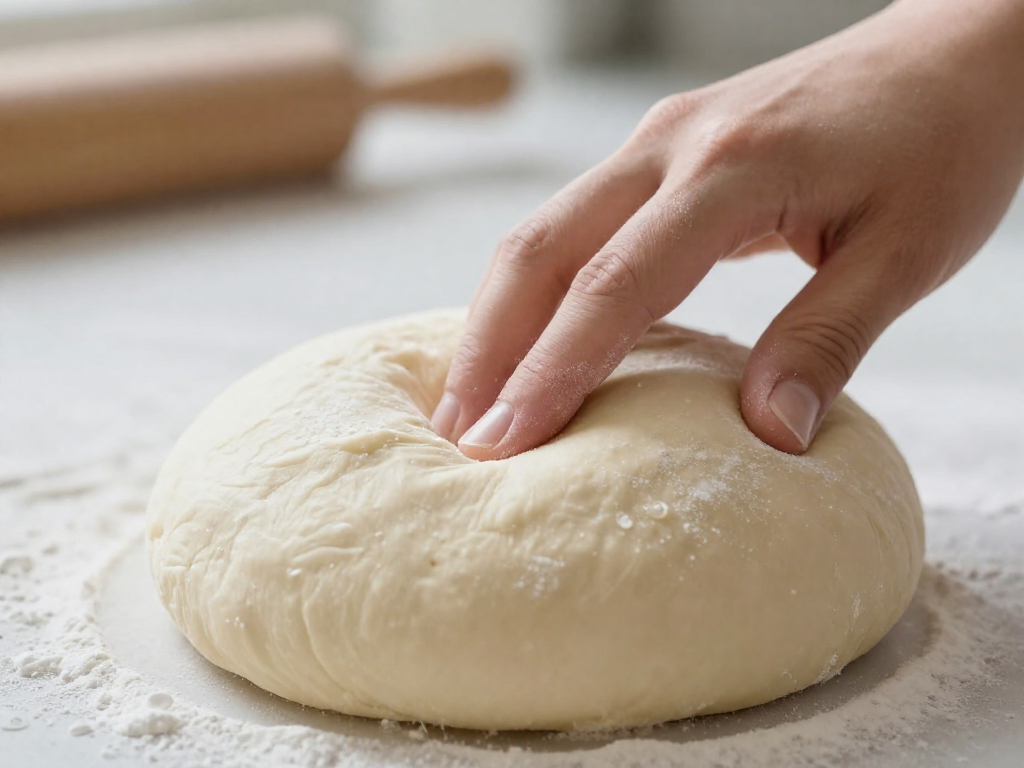
Signs the proof is done — the poke test
Lightly flour a fingertip and gently press the dough about 1 cm deep, then watch:
- Springs back slowly, leaving a small dent → ready to bake.
- Springs back instantly → under-proofed; give it more time.
- Dent stays, dough looks deflated → over-proofed.
A finished loaf should look slightly puffy and jiggly, not ballooned or domed tight.
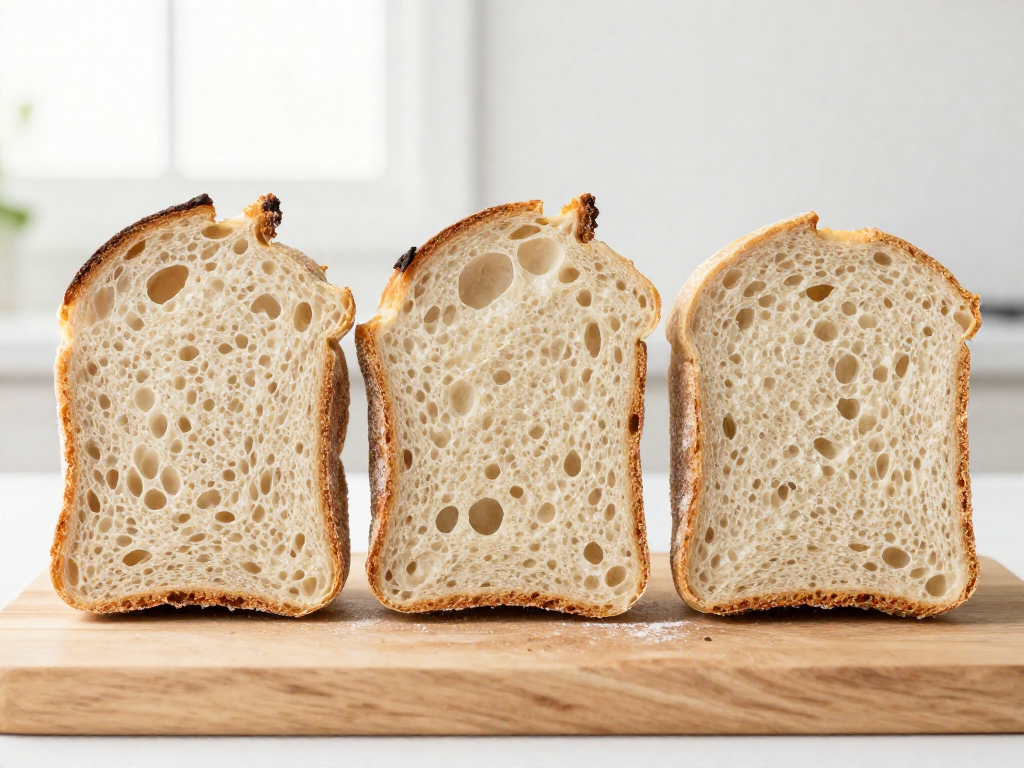
Why over-proofing causes flat loaves
Push the final proof too far and the gluten can no longer hold the gas it has produced. The structure collapses, so the dough spreads sideways and bakes flat with little oven spring. When in doubt, proof a touch less — a slightly under-proofed loaf still rises in the oven, but an over-proofed one rarely recovers.
Side-by-Side Comparison
Here's the quick, pin-it-now version. Both stages are fermentation (the process where your starter's wild yeast and bacteria eat flour sugars, producing gas and flavor), driven by your starter and your kitchen temperature. The difference is scale and purpose.
| Bulk Fermentation | Proofing (Final Proof) | |
|---|---|---|
| When it happens | Right after mixing, before shaping | After shaping, just before baking |
| Dough state | Whole batch in one bowl | Single shaped loaf |
| Main goal | Build strength and develop flavor | Final lift so the loaf is light, not dense |
| How to judge doneness | Dough grows ~50%, looks domed and jiggly, shows a few bubbles on top | Poke test: a gentle dent springs back slowly, not instantly and not at all |
| Typical duration | 4–6 hours at ~72°F (22°C) | 1–3 hours at room temp, or overnight in the fridge |
Order of operations:
Mix → Bulk Ferment → Shape → Proof → Bake
What's the same: Both are fermentation. Both speed up in a warm kitchen and slow down in a cool one, so your times will shift with the seasons.
What's different: Bulk ferment works on the whole batch to build dough strength. Proofing works on a single shaped loaf to give it that final rise before it hits the oven.
Note: Times are starting points, not guarantees. A warm kitchen can cut them in half, so always trust the visual cues over the clock.
How to Tell When Each Stage Is Done
Judge your dough by how it looks and behaves, not by the clock. Time is only a rough guide because warm kitchens speed things up and cool ones slow them down.
Bulk fermentation is done when:
- Volume has grown about 50–75% (not doubled—that's a common myth for sourdough).
- The surface looks smooth and slightly domed, not flat or slack.
- You can see bubbles on the top and sides through a clear container.
- When you nudge the bowl, the dough has a soft, alive jiggle like set jelly.
Skip the time trap: "Bulk for 4 hours" only works if your kitchen matches the recipe's temperature. Always trust the dough cues above first.
Proofing is done when you pass the poke test:
After shaping, the dough rests one final time. Press a lightly floured finger about 1 cm (½ inch) into the dough and watch:
- Springs back fast → under-proofed. Give it more time.
- Springs back slowly, leaving a small dent → ready to bake.
- Doesn't spring back at all, dent stays → over-proofed. Bake right away to limit damage.
Quick temperature reference
Dough rises fastest when warm. Use this to set expectations, not exact timers:
| Dough temp | Bulk fermentation pace |
|---|---|
| 21°C / 70°F | Slow (6–8 hrs) |
| 24°C / 75°F | Moderate (4–6 hrs) |
| 27°C / 80°F | Fast (3–4 hrs) |
Times vary by starter strength and flour, so use the cues—not the table—as your final call.
Common Mistakes (and Why Your Loaf Came Out Wrong)
Most beginner loaf problems trace back to one of the two rises going wrong. Here's how to match the symptom in your loaf to the stage that caused it.
Dense, tight crumb with barely any rise → Under-bulking. Your dough didn't finish bulk fermentation (the first rise, when the whole batch of dough rises in one bowl). The yeast and bacteria hadn't built up enough gas yet. Fix: Let bulk go until the dough is puffy, jiggly, and has grown by roughly 50–75%, not just a fixed clock time.
Slack, sticky dough you can't shape → Over-bulking. The dough fermented too long and the gluten (the protein network that gives bread structure) broke down. It feels soupy and won't hold a ball. Fix: End bulk sooner; in a warm kitchen this can happen in as little as 4 hours.
Gummy, undercooked interior and a crust that tears → Under-proofing. Proofing is the second rise, after shaping. Too short, and the dough hasn't relaxed or built enough gas, so it bursts and stays wet inside. Fix: Proof until a gently poked dimple springs back slowly and only partway.
Flat loaf that spreads sideways with poor oven spring → Over-proofing. The dough ran out of fuel before baking, so it collapses instead of rising in the oven (that final rise is called oven spring). Fix: Bake when the dimple springs back slowly but stays slightly indented.
Guessing because both rises blur together → Skipping the difference. Treating bulk and proof as one vague "let it rise" step is the most common beginner trap. They have different jobs and different "done" cues—watch each one separately.
Results vary by kitchen temperature and starter strength, so trust the dough's feel over the clock every time.
Quick Beginner Workflow Recap
Here's the whole rhythm in one glance. Follow it top to bottom and you'll keep bulk fermentation (the first rise, with the whole batch of dough together) and proofing (the second rise, after shaping) in their right places.
- Mix and rest. Combine your ingredients, then let the dough sit so the flour fully absorbs the water.
- Bulk ferment until the dough is about 50–75% larger, puffy, and domed. This builds the flavor and most of the rise.
- Shape the dough into its final form and add tension to the surface.
- Proof at room temperature or in the fridge (cold proofing) until the poke test passes: press a floured finger in, and the dent should spring back slowly, not instantly or not at all.
- Bake.
One rule ties it all together: watch the dough, not the clock. Times shift with your kitchen's temperature, so let the dough's look and feel tell you when each stage is done.
See also
- How to Know When Bulk Fermentation Is Done
- The Poke Test: How to Tell If Your Sourdough Is Proofed
- How to Shape a Sourdough Boule for Beginners
- Why Is My Sourdough Gummy? Troubleshooting Guide
- Cold Proofing vs. Room Temperature Proofing
- Sourdough Starter Basics for Beginners
Related articles
Sourdough Lingo You Don’t Need: Simple Words Instead of ‘Autolyse’ and ‘Crumb’
Why do sourdough bakers use so much jargon, and what simple substitutions can I use?
Jul 20, 2026 · 4 min read
The Beginner’s Guide to Sourdough Gluten Development: Why Stretch and Folds Work
How does gluten development work in sourdough, and why are stretch and folds so effective for beginners?
Jul 20, 2026 · 9 min read
How Long Does It Really Take to Bake Your First Sourdough?
Wondering how long sourdough really takes? See the realistic active vs. passive time for your first loaf, hour by hour, so you can plan with confidence.
Jun 29, 2026 · 8 min read