How to Tell When Your Sourdough Starter Is Ready to Bake With
How do I know if my starter is active enough to bake bread?
On this page

Why Starter Timing Matters More Than Your Recipe
If your loaves keep coming out dense, gummy, or flat, the culprit usually isn't your recipe—it's your starter (the living mix of flour and water that ferments and rises your bread). A starter that's weak, or one you used after it peaked, simply can't trap enough gas to lift the dough. This is the single most common hidden cause of disappointing beginner loaves.
Here's the hard truth: even a flawless recipe fails if the starter can't do its job. You can weigh every gram perfectly and follow the timing to the minute, but if the starter isn't active enough at the moment you mix, the dough won't have the leavening power it needs.
The good news? Readiness has almost nothing to do with how old your starter is or whether you fed it "on schedule." It's about activity level—how vigorously it's bubbling and rising right now. And that's something you can learn to read with a few simple visual cues, no hydration math or guesswork required.
In the steps below, you'll learn exactly what an active, bake-ready starter looks like.
The 4 Signs Your Starter Is Active and Ready

Before you mix a single gram of dough, run your starter through this quick checklist. If it hits all four signs, it's ready to bake. If it misses even one, give it another feeding and wait a few hours.
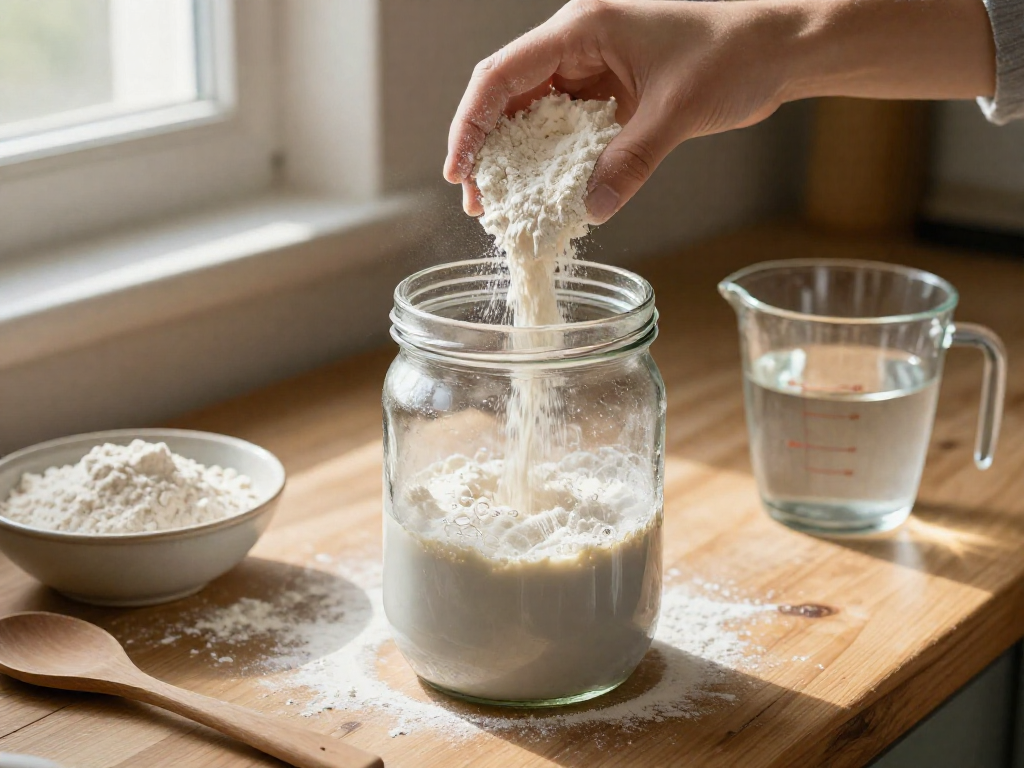
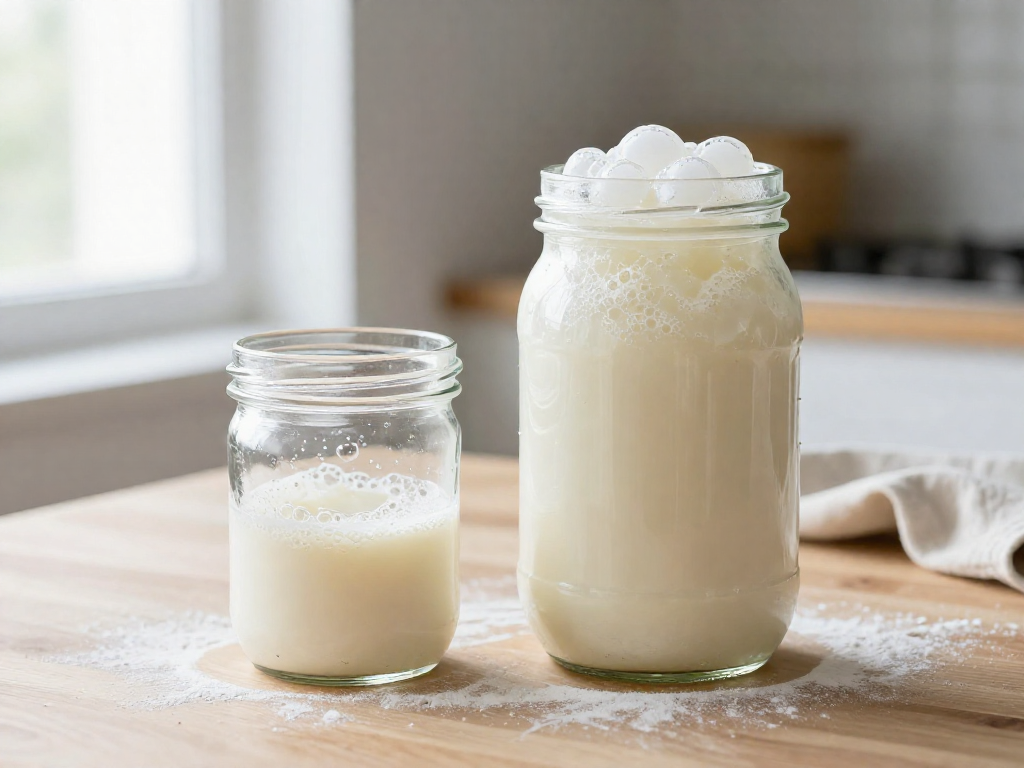
1. It doubles (or more) in volume within 4–8 hours of feeding. This is the single most reliable signal. After you feed your starter (add fresh flour and water), it should roughly double in size before it peaks and begins to fall. Use a rubber band or a piece of tape on the jar to mark the starting level so you can see the rise clearly. If it takes longer than 8–12 hours to double, it's still too sluggish to leaven a loaf well.
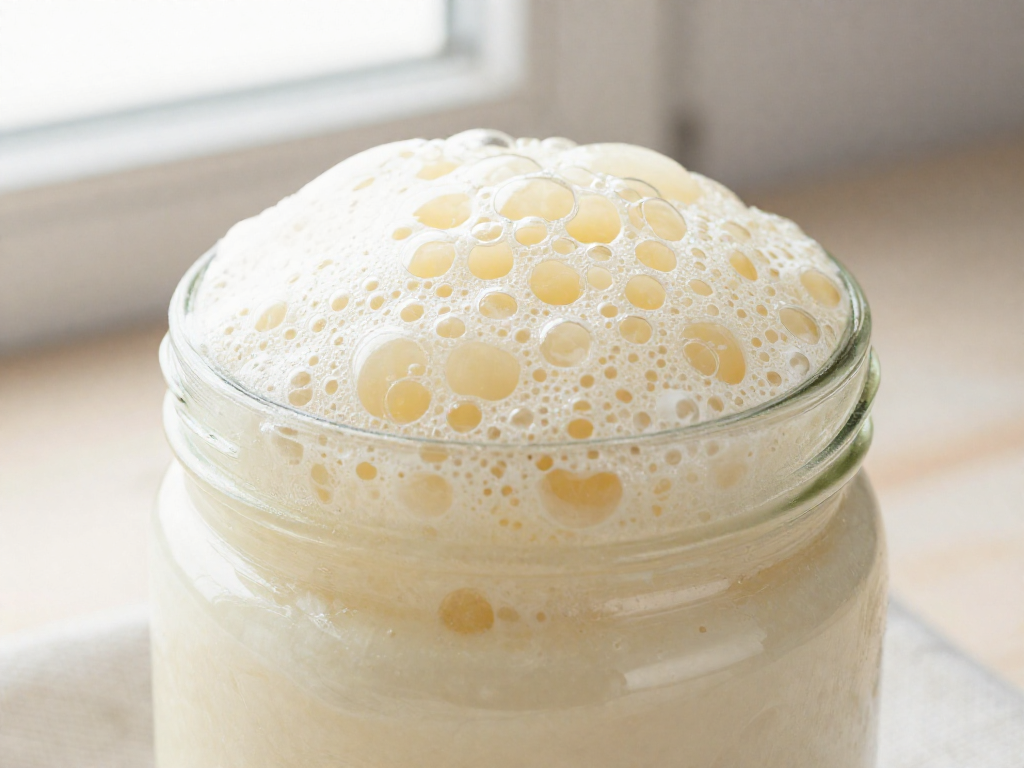
2. The surface is domed and bubbly, not flat or sunken. At its peak, a ready starter looks alive: the top puffs up into a gentle dome covered in bubbles of all sizes. A flat, liquid, or sunken-in surface usually means you've waited too long and it has already peaked and collapsed. Catch it on the way up, not on the way down.
3. It smells pleasantly tangy and yeasty — not sharp. A healthy starter smells a little sour, a little like yogurt or beer, sometimes faintly fruity. That's good. A smell like nail polish remover (acetone) or harsh vinegar means it's hungry and over-fermented — feed it again and let it bounce back before baking.
4. The texture is light, airy, and webbed with bubbles. Give it a stir. A ready starter feels mousse-like and stretchy, threaded through with bubbles rather than dense and pasty. Many bakers confirm this with the float test: drop a small spoonful into a glass of room-temperature water. If it floats, it's full of gas and ready. (This test isn't perfect — a stiff starter can sink even when ready — so treat it as a tiebreaker, not the final word.)
Bonus sign: a consistent, predictable rise. The most trustworthy starters behave the same way every day — doubling on a reliable schedule over your last several feedings. Predictability tells you the wild yeast and bacteria are stable and strong enough to carry a loaf.
Note: Exact timing varies with your kitchen's temperature and your flour. A warm 25°C/77°F counter speeds things up; a cool room slows them down. Watch the signs, not the clock.
Understanding Peak: The Best Window to Bake
Quick answer: Bake when your starter is at its highest point—right before it starts sinking back down. This moment is called peak, and it's when your starter has the most lift to give your dough.
How to Spot Peak
Use the rubber band trick: right after feeding, stretch a rubber band around the jar at the level of the starter (or draw a line with a marker). Then watch how high it climbs.
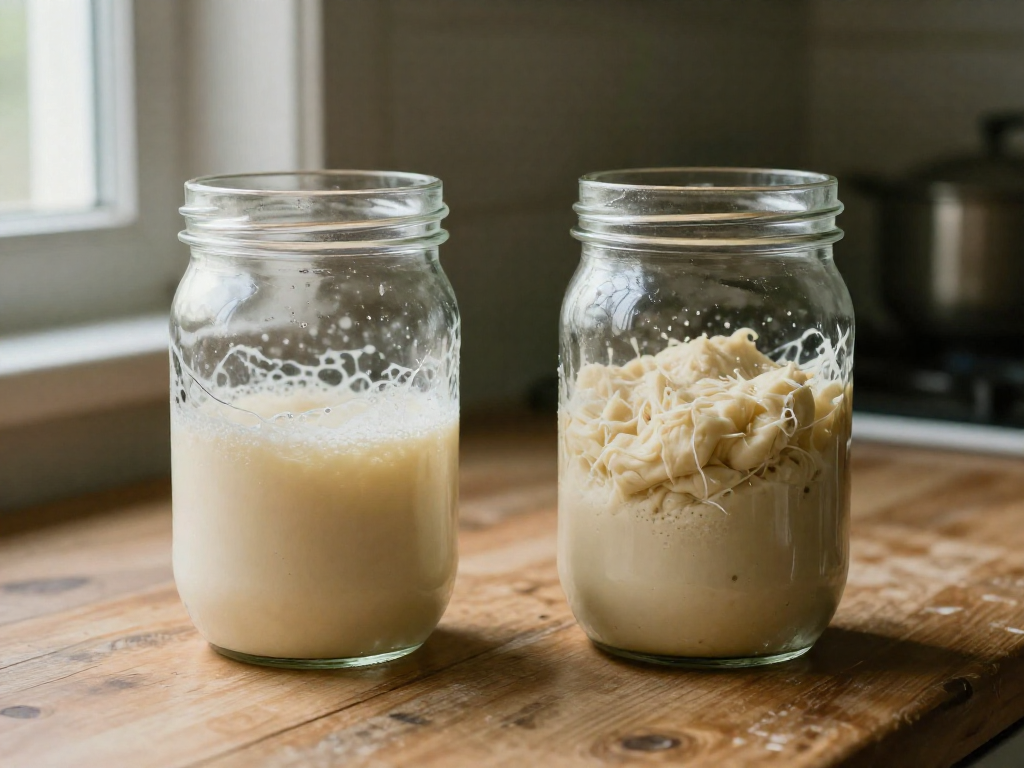
- Under-risen (too early): Risen less than double. Few bubbles, still dense. It needs more time—baking now usually gives a flat, tight loaf.
- At peak (just right): Roughly doubled (or more), domed on top, covered in bubbles, and smells pleasantly tangy. The surface looks full and stretched.
- Collapsed / over-risen (too late): Risen, then fallen back below its high mark. The top is flat or sunken, often with a sour, sharp, sometimes acetone-like smell and a watery layer.
Why Past Peak Weakens the Rise
A starter is a community of wild yeast (which produces the gas that lifts bread) and bacteria. At peak, the yeast is at its most active and there's plenty of food left. Once the food runs out, the yeast slows, gas escapes, and the structure collapses. Baking with a collapsed starter means less lift—a common cause of dense, gummy loaves.
Peak Timing Is Not a Fixed Number
There's no universal "feed at 8 a.m., bake at noon" rule. How fast your starter reaches peak depends on:
- Temperature: Warm kitchens (75–80°F) speed things up; cool rooms slow them down, sometimes by hours.
- Flour: Whole wheat and rye ferment faster than white flour.
- Feeding ratio: A 1:1:1 feed (equal starter, flour, water by weight) peaks faster than a 1:5:5 feed.
Tip: The first time, check the jar every hour and note when it tops out. That time becomes your personal baking window. Results vary by kitchen, so track your starter rather than the clock.
The Float Test: How to Do It and What It Really Tells You
Quick answer: a healthy, active starter usually floats. Here's how to check in under a minute.
How to do the float test
- Fill a clear glass with room-temperature water.
- Take a small spoonful (about 5g) of starter from the top of your jar.
- Gently drop it onto the surface of the water. Don't stir or push it down.
- Watch for 5–10 seconds.
What the result means:
- Floats = your starter is full of trapped carbon-dioxide gas from active fermentation (the bubbling process your wild yeast creates as it eats flour). This is a good sign it's ready, or close to it.
- Sinks = not enough gas yet. Give it more time, or feed it (add fresh flour and water) and wait until it bubbles and rises again.
Why it isn't 100% reliable
The float test measures gas, not whether your starter is at its absolute best. It can mislead you in two common cases:
- Stiff starters (low hydration — meaning less water relative to flour) are dense and can sink even when perfectly active.
- Liquid or runny starters (high hydration — more water) sometimes float on density alone, or a past-peak starter can still hold enough old gas to float when it's actually deflating.
So a sinking sample doesn't always mean "not ready," and a floating one doesn't guarantee "perfect."
Use it as a confirmation, not the final word
Treat the float test as a quick second opinion. Rely first on the visual signs from the earlier sections — doubled in size, a domed bubbly top, and a tangy-yeasty smell. If those line up and your starter floats, bake with confidence. Results still vary by kitchen temperature and flour, so trust what you see in the jar most.
What a NOT-Ready Starter Looks Like (and How to Fix It)
If your starter shows any of these signs, hold off on baking—it's telling you it needs more care first.
The warning signs:
- Flat and lifeless: No bubbles, no rise, no dome. It looks the same hours after feeding as it did right after.
- Hooch on top: A layer of gray or clear liquid means your starter is hungry. (Hooch is just the alcohol byproduct of a starter that's been left too long without food.) Pour it off and feed.
- Sluggish rise: A healthy starter should roughly double within 4–8 hours. If yours takes 12+ hours to double—or never doubles—it's not ready.
How to fix it:
- Feed more often. Switch to twice a day (every ~12 hours) until it's rising reliably.
- Warm it up. Yeast and bacteria are sluggish below 70°F (21°C). Move it to a warmer spot—on top of the fridge or in an oven with just the light on (around 75–80°F / 24–27°C).
- Use fresh flour. Old or bleached flour starves the culture. Unbleached all-purpose or whole wheat works best.
- Adjust the ratio. Feed 1 part starter to 1 part flour to 1 part water by weight (for example, 50g starter, 50g flour, 50g water). This gives it plenty of fresh food.
Young vs. unhealthy: A young starter (under 2 weeks old) is often just slow—keep feeding it consistently. A genuinely unhealthy one smells like rot or shows pink/orange streaks; that's mold, and you should start over.
How many feedings? Most new starters need 7–14 days of daily feeding before they double predictably and pass the float test. Results vary by kitchen temperature and flour, so judge by the bubbles and rise—not the calendar.
Quick Pre-Bake Checklist
Run through these five checks right before you mix your dough. If you can say "yes" to all of them, your starter is ready to go.
- Doubled in size? It should have visibly risen to about twice its original volume since your last feeding (use a rubber band or marker on the jar to track it).
- Bubbly and domed? Look for an active, bubbly surface and a slightly rounded top, not a flat or sunken one.
- Smells tangy? A pleasant, yogurt-like or fruity-sour smell means the wild yeast and bacteria are active. Sharp nail-polish or vinegar smells mean it needs another feeding.
- Passes the float test? Drop a small spoonful into water; if it floats, it's full of gas and ready.
- At peak, not collapsed? Use it while it's domed and rising, before it deflates and the top caves in.
✅ All five yes? Mix your dough now. Results vary by kitchen temperature, so trust these cues over the clock.
See also
- How to Make a Sourdough Starter from Scratch
- How to Feed and Maintain Your Sourdough Starter
- Why Is My Sourdough Loaf Dense and Gummy? Troubleshooting Guide
- Beginner Sourdough Bread Recipe (Step-by-Step)
- Sourdough Starter Feeding Ratios Explained
Related articles
The Emotional Side of Sourdough: Dealing with Starter Anxiety and Failure
How do I cope with the stress and disappointment when my sourdough starter fails or seems to die?
Jul 20, 2026 · 7 min read
Sourdough Starter Fasting: What to Do When You Go on Vacation
How do I prepare my sourdough starter for a multi-week absence and revive it smoothly?
Jul 20, 2026 · 9 min read
Can You Make a Sourdough Starter Without Discarding Flour?
Tired of throwing flour away? Learn whether you can make a sourdough starter without discarding, plus a low-waste method that actually works for beginners.
Jun 29, 2026 · 5 min read