How to Score Sourdough: Tools and Beginner Patterns
What do I use to score bread and how do I do it?
On this page
Why Scoring Matters (It's Not Just Decoration)
Quick answer: Scoring means slashing the top of your dough with a blade right before it goes in the oven. That single cut tells the loaf where to expand, so it opens up cleanly instead of bursting at a random weak spot.
Here's what's happening. In a hot oven, the gas trapped inside your dough suddenly expands. This rapid rise is called oven spring. The crust sets fast, so the dough underneath needs an escape route. Your score is that route.
What scoring does for you:
- Directs the oven spring so the loaf opens where you chose, not somewhere unpredictable.
- Prevents blowouts — without a score, gas forces its way out the side or bottom, leaving a torn, lopsided loaf.
- Creates the "ear" — that raised, crispy flap of crust that lifts up along an angled cut. It's the signature of a well-scored loaf.
The takeaway: You only need one good functional cut to fix flat, bursting loaves. Master a single confident slash first. The pretty leaf-and-wheat patterns you've seen are a bonus you can add later — they don't bake a better loaf, they just look nice on top of one.
Up next: the tools that make a clean cut possible.
Lame vs. Knife vs. Razor: What to Score With
Quick answer: buy a bread lame. It's the cheapest, sharpest, and easiest tool to control as a beginner. Here's how the three common options compare.
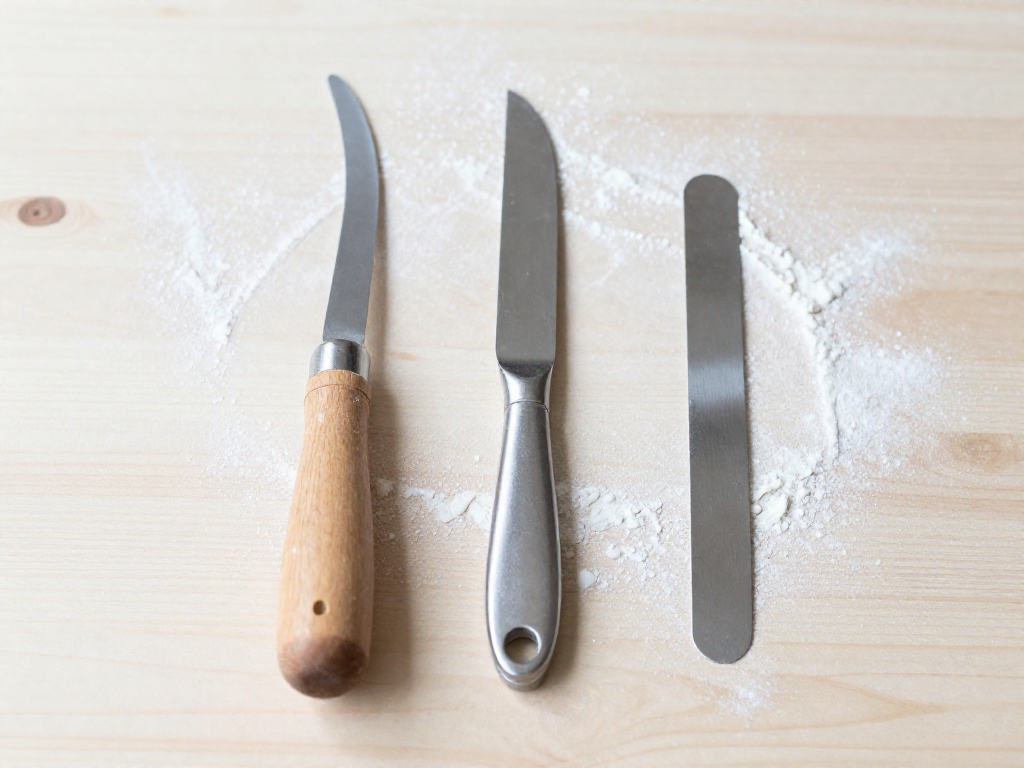
The three tools
- Bread lame (recommended). A lame (pronounced "lahm") is just a razor blade mounted on a handle. The razor edge slices wet dough cleanly without dragging, and the handle gives you control over angle and depth. They cost around $8–15 and replacement blades are pennies each. This is the tool you want.
- Sharp paring or utility knife. Works in a pinch if it's genuinely sharp, but the thicker blade tends to drag and tear wetter dough instead of slicing it, which gives you a rough, ragged cut. Fine for a first loaf before your lame arrives; not a long-term answer.
- Bare razor blade or box cutter. Just as sharp as a lame, but with no handle it's harder to control your angle and far easier to nick a finger. Skip it unless you have nothing else.
Curved vs. straight blades
Lame blades can be mounted flat (straight) or bowed into a curve:
- Straight blade: best for beginners. Clean, vertical or simple decorative cuts, easy to aim.
- Curved blade: held at a low angle, it lifts a flap of dough that bakes up into a raised "ear" (that crisp ridge along the cut). Great once you're comfortable, but trickier to control at first.
Start with a straight blade and move to curved when you want ears and patterns.
Keeping it sharp
A dull blade drags and tears, the #1 cause of ugly scores. Replace the blade as soon as it stops gliding through dough cleanly, usually every 5–10 loaves. Always store the lame with the blade covered.
Results vary by dough hydration (the amount of water in your dough) and kitchen conditions, so expect a few practice loaves before your cuts look clean.
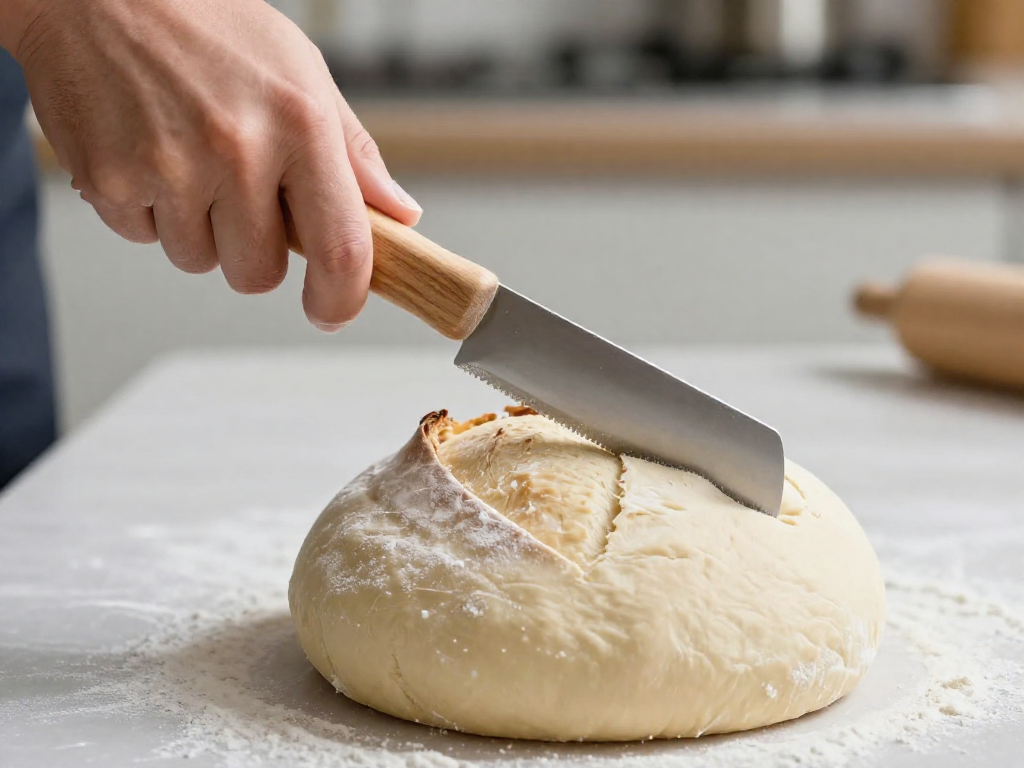
How to Hold and Angle Your Blade
The way you hold your blade matters more than which blade you buy. Here's exactly how to do it.
The Steps
- Grip it firmly but relaxed. Hold your lame (a handled razor blade made for scoring) like a pen, close to the blade so you have control. A loose grip leads to a wobbly, sawing cut.
- Set your angle. For an ear (the raised, crispy flap that peels up as the loaf bakes), tilt the blade to a shallow 30–45 degree angle so you're slicing under a flap of dough. For flat decorative cuts, hold the blade straight up at 90 degrees.
- Cut shallow. Aim for a depth of 1/4 to 1/2 inch (about 6–12 mm). Deeper than that and the loaf can deflate; shallower and the cut may seal shut in the oven.
- Move fast and once. Use one confident, continuous stroke. Sawing back and forth drags the dough, snags the surface, and gives you a ragged line. Commit to the motion.
- Score cold dough. Slash your dough straight from the fridge. Cold dough is firmer, so the blade glides cleanly instead of sticking and tearing.
If the Dough Sticks to the Blade
- Lightly dust the blade with flour, or
- Dip or mist it with water before each cut.
Reset between scores so the blade stays clean.
Quick reference
- Ear: 30–45°, blade tilted under the surface
- Decorative: 90°, blade straight down
- Depth: 1/4–1/2 inch
- Motion: one fast pass, no sawing
Results vary with your flour, hydration, and kitchen temperature, so treat your first few loaves as practice. The angle and speed will start to feel natural after a handful of bakes.
3 Beginner Scoring Patterns That Always Work
Start with one of these three. Each is forgiving, repeatable, and matched to a loaf shape. Score a cold dough straight from the fridge (it holds its shape better), with your blade held at the angle covered in the previous section.
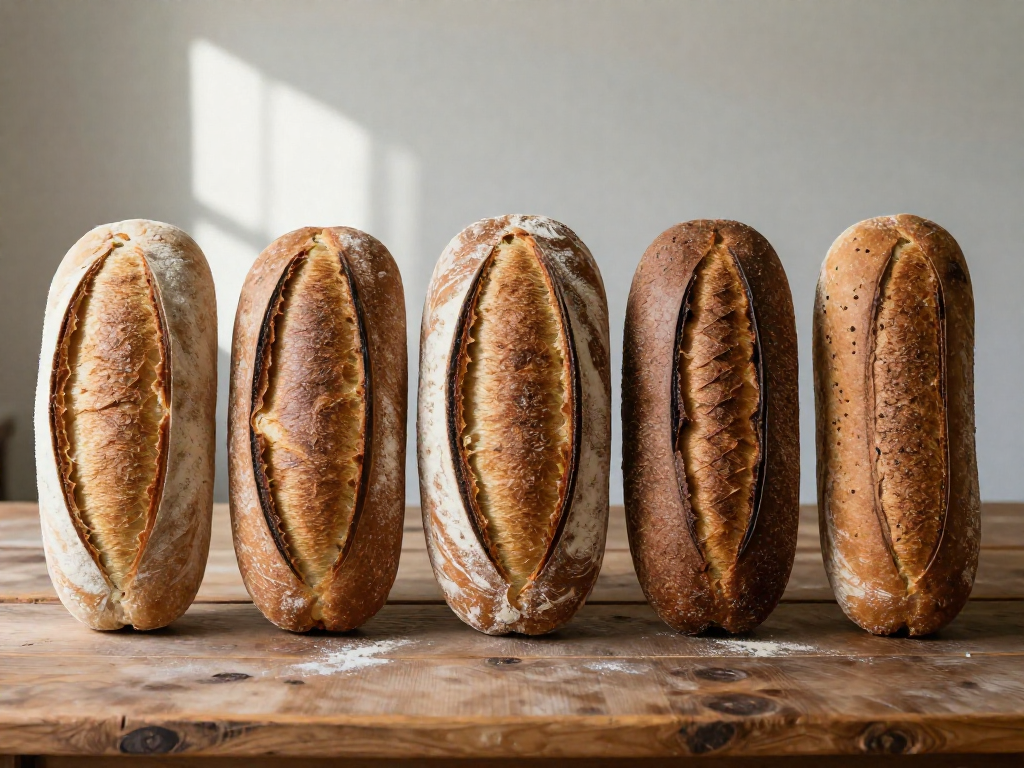
1. The Single Slash — best for a batard (oval loaf)
This is the most reliable way to get an "ear," the raised, crispy flap of crust that lifts as the bread bakes.
- Position the cut slightly off-center, running most of the length of the loaf.
- Hold the blade at a shallow angle (roughly 30°), almost lying against the surface rather than straight down.
- Make one confident, continuous stroke about 1/4 inch (0.5 cm) deep.
Why off-center and angled: the dough opens along one side and curls up into an ear. A straight-down center cut tends to split flat with no lift.
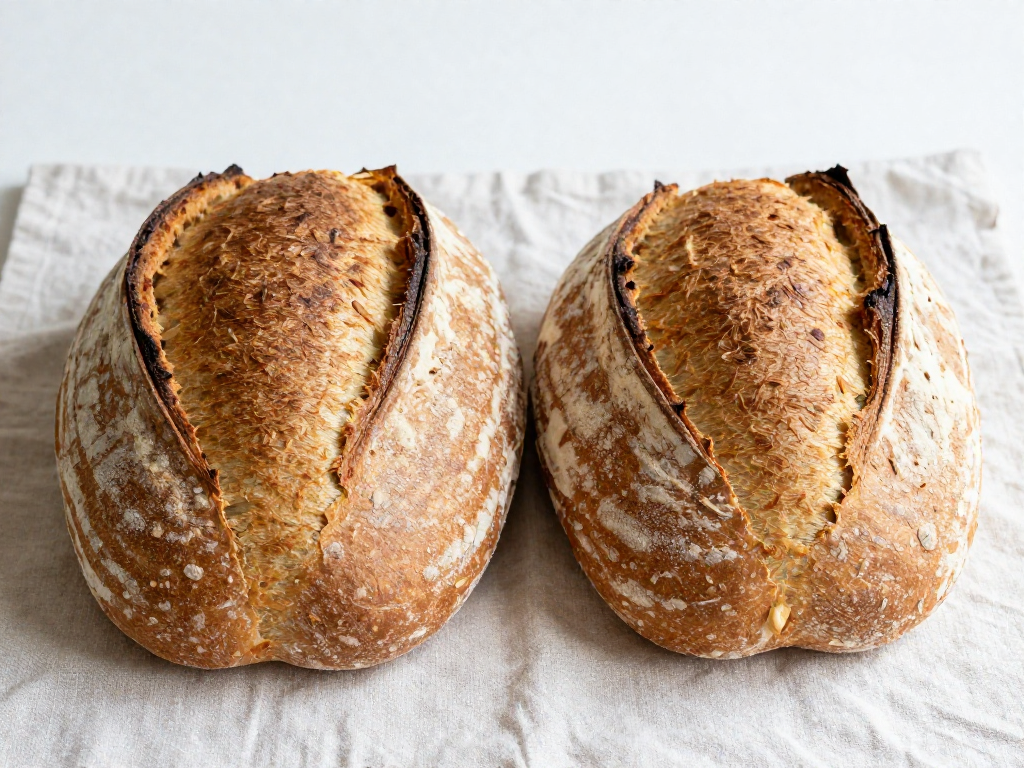
2. The Cross or Square — best for a boule (round loaf)
A round loaf wants its expansion spread evenly, so use a symmetrical pattern.
- Cross: two cuts, each about 1/4 inch (0.5 cm) deep, crossing at the center.
- Square: four shorter cuts forming a box on top, which gives a slightly more dramatic burst.
Keep the blade nearly vertical (about 90°) for these even cuts.
3. The Wheat / Leaf — an easy decorative next step
Once the slash feels natural, try this on a batard:
- Cut one shallow center line down the loaf.
- Add short diagonal cuts branching off each side, alternating like a leaf's veins.
Keep decorative cuts shallow (1/8 inch / 0.3 cm) so they don't compete with one main "expansion" cut for oven spring.
Quick troubleshooting:
- No ear / cut bakes flat → your angle was too steep; lay the blade flatter next time.
- Cut closed up before baking → dough was too warm or over-proofed; chill it first.
- Dough dragged and tore → blade was dull or you hesitated; use one swift stroke.
Results vary with your flour, kitchen temperature, and proof, so treat the first few loaves as practice rather than a guaranteed look.
Common Scoring Mistakes and Quick Fixes
Most scoring problems trace back to four causes. Match your symptom below, then apply the fix.
Your blade drags or tears the dough instead of slicing. The blade isn't sharp enough, or the dough is too warm and sticky. Use a fresh razor or lame (the handled razor tool for scoring), and chill your shaped loaf in the fridge for 30–60 minutes before scoring. Cold dough is firmer and cuts cleanly.
No "ear" forms (the raised, crispy lip along your main cut). Your blade angle is too shallow or your cut is too deep. Hold the blade at about a 30–45° angle to the surface and keep the main slash shallow—around 1/4 inch (0.5 cm). A shallow, angled cut lets steam lift that flap into an ear.
The loaf bursts open on the side or bottom. Your scores are too shallow or too few, so the expanding dough escapes wherever it can. Add one confident main cut about 1/2 inch (1 cm) deep to give the rising gas a clear exit.
The dough deflates as you score. Usually overproofing (dough fermented too long, so it's weak and slack) or a dull blade snagging the surface. Try scoring a touch earlier in your timing, and always use a sharp blade.
Results vary by kitchen and climate, so adjust as you go.
Quick Pre-Bake Scoring Checklist
Run through this 30-second checklist right before your dough goes into the oven. Save or pin it so it's handy on bake day.
- Dough is cold from the fridge. A chilled, firm dough (straight from a cold proof in the refrigerator) holds its shape and lets the blade glide instead of dragging.
- Blade is sharp and clean. Use a fresh razor or a sharp lame (the handled scoring tool). Wipe off any old dough so the cut stays crisp and doesn't tear.
- Decide your pattern and angle first. Pick your design and your blade angle—about 30° for an "ear," 90° straight down for simple lines—before you touch the dough. Hesitation causes drag marks.
- Score fast and confidently, then bake immediately. One smooth, committed motion per cut. Get the loaf into the hot oven right away so the cuts open well.
Results vary by kitchen and climate, so treat your first few loaves as practice—each bake teaches you something.
FAQ
What can I use to score sourdough if I don't have a lame?
A lame is just a handle holding a razor blade, so any sharp, thin blade works. Best alternatives: a clean double-edged razor blade held with your fingers (or pushed onto a wooden skewer or chopstick), a utility/craft knife, or a very sharp paring knife. The blade must be thin and razor-sharp so it slices cleanly without dragging the dough. Serrated bread knives and dull knives tear the surface and ruin the cut, so avoid them. For your first loaf, a fresh razor blade gives the cleanest result.
How deep should I score sourdough bread?
For a main expansion cut, score about 1/4 to 1/2 inch deep (roughly 5–12 mm), holding the blade at a shallow 30–45 degree angle to the dough surface. A shallow angled cut creates an 'ear' (the raised flap of crust). Decorative cuts can be shallower, about 1/8 inch. Too shallow and the loaf bursts at random weak spots; too deep and it can deflate. If you're unsure, start at about 1/4 inch deep at an angle and adjust on your next bake.
Should I score sourdough cold or at room temperature?
Score it cold, straight from the fridge. A cold dough (after an overnight cold proof, meaning a slow final rise in the refrigerator) is firmer and less sticky, so the blade glides through cleanly and holds its shape instead of dragging or collapsing. Take the dough from the fridge, tip it onto parchment, score immediately, then load it into your hot Dutch oven. Room-temperature dough is softer and far more likely to snag, smear, or deflate when you cut it.
Why doesn't my sourdough get an ear?
An ear is the crisp raised flap along your main score. The most common reasons it doesn't form: 1) the cut is too vertical, so hold the blade at a shallow 30–45 degree angle to create a flap; 2) the cut is too shallow, aim for about 1/4–1/2 inch deep; 3) weak oven spring, which is the rapid rise in the first 10 minutes, usually caused by under-proofing or not enough steam, so bake covered in a Dutch oven for the first 20 minutes; 4) low surface tension, so shape the loaf more tightly before its final rise. Results vary by flour, kitchen temperature, and oven, so expect to fine-tune over a few bakes.
Do I score sourdough before or after the final proof?
Score after the final proof, right before the loaf goes into the oven. The final proof (also called proofing, the last rise after shaping) is when the dough builds the gas it needs to expand. Scoring at the very last moment gives the dough a clean, controlled place to open up as it springs in the oven. If you cut earlier, the score closes back up as the dough continues to rise, so you lose the controlled expansion and the ear.
See also
- How to Tell When Sourdough Is Fully Proofed
- Beginner Sourdough Bread Recipe (Step by Step)
- Why Is My Sourdough Flat or Dense? Troubleshooting Guide
- Essential Sourdough Baking Tools for Beginners
Related articles
Flour Types for Sourdough: A Visual Guide to Protein Content and Results
How do different flours affect sourdough bread, and what do the results look like side by side?
Jul 20, 2026 · 11 min read
The Only 5 Tools You Really Need for Your First Sourdough Loaf
Start baking sourdough without the clutter and expense. These are the only 5 tools you really need—and the ones you can skip.
Jul 20, 2026 · 3 min read
Dutch Oven vs. Open Bake: Which Sourdough Method Is Best for Beginners?
Dutch oven or open baking with steam for sourdough? Compare ease, cost, and crust so beginners can pick the right method and bake a great loaf.
Jul 14, 2026 · 4 min read