How Long Does It Really Take to Bake Your First Sourdough?
What is the realistic time commitment for a sourdough loaf?
On this page
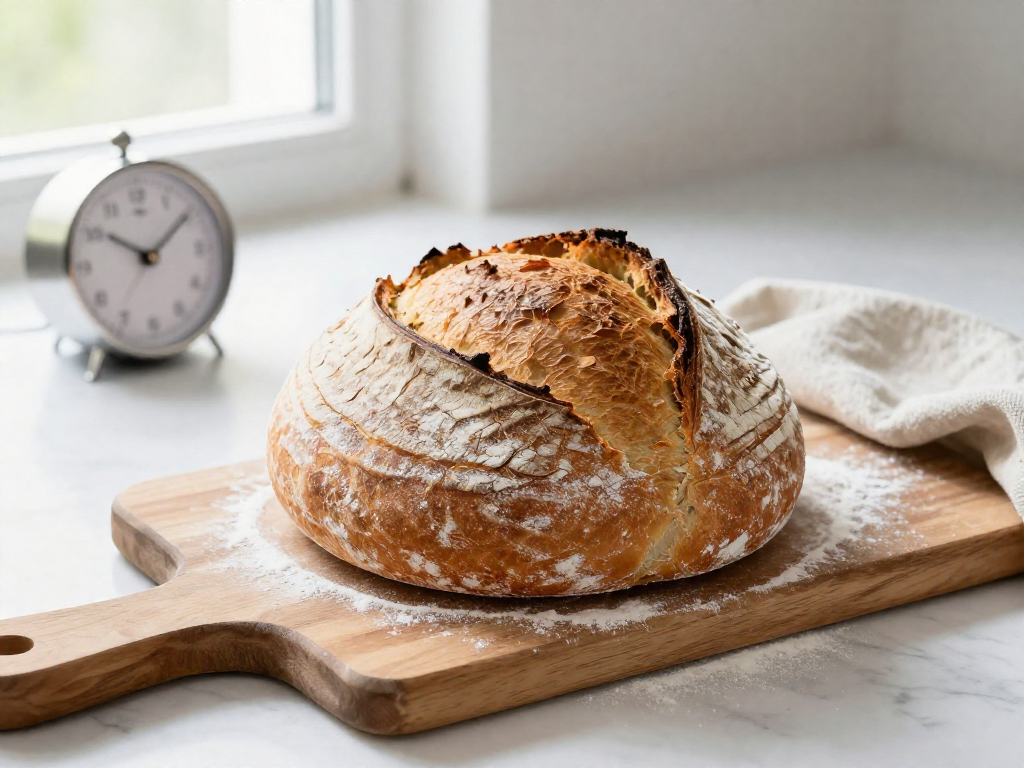
Open by naming the fear: most beginners assume sourdough means being chained to the kitchen all day. Reframe immediately with the key truth—most of the "time" is passive waiting, and the hands-on work adds up to less than 30 minutes. Promise a clear hour-by-hour breakdown so the reader can fit a loaf into a real life and a real weekend.
The Short Answer: Active vs. Passive Time
Here's the honest answer most recipes bury: your first sourdough loaf takes about 24–36 hours from start to finish, but you'll only spend 20–30 minutes actually doing anything. The rest is waiting while the dough does its work.
That gap is the whole secret. Sourdough is slow because of fermentation — the process where wild yeast and bacteria in your starter eat the flour's sugars, producing the gas and flavor that make bread rise and taste tangy. That happens on its own clock, not yours.
The key mental shift: sourdough needs your attention, not your presence. You're not standing at the counter for 30 hours. You set a timer, do a quick task, and walk away.
Here's how those minutes and hours break down by stage:
| Stage | Active minutes | Clock hours (passive) |
|---|---|---|
| Feed the starter | 2 min | 6–12 hrs (until bubbly) |
| Mix dough | 5 min | — |
| Bulk ferment* | 5–10 min (occasional folds) | 4–8 hrs |
| Shape the loaf | 5 min | — |
| Cold proof in fridge | 2 min | 12–16 hrs |
| Bake | 2 min | ~1 hr |
| Cool before slicing | — | 1–2 hrs |
* Bulk ferment = the first long rise, when the whole batch of dough ferments together before shaping.
Exact times shift with your kitchen's temperature and your starter's strength, so treat these as a starting range, not a guarantee. We'll walk through each stage with weights, timing, and what to look for next.
Stage-by-Stage Time Breakdown

Here's exactly where the hours go. Most of it is hands-off waiting (called passive time), not active work. Across a typical loaf you'll spend roughly 45 minutes actually doing things and 18–36 hours waiting, mostly while you sleep or go about your day.
1. Feeding (refreshing) the starter
Active: ~5 min | Passive: 4–12 hrs "Feeding" means mixing your starter with fresh flour and water so the wild yeast wakes up. Combine 50 g starter, 50 g flour, and 50 g water. Then wait until it's doubled in size, domed on top, and full of bubbles. Cue: drop a small spoonful in water—if it floats, it's ready. Timing varies hugely with kitchen temperature: 4 hours in a warm room, up to 12 in a cold one.
2. Mixing and autolyse
Active: ~10 min | Passive: 30 min–1 hr Mix your flour and water and let it sit before adding starter and salt. This rest is the autolyse—it lets the flour fully absorb water, which makes the dough easier to work and improves structure. Cue: the dough goes from shaggy and rough to smoother and slightly stretchy.
3. Bulk fermentation with stretch-and-folds
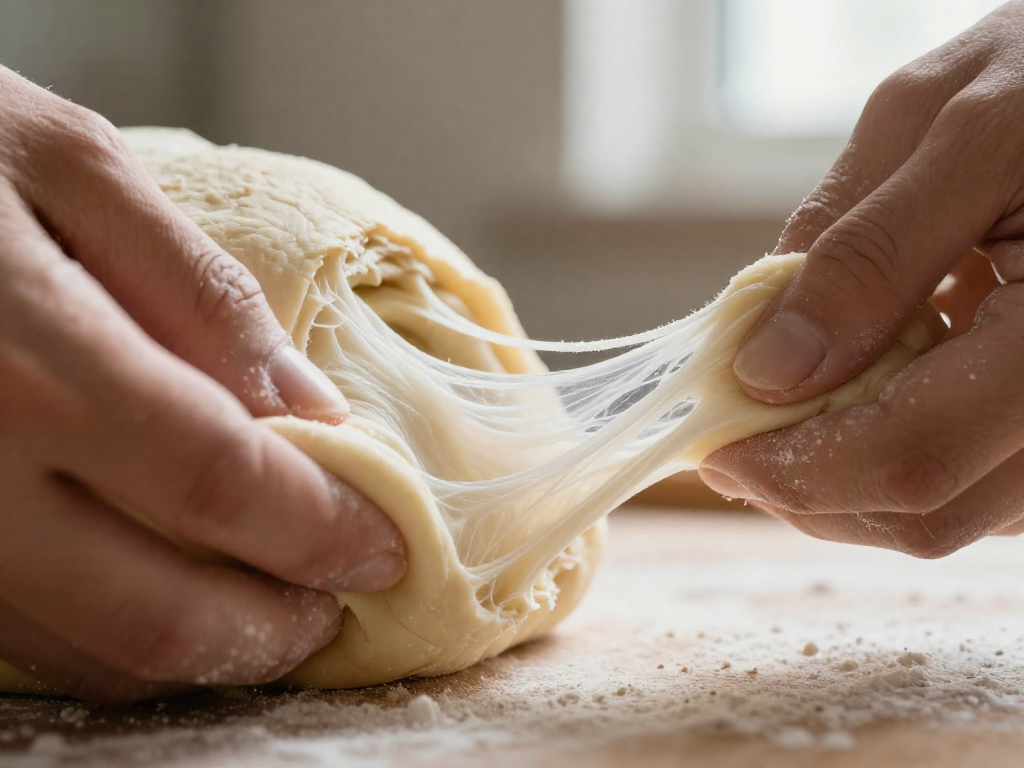
Active: ~15 min total | Passive: 4–6 hrs Bulk fermentation (or "bulk ferment") is the main rise, when the dough develops flavor and gas. Every 30–45 minutes for the first 2 hours, do a stretch-and-fold: grab one side of the dough, stretch it up, and fold it over the center; repeat on all four sides. That's the only active part. Cue: dough has risen 50–75%, looks puffy, and jiggles when you shake the bowl.
4. Shaping and bench rest
Active: ~10 min | Passive: 20–30 min Shape the dough into a tight round, then let it rest on the counter (the "bench rest") so it relaxes before the final shape. Cue: the surface holds a smooth, taut skin without tearing.
5. Cold proof in the fridge
Active: ~2 min | Passive: 8–16 hrs Place the shaped dough in the fridge overnight. This slow, cold final rise deepens flavor and makes scoring easier. Cue: dough feels firm and cold; a gentle poke springs back slowly.
6. Baking
Active: ~5 min | Passive: 45–50 min Bake covered in a hot Dutch oven for ~25 min, then uncovered for ~20–25 min. Cue: deep golden-brown crust and an internal temperature of 205–210°F (96–99°C).
7. Cooling
Active: 0 min | Passive: 1–2 hrs This is the hardest wait. The inside is still cooking as it cools—cutting early traps steam and leaves a gummy texture. Let it cool fully on a wire rack before slicing.
Results vary by flour, kitchen temperature, and starter strength, so treat these ranges as a guide, not a guarantee.
What Actually Affects Your Timing
Your sourdough timeline isn't fixed—it shifts with a handful of variables. Here's what to watch, ranked by how much it matters:
1. Kitchen temperature (the big one). Sourdough is alive, and warmth wakes it up. At a cozy 78°F (26°C), bulk ferment—the first long rise where the dough develops flavor and structure—might finish in about 4–5 hours. In a cool 65°F (18°C) kitchen, that same dough can take 8 hours or more. This single factor explains why two bakers using the identical recipe get wildly different times.
2. Starter strength. Your starter is the jar of fermented flour and water that makes the dough rise. A starter fed 4–6 hours ago, bubbly and doubled in size, lifts dough quickly. A sluggish or recently neglected starter drags everything out. Use it near its peak.
3. Hydration and flour type. Hydration is the ratio of water to flour by weight—a 75% hydration dough has 375g water per 500g flour. Wetter doughs ferment a touch faster and feel stickier. Whole wheat and rye speed things up because they carry more wild yeast and nutrients; plain white bread flour is slower and more forgiving.
4. The recipe and how far you let it rise. Some recipes push a fuller, airier rise; others stop earlier for a tighter crumb. More rise means more waiting.
Why the same recipe swings from 4 to 8 hours: stack a warm kitchen, a peak-active starter, and a little whole wheat, and you're at the fast end. Stack a cold room, a tired starter, and all-white flour, and you're at the slow end.
Beginner tip: Watch the dough, not the clock. Aim for a 50% rise with a few bubbles on the surface—your kitchen decides the time.
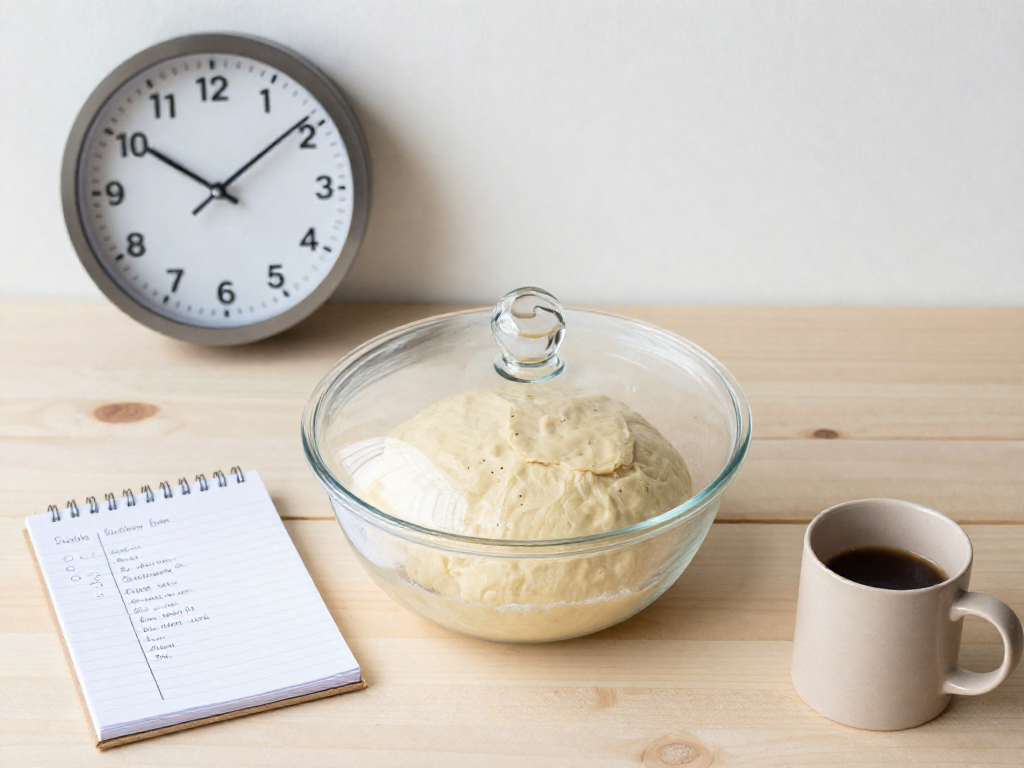
Realistic Schedules That Fit a Normal Life
You don't have to babysit dough all day. Most of the time is passive (the dough works on its own), so you only need a few short, hands-on moments. Here are three tested schedules—pick the one that matches your week.
1. The Overnight Schedule (mix at night, bake in the morning)
Best if your evenings are free and you want fresh bread for breakfast.
- 8:00 PM – Mix flour, water, salt, and starter. Let it rest (this rest is the autolyse + bulk ferment, the long rise where the dough develops flavor and air).
- 8:00 PM–11:00 PM – Do 3–4 quick "stretch and folds" (lift one side of the dough, fold it over) about 30 minutes apart. Each takes under a minute.
- 11:00 PM – Shape the loaf, place in a bowl, cover, and refrigerate overnight (this cold rest is the cold proof).
- 7:00 AM – Preheat oven, then bake straight from the fridge.
2. The Weekend Daytime Schedule
- Friday 9:00 PM – Feed your starter so it's bubbly and active by morning.
- Saturday 9:00 AM – Mix dough.
- 9:00 AM–1:00 PM – Bulk ferment with stretch and folds; dough should grow ~50% and look puffy.
- 1:00 PM – Shape, then cold proof in the fridge.
- 5:00 PM (or later) – Bake.
3. The Two-Day Fridge Schedule (maximum flexibility)
This is the secret to baking on your timeline. After shaping, the cold proof can stretch from 8 to 36 hours. The fridge slows fermentation almost to a stop, so a shaped loaf will happily wait. Mix Saturday, bake Sunday afternoon, or even Monday after work—whenever you're ready, just preheat and bake.
Sensory cue: A loaf ready to bake springs back slowly when poked, leaving a shallow dent. If it springs back instantly, give it more time; if the dent stays flat, bake now.
Results vary by kitchen temperature—warmer rooms speed things up, cooler rooms slow them down.
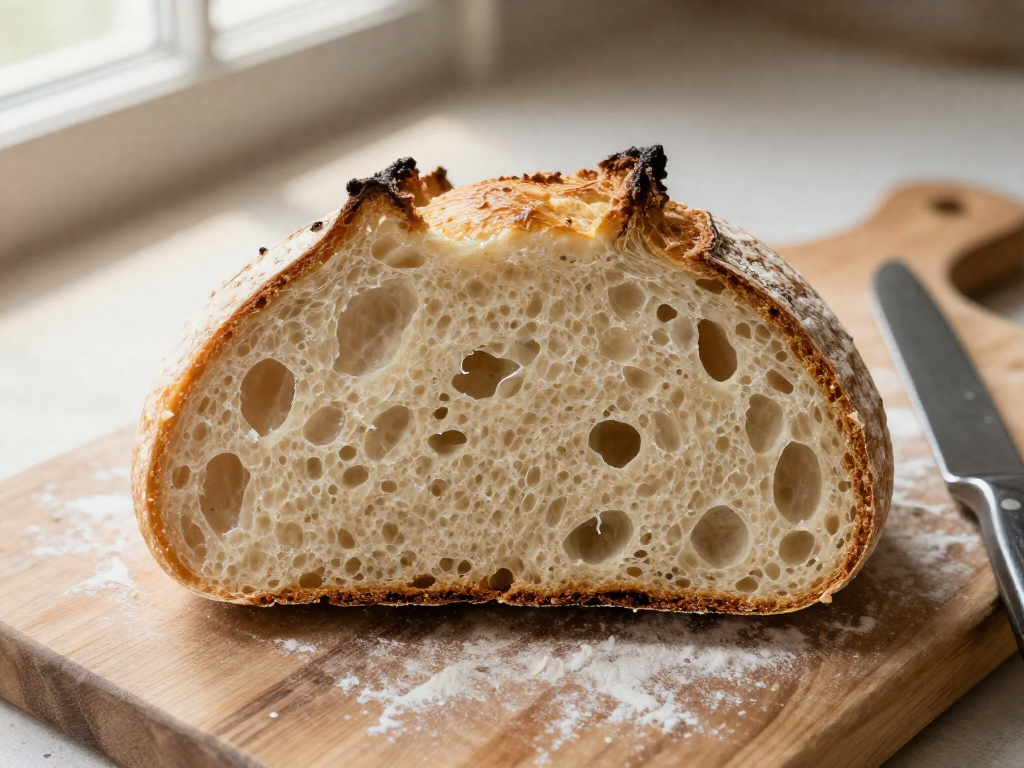
Why Rushing Causes Dense, Gummy Loaves
Most beginner sourdough failures trace back to one thing: cutting time short at the wrong stage. Here's exactly where rushing bites you.
You ended bulk ferment too early. Bulk ferment is the first long rise, after mixing, when the whole batch of dough sits and the wild yeast builds gas. If you stop it before the dough has risen 50–75% and feels jiggly and domed, the loaf is underproofed—it goes into the oven without enough trapped gas, so it bakes up dense and flat. Look for a puffy, bubbly surface and a dough that wobbles when you nudge the bowl.
You sliced it while still warm. A sourdough loaf keeps cooking inside as it cools. Cut it before it's fully cool (about 1–2 hours, until the bottom feels room-temperature) and the center stays gummy and pasty—it never finished setting.
Your starter was tired. Starter is the living mix of flour and water that leavens the bread. A sluggish, recently-fed-but-not-peaked starter has weak yeast activity, so every rise drags and the final loaf barely springs. Use it when it has doubled and looks bubbly and domed, usually 4–8 hours after feeding (timing varies by your kitchen's temperature).
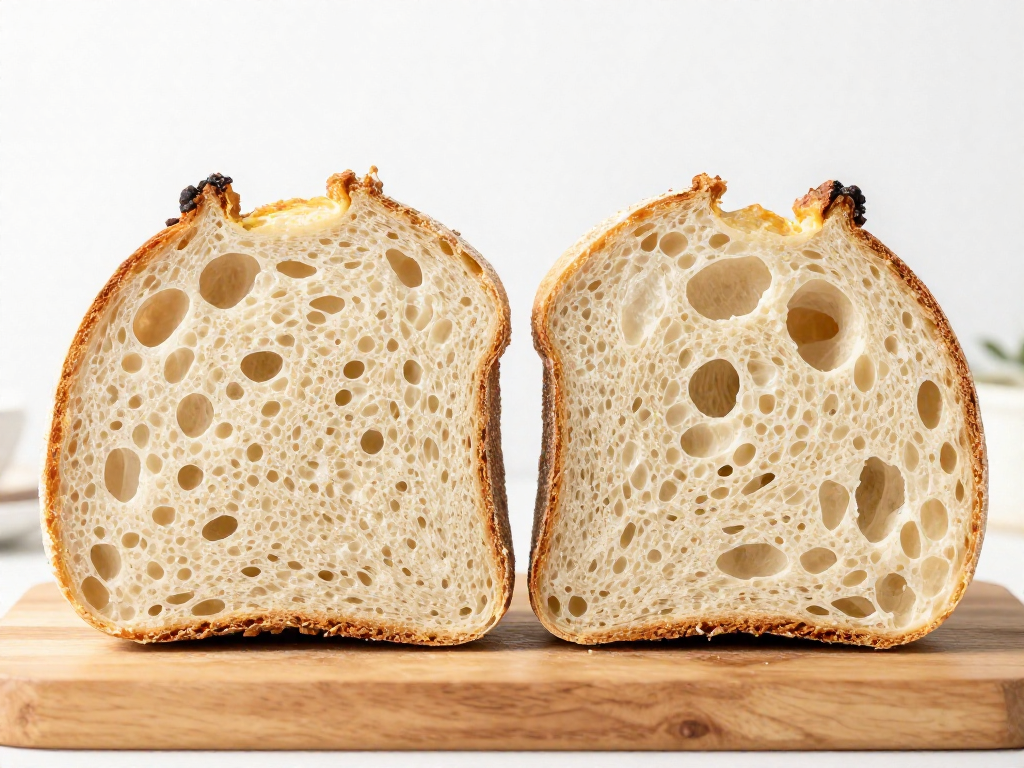
The patience payoff: giving each stage its full time develops deeper, tangier flavor and the open, airy crumb beginners are chasing.
Tips to Make Sourdough Feel Faster
Most sourdough time is passive—the dough works while you don't. These habits shrink the hands-on minutes and let you ignore the dough in between.
- Store starter in the fridge. A starter is the living mix of flour and water that makes your bread rise. Keep it cold and feed it (stir in fresh flour and water) just once, the day before you bake, instead of daily.
- Prep the night before. Weigh out flour, water, and salt and set out your bowl, scale, and Dutch oven. Morning you only has to mix.
- Control speed with a proofing spot. Proofing is the rest where dough rises. An oven with just the light on (around 24–27°C / 75–80°F) speeds it up; the counter slows it down. Pick one to fit your day.
- Set phone timers for every stage. Then walk away. You don't have to watch the dough—the timer brings you back for a 2-minute task.
- Use the fridge to decouple from your schedule. A shaped loaf can rest cold overnight (8–14 hours) and bake when you're ready, not when the dough demands.
Results vary by kitchen and climate, so treat times as starting points, not guarantees.
See also
- How to make and maintain a sourdough starter
- Beginner sourdough bread recipe step by step
- Sourdough troubleshooting: why is my loaf dense?
- Understanding bulk fermentation for beginners
- What hydration means in sourdough baking
Related articles
Sourdough Lingo You Don’t Need: Simple Words Instead of ‘Autolyse’ and ‘Crumb’
Why do sourdough bakers use so much jargon, and what simple substitutions can I use?
Jul 20, 2026 · 4 min read
The Beginner’s Guide to Sourdough Gluten Development: Why Stretch and Folds Work
How does gluten development work in sourdough, and why are stretch and folds so effective for beginners?
Jul 20, 2026 · 9 min read
The Complete Beginner's Guide to Sourdough (Start Here)
New to sourdough and tired of dense, gummy loaves? This complete beginner's guide shows you exactly where to start—from starter to your first bakeable loaf.
Jun 29, 2026 · 16 min read