Essential Sourdough Tools for Beginners (and What to Skip)
What tools do I actually need to start sourdough?
On this page
Lead with reassurance: you can bake a great first loaf with a handful of things you likely already own. Frame the article as cutting through the overwhelming "you need 20 tools" advice by splitting everything into three honest buckets — must-have, nice-to-have, and skip — so a nervous beginner can start this weekend without dropping $200.
The Truth: You Need Less Than You Think
Here's the short answer: you can bake your first sourdough loaf with the bowls, spoons, and oven you already own, plus one or two cheap additions (usually a $15 kitchen scale and a $2 plastic dough scraper). That's it.
Those photogenic "sourdough starter kits" you see online—bannetons, lame holders, branded jars, fancy proofing boxes—are mostly upsells, not requirements. None of them will save a loaf, and skipping them won't ruin one.
To keep this simple, every tool in this article falls into one of three buckets:
- Must-have — you genuinely can't bake without it (or a free substitute).
- Nice-to-have — makes life easier or more consistent, buy it later.
- Skip — money better spent on flour.
So if you're feeling intimidated, let that go now. Good bread comes from technique—how you mix, fold, and time your dough—far more than from gadgets. Master a few cheap basics and you'll out-bake someone with a $300 setup. Let's sort out exactly what to grab first.
Must-Have Tools to Bake Your First Loaf
Here's the short list. You can bake a great first loaf with these six items and nothing else.
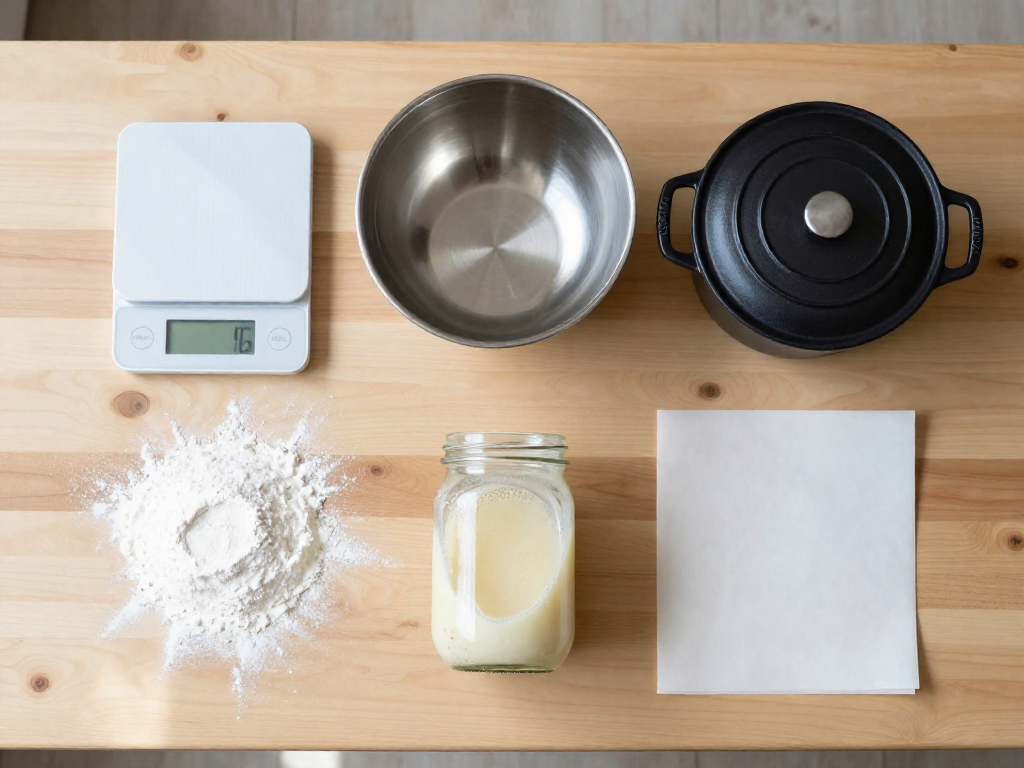
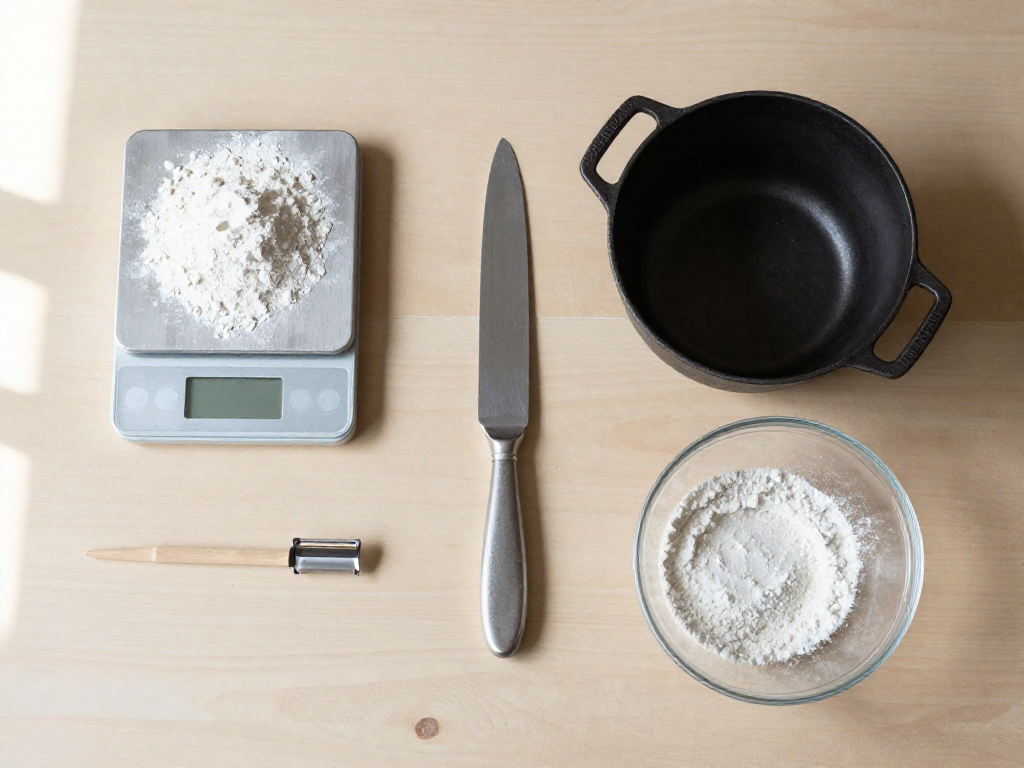
1. A digital kitchen scale (grams)
This is the one tool you cannot skip. Sourdough is measured by weight, not by the cup, because flour packs differently every time you scoop it — one "cup" can vary by 30+ grams, which throws off your hydration (the ratio of water to flour in your dough, written as a percentage). A 70% hydration dough means 700g water for every 1000g flour. Cups make that math unreliable and lead to dough that's too wet or too dry.
- Budget option: Any scale that reads in 1-gram increments and has a "tare" button (to zero out the bowl's weight). Around $12–15.
2. A large mixing bowl
You'll mix your dough here and let it rise during bulk fermentation (the first long rise, when the whole batch of dough ferments and develops flavor and air). Pick a bowl big enough for the dough to roughly double without overflowing.
- Budget option: A bowl you already own. Glass or stainless steel both work fine.
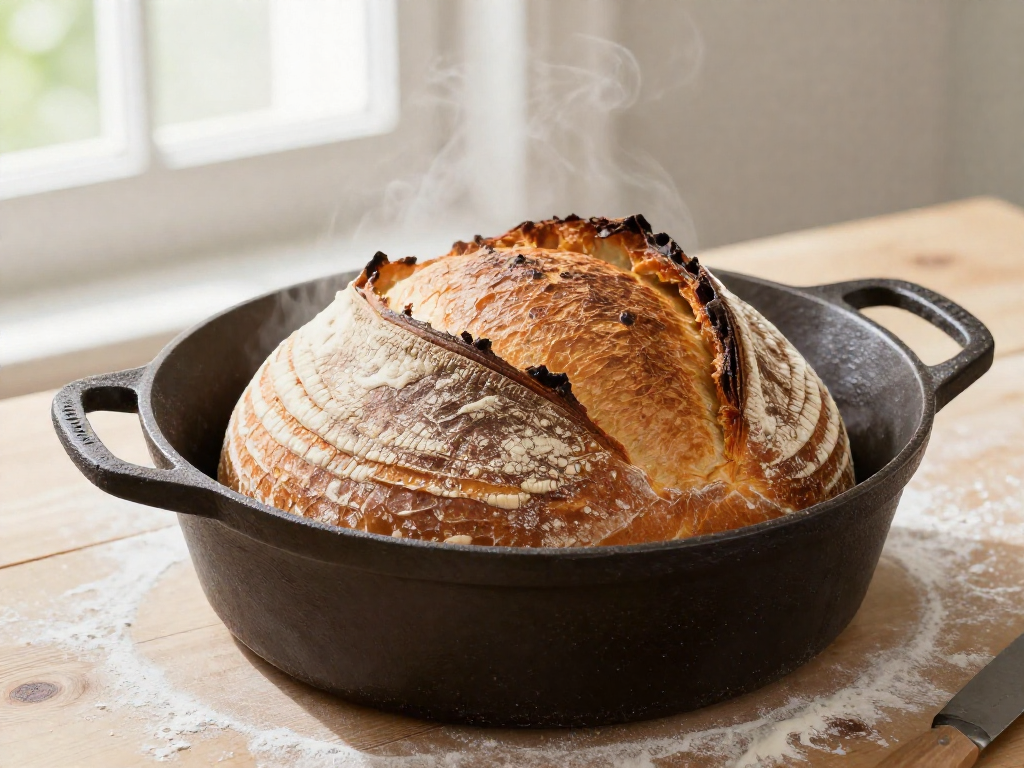
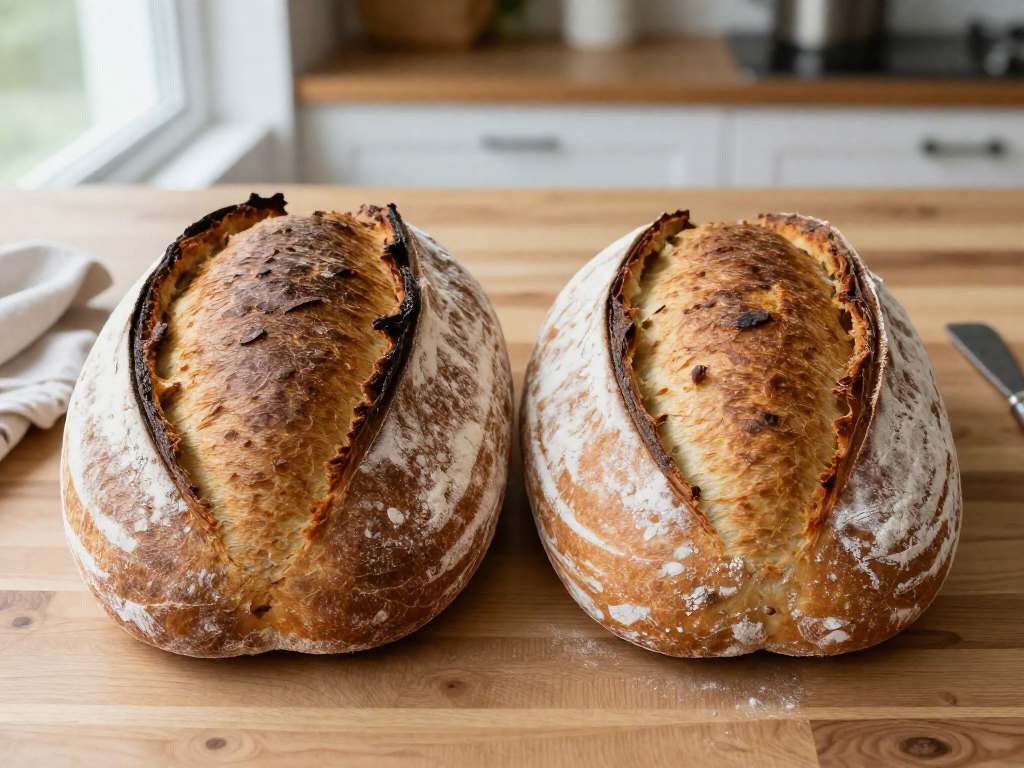
3. A Dutch oven or heavy lidded pot
This is the single biggest crust upgrade you can make. The lid traps steam from the dough during the first part of baking, which keeps the surface soft so the loaf can expand fully, then crisps into a deep, crackly crust once you remove it. No fancy steam setup required.
- Budget option: Any oven-safe pot with a tight lid rated to at least 450°F (230°C). An enameled cast-iron pot is ideal but not required. $30–40 for a basic one.
4. Parchment paper
Lining your pot with parchment lets you lower the dough in without burning your hands and lift the baked loaf straight out — no sticking, no struggle.
- Budget option: Standard grocery-store parchment. Skip pre-cut sheets to save money.
5. A jar for your starter
Your starter (the live mix of flour and water that makes your bread rise instead of commercial yeast) just needs a clean home where you can see it grow.
- Budget option: A clean glass jar from your recycling bin. A wide mouth makes stirring and feeding easier. Leave the lid loose so gas can escape.
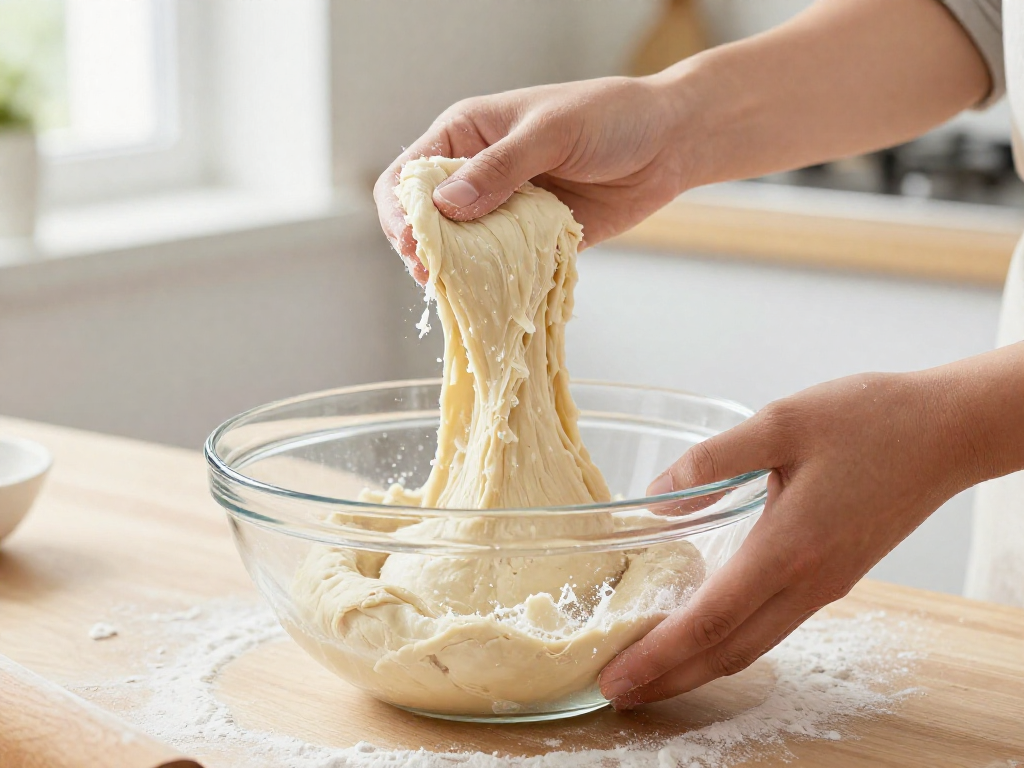
6. Your hands and a bench knife (or sturdy spatula)
Your hands are your best dough tool for mixing and shaping. A bench knife (a flat rectangular metal scraper) helps you divide dough and shape the loaf cleanly, but a sturdy spatula does the job at first.
- Budget option: A flexible plastic dough scraper for a few dollars, or just use a spatula you own.
What it all costs
If you buy everything new, the full must-have list runs roughly $60–90, and most of that is the Dutch oven and scale. If you already own a bowl, a jar, and a spatula, you can start for around $25–55. You do not need anything else to bake your first loaf.
Nice-to-Have Tools That Make Life Easier
Once you're hooked and baking regularly, these upgrades make handling dough easier and your loaves more consistent. None are required for your first loaf—buy them one at a time as you feel the need.
-
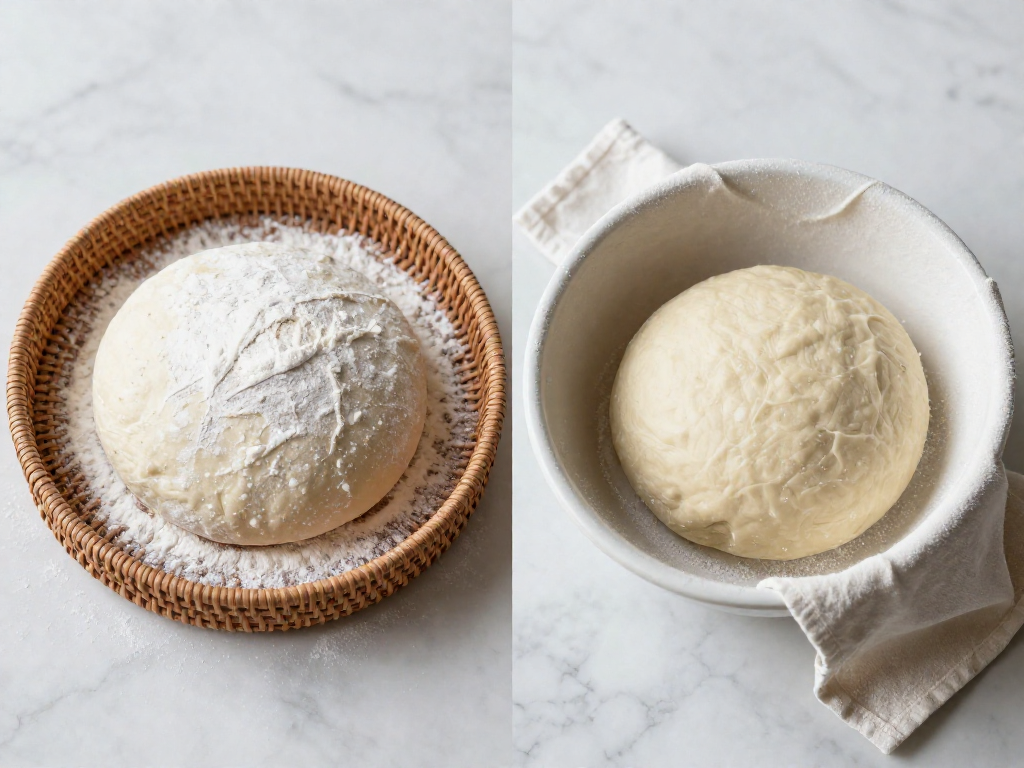
Banneton (proofing basket) — A round or oval basket that holds your shaped dough during its final rise and leaves a pretty spiral pattern. Skip-it version: a mixing bowl lined with a clean, well-floured tea towel works almost as well. Buy the banneton once you're tired of dough sticking to the towel.
-
Bread lame — A handle holding a razor blade, used for scoring (slashing the top of the dough just before baking so it expands in a controlled way instead of bursting). Skip-it version: a fresh, sharp razor blade or a thin paring knife. The lame mainly gives you a better grip and cleaner cuts.
-
Dough scrapers (bench + bowl) — The single best cheap upgrade. A stiff bench scraper (a flat metal blade) lifts and shapes sticky dough on the counter; a flexible bowl scraper (a curved plastic card) cleans dough out of the bowl. Together they save you from gluing dough to your hands.
-
Instant-read or probe thermometer — Lets you check dough temperature (warmer dough ferments faster, cooler dough slower), which makes your timing far more predictable across seasons. Aim for a dough around 24–26°C (75–78°F). It also confirms a baked loaf is done at about 96°C (205°F) internal.
-
Linen couche and tea towels — A couche is a heavy linen cloth used to cradle and separate shaped loaves (especially baguettes) while they rise. For beginner round loaves, plain cotton tea towels are plenty.
-
Wire cooling rack — Lets air circulate under the loaf as it cools, so steam escapes instead of condensing into a damp, gummy bottom crust. Skip-it version: rest the loaf on its side, but a rack is cheap and worth it.
Buy-when-you-need-it order: dough scrapers → cooling rack → thermometer → banneton → lame → couche.
Results vary by kitchen and climate—use these tools as aids, not guarantees.
Tools You Can Safely Skip (at Least for Now)
Save your money. None of the gadgets below will make your first loaves better, and most have a free or cheap substitute you probably already own. Here's what to skip and what to use instead.
-
Stand mixer. Beginner sourdough relies on stretch-and-fold (gently lifting and folding the dough every 30 minutes during the first few hours) and no-knead methods that build strength without machinery. A mixer can even over-work wet dough.
- Use instead: your hands and a large bowl. Free.
-
Proofing box. These heated boxes hold dough at a steady warm temperature, but you don't need a dedicated one to start.
- Use instead: your oven with the light on (and the door shut), or the microwave with a mug of just-boiled water beside the bowl. Aim for roughly 24–27°C (75–80°F).
-
"Sourdough kits" and bread-specific scales. Bundled kits mark up basic items, and a baking-only scale does nothing a normal one can't.
- Use instead: any digital kitchen scale that reads in 1-gram steps. Around $12.
-
Grain mill, baking stone, and decorative stencils. Milling your own flour is an advanced hobby, and a Dutch oven traps steam better than a stone, giving a better rise and crust. Stencils are pure decoration.
- Use instead: store-bought flour, a Dutch oven (or any heavy lidded pot), and a sharp knife for scoring. Skip the stencils entirely.
-
pH meters and other advanced measuring tools. Tracking dough acidity with a pH meter is for experimenters chasing fine-tuned flavor, not for baking a solid first loaf.
- Use instead: your eyes and nose. A ready starter doubles in size and smells tangy but pleasant; ready dough looks puffy and jiggly.
Buy these later only if baking becomes a regular habit. For now, the cheaper substitutes give the same results while you learn.
Smart Substitutes Using What's Already in Your Kitchen
You don't need to buy anything to bake your first loaf this weekend. Here are five swaps using gear you probably already own.
-
Banneton → bowl + floured tea towel. A banneton is just a basket that holds the dough's shape during its final rise (called proofing). Line any medium bowl with a clean tea towel, rub it generously with flour (a 50/50 mix of regular and rice flour resists sticking best), and let the shaped dough rest seam-side up inside.
-
Lame → sharp knife or razor blade. A lame is the handled blade used to score (slash) the top of the loaf so it expands cleanly in the oven. A new utility razor blade or your sharpest paring knife cuts a clean, shallow slash about 1/4 inch (0.5 cm) deep. Make one confident stroke.
-
Branded Dutch oven → any heavy oven-safe pot with a lid. The pot traps steam, which gives you a crisp crust and good oven spring (the final rise as the loaf hits the heat). Any cast-iron, enameled, or thick stainless pot with an oven-safe lid works. Check the lid knob is rated to 450°F (230°C); if not, remove it and cover with foil.
-
Proofer → oven-light trick. A proofer keeps dough warm. Instead, place the dough in your turned-off oven with only the interior light on. This holds a gentle 75–80°F (24–27°C), ideal for rising.
-
Dough whisk → spatula or sturdy spoon. For mixing flour, water, and starter, a silicone spatula or wooden spoon works fine. Just mix until no dry flour remains.
A Simple Buying Order: Start Here, Upgrade Later
You don't need everything at once. Buy in this order, and stop whenever your loaves are good enough for you—each step is optional.
Step 1 — Buy first (biggest impact):
- Digital kitchen scale (grams). Sourdough lives or dies by accurate weights; cups are too inconsistent.
- Dutch oven (heavy lidded pot). It traps steam for a tall rise and crisp crust—no fancy oven setup needed.
Step 2 — Add once you bake regularly:
- Bench scraper for handling sticky dough and dividing it cleanly.
- Banneton (a proofing basket that supports the dough as it rises). A bowl lined with a floured towel works until you're ready.
Step 3 — Add when chasing consistency:
- Lame (a handled razor for scoring the top so the loaf expands evenly). A sharp paring knife covers you for now.
- Instant-read thermometer to check dough and water temperature, which affects how fast your dough ferments.
Treat each step as a small, no-pressure upgrade. Results vary by kitchen and climate, so add tools only as your needs grow.
See also
- Beginner sourdough starter guide: how to make and feed your starter
- Easy beginner sourdough bread recipe (step-by-step)
- Sourdough troubleshooting: why is my loaf dense, flat, or gummy?
- Understanding sourdough hydration for beginners
- How to score sourdough bread for beginners
Related articles
Flour Types for Sourdough: A Visual Guide to Protein Content and Results
How do different flours affect sourdough bread, and what do the results look like side by side?
Jul 20, 2026 · 11 min read
The Only 5 Tools You Really Need for Your First Sourdough Loaf
Start baking sourdough without the clutter and expense. These are the only 5 tools you really need—and the ones you can skip.
Jul 20, 2026 · 3 min read
Dutch Oven vs. Open Bake: Which Sourdough Method Is Best for Beginners?
Dutch oven or open baking with steam for sourdough? Compare ease, cost, and crust so beginners can pick the right method and bake a great loaf.
Jul 14, 2026 · 4 min read