Do You Really Need a Banneton? Cheap Proofing Basket Alternatives
Do I need a banneton or can I use something else?
On this page
The Short Answer: No, You Don't Need One
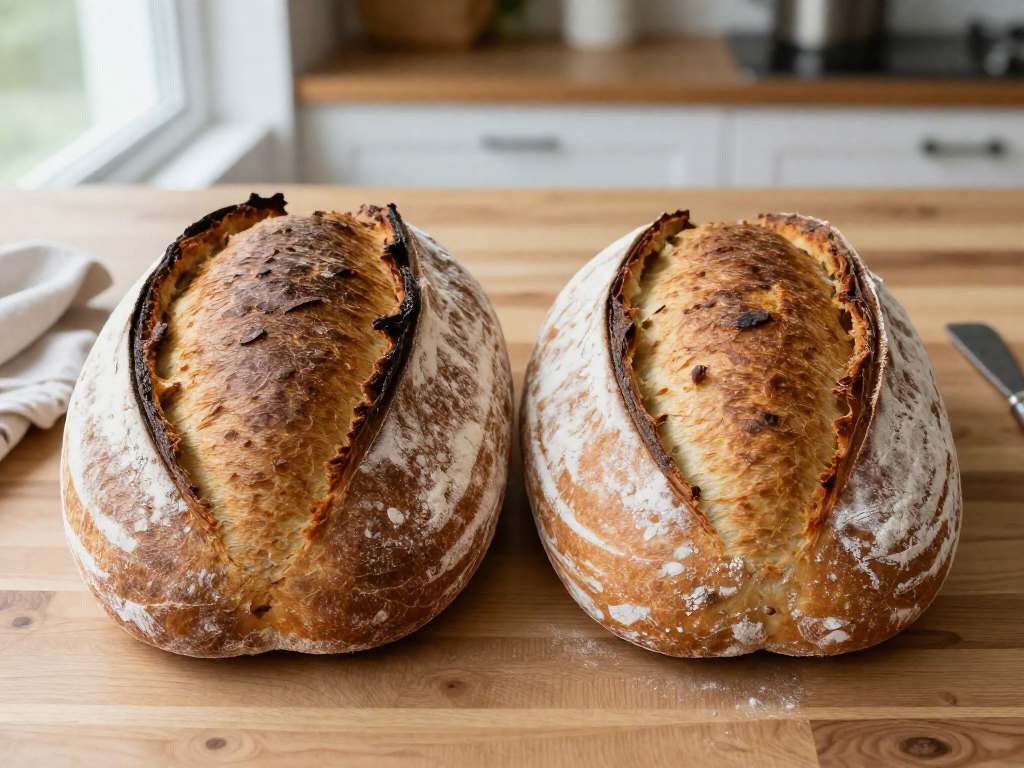
No, you don't need a banneton to bake great sourdough. A banneton (that round or oval cane basket you've seen in photos) is convenient, not required. It simply holds your shaped dough while it does its final rise, helping it keep a tall, round shape and leaving those pretty spiral rings on the crust.
But here's the part that matters most: your loaf's quality comes from technique, not gear. A good rise, an open crumb, and a crackly crust come from a healthy starter, proper shaping, and good timing—none of which live inside a basket. Plenty of beginners bake beautiful loaves using a mixing bowl and a kitchen towel they already own.
So before you spend money, let's cover two things: exactly what a banneton does for your dough, and the cheap, tested substitutes that do the same job. By the end, you'll know which option fits your kitchen.
What a Banneton Actually Does
A banneton (a proofing basket, usually made of cane or pulp) does three jobs during the final proof—the last rise your shaped dough takes before it goes in the oven. Only two of those jobs actually affect how your loaf turns out.
The two that matter:
- It holds the dough's shape. Wet, beginner-friendly doughs are slack and want to spread into a puddle. A snug basket supports the sides so the dough rises up instead of out, giving you a taller, rounder loaf.
- It wicks moisture from the surface. As the dough rests, the basket pulls a little water from the outer skin. That slightly drier surface is easier to score (slash with a blade) and bakes into a crisp, crackly crust.
The one that doesn't:
- It leaves a spiral or ridge pattern. Those flour-dusted rings are purely cosmetic. They look great in photos but have zero effect on flavor, texture, or rise.
Bottom line for choosing an alternative: any substitute needs to (1) cradle the dough so it can't flatten and (2) let the surface breathe or sit against something that absorbs moisture. The pretty pattern is optional. Keep these two functions in mind and almost anything in your kitchen becomes a candidate—which is exactly what the next section covers.
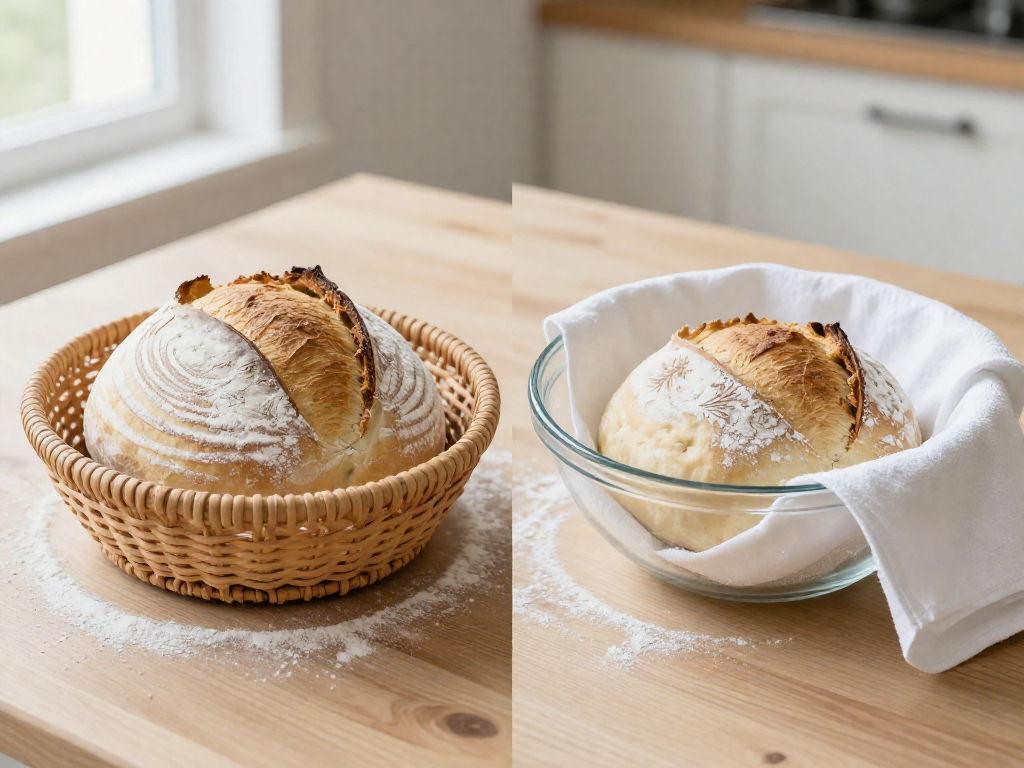
The Bowl-and-Towel Method (Best Free Alternative)
If you want to proof a loaf tonight without buying anything, this is the method to use. "Proofing" just means the final rise after you shape your dough, and a regular mixing bowl plus a towel does the same job as a banneton: it holds your dough in a round shape while it rises.
What you need
- A mixing bowl roughly the size of your finished loaf (a 1.5–2 quart / 1.5–2 liter bowl fits a standard 500g loaf well)
- A clean, smooth towel — a flour-sack towel or a flat-weave tea towel
- Rice flour for dusting (about 2–3 tablespoons / 25–35g)
Steps
- Line the bowl with the towel, pressing it down so it follows the bowl's shape with no big folds.
- Dust generously with rice flour. Rice flour doesn't absorb moisture the way regular wheat flour does, so it acts like a non-stick barrier. Cover the whole towel, especially the bottom. If you only have all-purpose flour, use it, but expect more sticking.
- Place your shaped dough seam-side up. The seam is the pinched-together bottom where you sealed the dough during shaping. It sits up now so it ends up on the bottom after you flip the loaf out to bake.
- Cover and proof. Drape another towel or a plastic bag over the top so the surface doesn't dry out.
Visual cue: the dough is ready when it looks puffy and springs back slowly after a gentle poke, leaving a small dent.
Skip terrycloth and fuzzy towels. Their loops grab the dough and tear the surface when you flip it out, leaving fibers stuck in the crust.
Results vary by kitchen temperature and your dough's hydration (how wet it is), so watch the dough, not just the clock.
Other Cheap Alternatives That Work
Beyond a bowl and towel, you probably already own something that works. Here are four tested options:
-
Colander + floured towel. Line any colander with a clean kitchen towel and dust it heavily with flour (or a 50/50 mix of flour and rice flour, which sticks less to wet dough). The holes let a little air reach the dough as it proofs—the rest period where shaped dough relaxes and rises before baking—so the surface firms up slightly. Good for round loaves (boules).
-
Plastic or glass container. For a sandwich-style or rectangular boule, proof the shaped dough seam-side up in a lightly oiled or floured container with a lid. Straight sides give you a neat, uniform shape and the lid stops the dough drying out.
-
Fabric-lined strainer or a clean baseball cap. For small loaves, any bowl-shaped object lined with a floured cloth will do. A clean cotton cap is surprisingly handy for single-serve rounds.
-
Bread loaf pan. The easiest option: skip shaping entirely. Tip your dough straight into a greased loaf pan, let it proof, and bake. The pan supports the dough, so you avoid flat, spreading loaves.
Quick troubleshooting: If dough sticks badly, you under-floured the cloth—use more next time, adding rice flour if needed. If the loaf spreads flat, your container was too wide; choose a snugger one to support the shape. Results vary with your flour and kitchen temperature, so adjust as you go.
When a Banneton Is Actually Worth Buying
You don't need a banneton (a proofing basket that holds your shaped dough as it rises), but there are a few cases where buying one pays off:
- You bake weekly. A dedicated basket means less improvising, more consistent results, and far less mess than flouring a towel-lined bowl every time.
- You want that look. Bannetons leave the classic spiral or cross-hatch ridges on the crust. It's purely decorative, but it's the reason many loaves look "bakery-made."
Cane vs. plastic pulp:
- Cane (rattan): Gives the prettiest ridged pattern, needs careful flouring early on to prevent sticking. Roughly $12–25.
- Plastic pulp: Easier to clean, more sticking-resistant, slightly less pronounced pattern. Roughly $10–18.
Budget tips:
- Check thrift stores and yard sales — wicker baskets often work fine lined with a floured cloth.
- Wait until you've had a few successful bakes before buying. There's no point investing in nicer gear until your dough is rising well.
Results vary by kitchen and climate, so treat a banneton as an upgrade, not a fix for a struggling starter.
Quick Tips to Stop Your Dough From Sticking
Sticking is the #1 reason DIY proofing baskets fail. Here's how to dodge it:
- Use rice flour, not wheat flour. Rice flour doesn't absorb water and stays gritty, so it acts like tiny ball bearings between dough and towel. Wheat flour turns into a sticky paste. Keep a small jar of white rice flour just for dusting.
- Flour the towel, not just the dough. Rub rice flour generously into the weave of a clean, lint-free tea towel before laying it in your bowl. This is your real non-stick layer.
- Don't over-flour the dough surface. A thick coat of flour on the dough itself gets sealed inside the loaf and leaves raw, pasty streaks. A light dusting on the seam side is enough.
- Shape tightly. A slack, loose dough spreads and grips the cloth. Build surface tension by pulling the dough taut into a tight ball or log so it holds its shape and releases cleanly.
Tip: if it still sticks, you under-floured the towel or your dough is very wet (high hydration—meaning lots of water relative to flour). Add a bit more rice flour next time.
See also
- Beginner sourdough starter guide
- How to shape a sourdough boule
- Why is my sourdough flat and dense? Troubleshooting
- Essential sourdough tools for beginners
- Rice flour vs. wheat flour for dusting
Related articles
Flour Types for Sourdough: A Visual Guide to Protein Content and Results
How do different flours affect sourdough bread, and what do the results look like side by side?
Jul 20, 2026 · 11 min read
The Only 5 Tools You Really Need for Your First Sourdough Loaf
Start baking sourdough without the clutter and expense. These are the only 5 tools you really need—and the ones you can skip.
Jul 20, 2026 · 3 min read
Dutch Oven vs. Open Bake: Which Sourdough Method Is Best for Beginners?
Dutch oven or open baking with steam for sourdough? Compare ease, cost, and crust so beginners can pick the right method and bake a great loaf.
Jul 14, 2026 · 4 min read