Best Dutch Ovens for Beginner Sourdough Bakers
Which dutch oven should I buy for sourdough?
On this page
Start by validating the reader's confusion: most Dutch oven guides push expensive enameled cookware, but a beginner just needs a pot that traps steam and survives high heat. Promise honest picks at every budget and an explanation of what actually matters so they stop second-guessing the purchase.
Why a Dutch Oven Makes or Breaks Your Sourdough

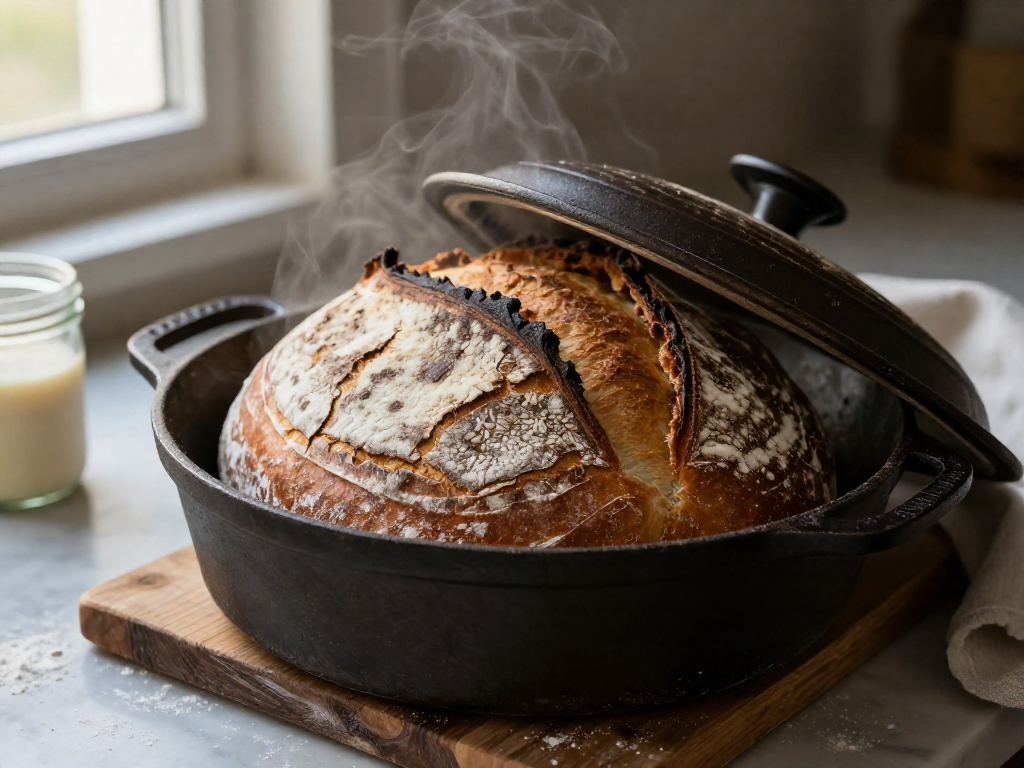
Short answer: A Dutch oven traps the steam your dough releases while baking, and that steam is what gives you a tall, open loaf with a crackly crust. Without it, most home loaves bake up pale, flat, and tough. Here's why.
When dough first hits a hot oven, it puffs up dramatically in the first 15–20 minutes. Bakers call this oven spring (the final rise that happens from heat alone). Steam keeps the outside of the loaf soft and stretchy during this window, so it can expand instead of setting into a hard shell too early.
Why your home oven can't do this on its own: A regular oven vents air constantly, so any steam escapes within seconds. You can throw ice cubes or pans of water in there, but the moisture just leaks away. Professional bakeries use sealed steam-injection ovens that home kitchens simply don't have.
The Dutch oven is the fix. Put your dough inside a heavy pot, snap on the lid, and you've built a tiny sealed chamber. The water in your dough turns to steam and has nowhere to go, so it surrounds the loaf for that critical first 20 minutes. You then remove the lid for the rest of the bake, letting the crust dry out, brown, and crackle.
The reassuring part: You do not need the priciest pot on the shelf. Steam doesn't care about brand names. Any enclosed, oven-safe vessel that holds heat and seals reasonably well will give you great results. The picks below are simply the ones that make a beginner's life easiest at each budget.
What Actually Matters When Choosing a Dutch Oven
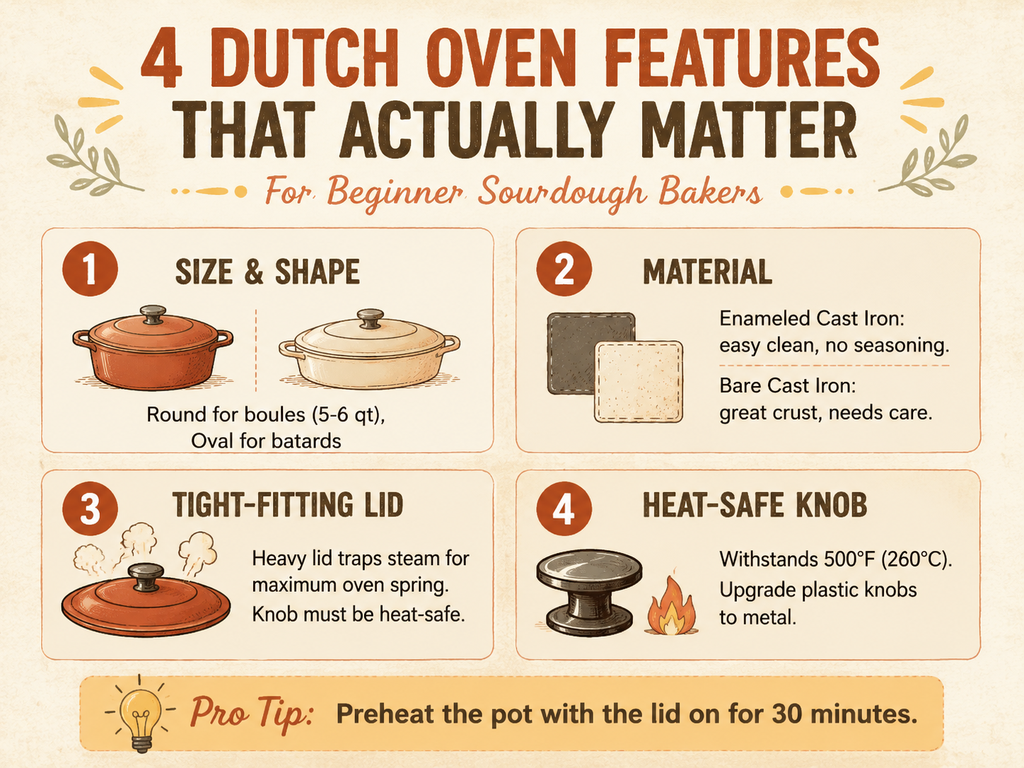
If you only remember one thing: buy a 5–7 quart round Dutch oven rated to at least 450°F, with handles you can grip in oven mitts. That covers 90% of beginner needs. Here's the why behind each factor, in order of importance.
1. Size: 5–7 quarts is the sweet spot
A standard beginner loaf uses about 500g of flour and bakes into a round loaf called a boule (pronounced "bool," French for "ball"). A 5–7 qt pot gives that boule room to spring upward without the dough spreading flat against the walls. Smaller than 5 qt and the dough crowds the sides; much larger and the loaf spreads out and bakes flatter.
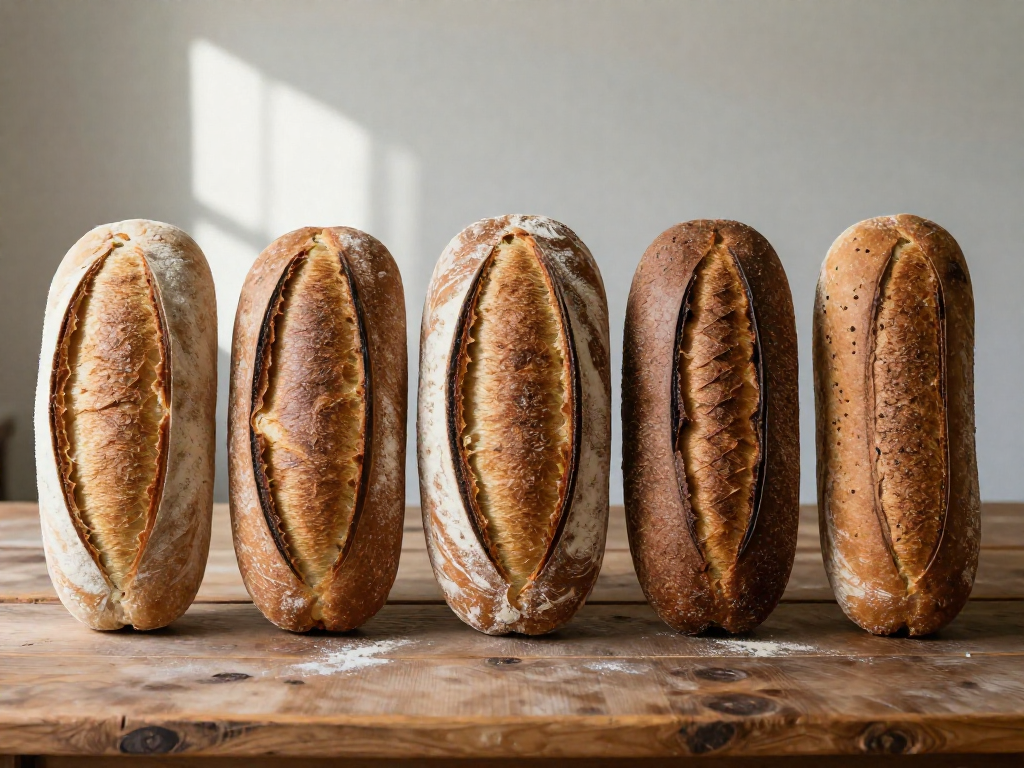
2. Shape: round beats oval for beginners
Round pots match the natural shape of a boule, so the loaf rises evenly on all sides. Oval pots are designed for longer bâtard (an oval loaf) shapes that are harder to master early on. Start round.
3. Heat tolerance: confirm 450°F+ (knob included)
Sourdough bakes hot—usually 450–500°F. The pot itself is rarely the problem; the lid knob is. Many come with plastic or low-rated knobs that melt or crack. Check the manufacturer's rating, and if the knob tops out around 375–400°F, swap it for an all-metal replacement knob (a few dollars online).
4. Shallow base vs deep pot: protect your knuckles
Loading sticky dough into a deep, narrow pot at 500°F is how beginners burn their forearms. A shallow-base design (or a "combo cooker," explained below) lets you lower dough in from above with far less reach. If you buy a tall pot, plan to lower the dough on a sling of parchment paper to keep your hands clear.
5. Weight and handles: can you lift it safely at 500°F?
Cast iron is heavy. Fully heated, a 7 qt pot can be a two-mitt job. Look for large side handles you can grip with thick oven mitts, and be honest about what you can lift safely.
6. Material: enameled vs bare cast iron vs combo cooker
- Enameled cast iron — easiest for beginners; no seasoning needed, easy to clean. Watch the knob rating.
- Bare cast iron — cheaper and tougher, but needs seasoning and careful drying to avoid rust.
- Combo cooker — a shallow skillet base with a deep lid that flips over it. The shallow base makes loading the easiest of all three, which is why many bakers love it.
Results vary by oven, climate, and dough, so treat these as guidelines rather than guarantees—any pot meeting the criteria above will get you a great first loaf.
Best Overall: The Pick Most Beginners Should Buy
Buy this: a 5–6 quart round enameled cast iron Dutch oven (the Lodge 6 qt is our tested top pick). If you only read one line, that's it.
Why it wins
- Size: 5–6 quarts fits a standard beginner loaf made with about 500 g (4 cups) of flour without crowding it. Smaller pots squish the dough; bigger ones waste heat.
- Heat rating: Safe to at least 500°F (260°C), so you can preheat it empty and trap steam — the moisture that lets your loaf expand (called "oven spring," the sudden rise in the first 10–15 minutes of baking).
- Easy loading: The wide round shape and low sides let you lower dough in without burning your knuckles.
- Price-to-value: Enameled cast iron usually costs less than premium brands while baking nearly identical crust.
Best for: First-time bakers who want one pot that just works and won't be replaced in six months.
Honest drawbacks: It's heavy (about 12 lb / 5.4 kg), the loop handles can feel small with thick mitts, and enamel can stain over time (cosmetic only — it still bakes fine).
Approximate price: $60–$100 USD. Results vary by oven and climate, so treat temperatures as starting points.
Best Budget Dutch Oven Under $50
Quick answer: A bare cast iron combo cooker (the shallow pan + deep lid style, often sold around $40–$50) is the best budget pick for learning. It traps steam beautifully, and the shallow bottom makes it easy to slide your dough in and lift the baked loaf out — fewer burned knuckles than a deep, tall pot.
If you'd rather skip seasoning entirely, a basic enameled round Dutch oven in the same price range also works. Just know that very cheap enamel can chip over time at high heat.
What you give up at this price:
- Thinner walls, so heat is slightly less even — minor for beginners.
- No fancy handles or lighter-weight designs.
- Shorter warranty and less consistent quality control.
None of this matters much while you're still learning shaping and timing. A budget pot bakes a great loaf; upgrade later only if you bake weekly.
Caring for bare cast iron:
- After baking, let it cool, then wipe clean — avoid soap and never soak it.
- Dry it fully on a warm burner so no water remains (prevents rust).
- Rub a thin layer of neutral oil over the surface while warm, then wipe off the excess.
Results vary by oven and climate, so treat early bakes as practice.
Best Splurge Dutch Oven (If You're All In)
Our pick: A premium enameled cast iron round Dutch oven (5.5–7 quart). Enameled means the cast iron is coated in a smooth glass-like layer, so there's no seasoning to maintain and nothing to rust.
What the extra money buys you:
- A flawless enamel coating that resists chipping and cleans up with a sponge (no scrubbing burnt flour off bare iron).
- Tighter-fitting lids that trap more steam, which helps your loaf rise and gives a crackly crust.
- Heavier, more even walls that hold heat steadily, so your bake is more forgiving if your oven runs hot or cold.
Lifetime durability and resale value: These are built to last decades and often carry a lifetime warranty. They also hold their value well, so if sourdough isn't for you, you can resell it for a solid chunk of what you paid.
Honest take: A pricier pot is nicer to use, not a shortcut to better bread. A confident bake in a $40 pot beats a nervous one in a $400 pot. Buy this if you'll use it for years and want a pot you'll love handling, not because you expect the price tag to fix a dense or gummy loaf. (Those usually come down to starter strength and bulk fermentation timing, covered in our troubleshooting section.)
Best Easy-Loading Pick (Shallow Base Design)
If reaching into a deep, scorching-hot pot makes you nervous, choose a shallow-base Dutch oven with a tall, domed lid. Instead of lowering your dough down into a deep well (where your knuckles can brush the 450°F/230°C walls), you load the dough onto the low base while the tall lid sits aside. Less reaching means fewer burns and a calmer first bake.
Why it works for beginners:
- The wide, low base gives you a clear target, so your dough lands neatly and you don't have to drop it from a height.
- Your hands stay mostly outside the pot during loading.
- A flat-ish base also makes it easy to slide in a parchment sling for safe transfers.
The trade-off: the tall lid caps how high your loaf can rise before it touches the top. For most beginner loaves (700–900g dough) this is plenty of room. If you bake very tall, high-rising boules, that lid clearance can become a limit—but that's rarely a problem when you're starting out.
Quick Comparison Table
Short on time? Here's every pick at a glance. "Heat rating" means the highest oven temperature the pot is rated to handle safely—sourdough usually bakes at 450–500°F (230–260°C), so anything rated 500°F or higher is ideal.
| Model | Size | Price Range | Heat Rating | Best For |
|---|---|---|---|---|
| Lodge Enameled Dutch Oven | 6 qt | $80–$100 | 500°F | Best overall—reliable, roomy, beginner-friendly |
| Lodge Bare Cast Iron Combo Cooker | 3.2 qt | $40–$50 | 500°F+ | Best budget—easy-loading, hard to beat under $50 |
| Le Creuset Round Dutch Oven | 5.5 qt | $380–$420 | 500°F | Best splurge—buy-it-for-life finish |
| Challenger Bread Pan | ~4 qt | $300–$330 | 500°F+ | Best easy-loading—shallow base, no burnt knuckles |
Tip: Pinterest savers, pin this table for later. Prices vary by retailer and sales.
How to Use Your Dutch Oven for Sourdough (Quick Method)
Got your Dutch oven? Here's the no-fuss method to bake a shaped, proofed loaf. (A Dutch oven is a heavy lidded pot that traps steam, giving you a crisp crust and big oven spring—the dramatic rise a loaf gets in its first minutes of baking.)
1. Preheat the pot empty. Put the Dutch oven (lid on) into a cold oven, set it to 475–500°F (245–260°C), and heat for 30–45 minutes. A fully preheated pot is what gives you that loud, crackly crust.
2. Load safely with parchment. Place your proofed dough on a sheet of parchment paper, score the top with a quick, confident slash (about ½ inch deep), then use the parchment as a sling to lower it into the screaming-hot pot. The parchment prevents sticking and keeps your hands away from the metal. Work fast and use thick oven mitts.
3. Lid on, then lid off. Bake covered for 20 minutes (the trapped steam helps the loaf expand). Remove the lid and bake another 20–25 minutes until the crust is deep golden-brown.
4. Cool before slicing. Lift the loaf onto a wire rack and wait at least 1 hour. Cutting early releases steam and leaves the crumb gummy and damp—this single step fixes more "gummy loaf" complaints than anything else.
Times and temperatures vary by oven and climate—watch the color and adjust.
Common Dutch Oven Mistakes Beginners Make
Most flat, pale, or gummy loaves come down to a handful of avoidable Dutch oven errors. Here's how to fix the big four.
1. Skipping the preheat. Your Dutch oven needs to be screaming hot before the dough goes in, or you won't get oven spring (the rapid rise a loaf does in the first 10–15 minutes of baking). Preheat the empty, covered pot for at least 45 minutes at 230°C / 450°F.
2. Melting the knob. Many lids ship with a plastic knob rated to ~190°C / 375°F — well below sourdough temps. Check the rating first. If it's too low, swap in a metal knob or bake the lid knob-side down.
3. Using a pot that's too big. In an oversized pot the dough relaxes outward instead of up, giving you a flat, spread-out loaf. For one standard loaf, aim for a 4–5 qt (3.8–4.7 L) pot.
4. Slicing too early. Cutting a hot loaf traps steam and leaves a gummy, wet crumb. Let it cool on a rack for at least 1–2 hours.
Results vary with your oven and climate — treat these as starting points, not guarantees.
See also
- Beginner sourdough bread recipe (step-by-step)
- How to create and maintain a sourdough starter
- Sourdough troubleshooting: why is my loaf dense or gummy?
- Understanding hydration percentages for beginners
- Essential sourdough tools for beginners
Related articles
Flour Types for Sourdough: A Visual Guide to Protein Content and Results
How do different flours affect sourdough bread, and what do the results look like side by side?
Jul 20, 2026 · 11 min read
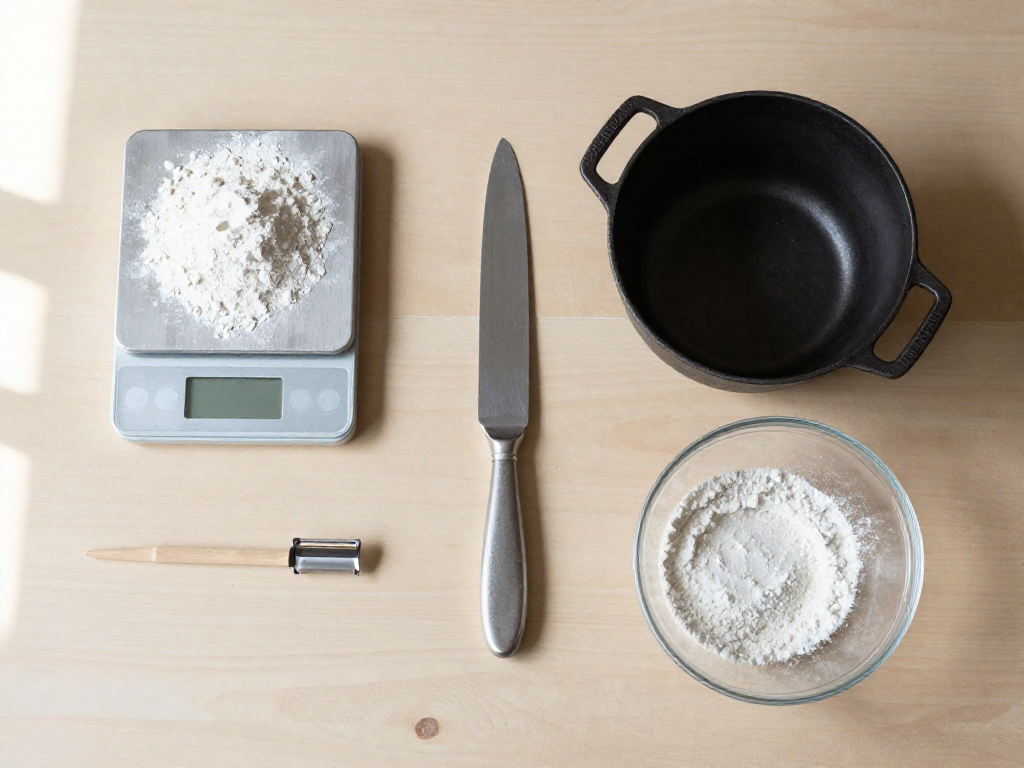
The Only 5 Tools You Really Need for Your First Sourdough Loaf
Start baking sourdough without the clutter and expense. These are the only 5 tools you really need—and the ones you can skip.
Jul 20, 2026 · 3 min read
Dutch Oven vs. Open Bake: Which Sourdough Method Is Best for Beginners?
Dutch oven or open baking with steam for sourdough? Compare ease, cost, and crust so beginners can pick the right method and bake a great loaf.
Jul 14, 2026 · 4 min read