Why Didn't My Sourdough Get a Good Oven Spring?
Why did my loaf fail to rise in the oven?
On this page
What Oven Spring Actually Is (and What Good Spring Looks Like)
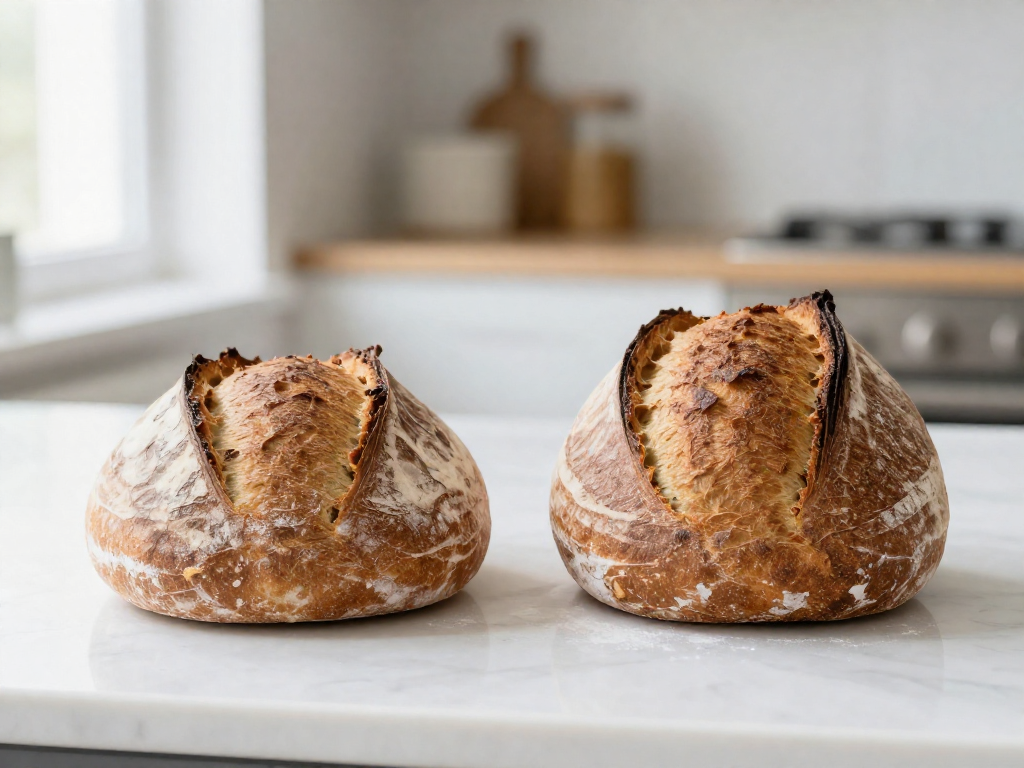
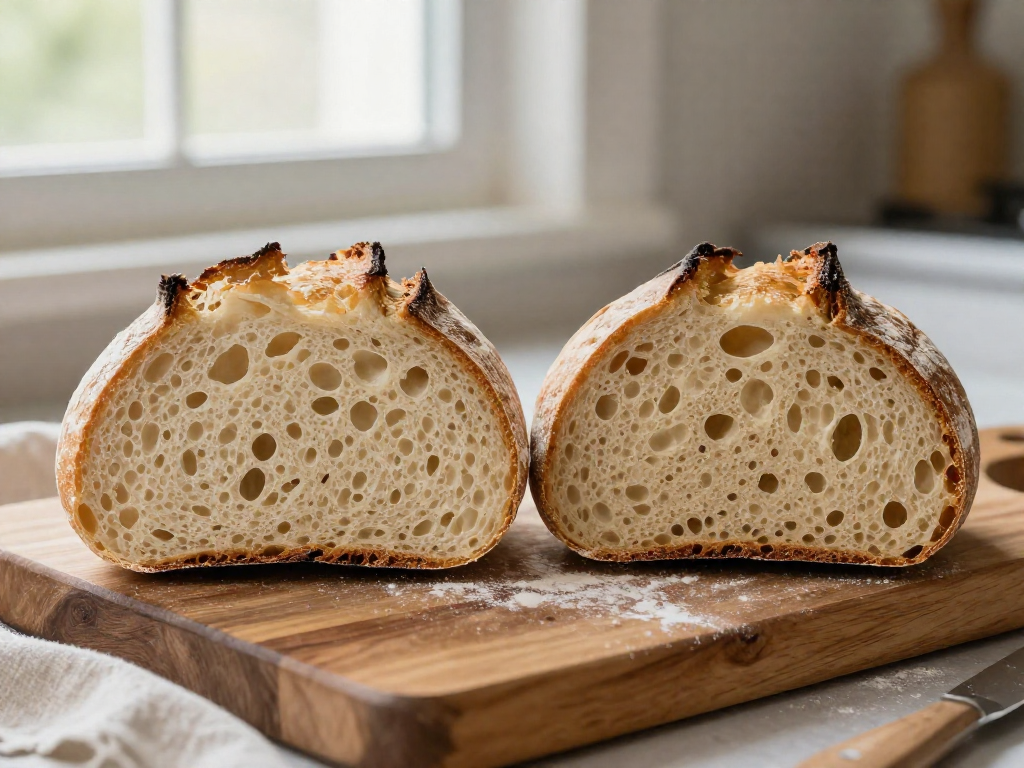
Quick answer: Oven spring is the rapid, final burst of rise your loaf gets in the first 10–15 minutes of baking. Good spring looks like a tall, domed loaf with a raised, slightly torn lip along your cut line — bakers call this the "ear."
Here's what's happening inside the oven during those first minutes:
- The carbon dioxide gas trapped during fermentation heats up and expands.
- Water in the dough turns to steam, pushing the dough outward.
- Your wild yeast gets one last burst of activity before the heat (around 140°F / 60°C) kills it and the crust sets.
Signs of good oven spring:
- A loaf that's noticeably taller after baking than it was going into the oven.
- A domed top, not a flat or sunken one.
- A clean, raised ear where you scored the dough.
Quick gut-check: is it really a spring problem?
Before you blame oven spring, confirm that's actually the issue:
- Tall but gummy inside? That's likely underbaking or under-fermentation, not spring.
- Flat and spread out before baking? That's usually a shaping or dough-strength problem (we'll cover this later).
- Rose fine, then collapsed? That points to over-fermentation.
If your loaf goes in looking promising but comes out short and squat, you're in the right place — keep reading.
Cause #1: Your Dough Was Over- or Under-Proofed
Proofing is the rest your shaped dough takes before baking, while wild yeast produces gas that inflates the loaf. Getting this stage wrong is the number one reason beginner loaves come out flat or dense, so start here.
The quick fix: Stop proofing based on how the dough looks and feels, not the clock. A timer is only a rough guide because temperature changes everything.
How to tell what went wrong
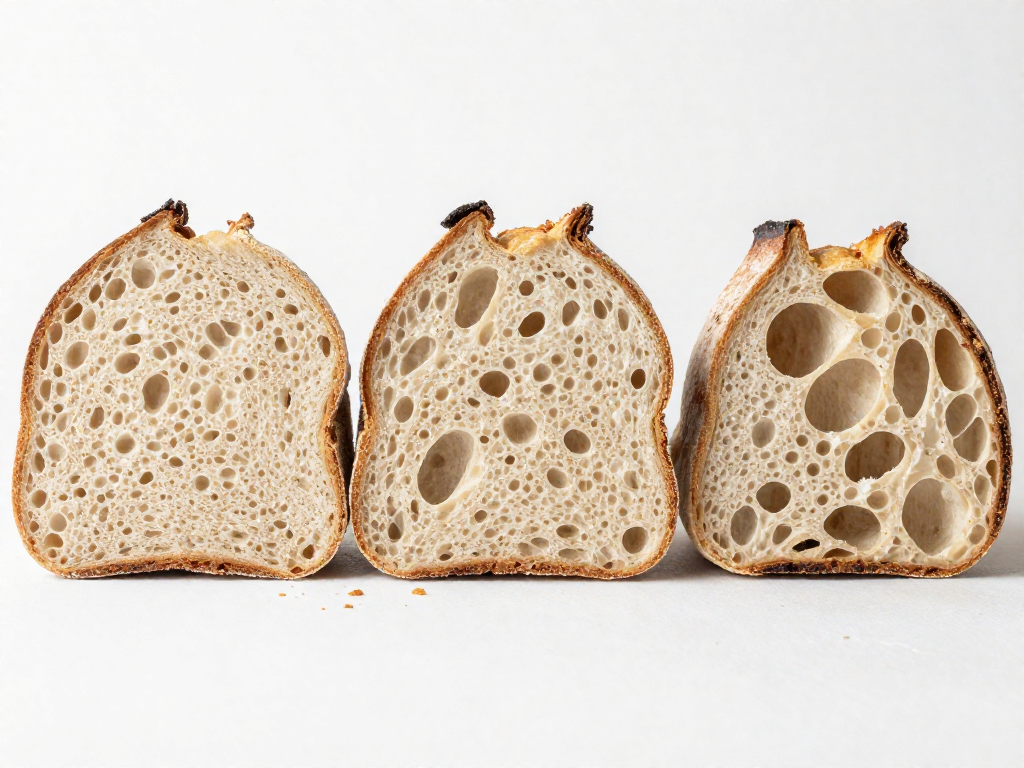
- Over-proofed: The yeast ran out of food and the gluten (the stretchy protein network that traps gas) got so stretched it can no longer hold its shape. The dough looks slack, spreads out flat, and may collapse when you score it. Oven spring is weak because the gas has already peaked and escaped.
- Under-proofed: Not enough gas has built up yet. The loaf bakes up small and tight with a dense, close crumb. It may also tear or burst at the side because the dough was still too firm to expand evenly.
The poke test
Lightly flour a finger and gently press about 1 cm (½ inch) into the dough:
- Springs back fast → under-proofed, give it more time.
- Springs back slowly and leaves a slight dent → ready to bake.
- Stays fully dented, no spring → over-proofed.
Why timing alone fails
Yeast activity roughly doubles for every increase in temperature, so warmth speeds proofing and cold slows it down.
- Warm kitchen (26–28°C / 78–82°F): dough can be ready in as little as 3–4 hours.
- Cool kitchen (18–20°C / 64–68°F): the same dough may need 6–8 hours or an overnight fridge rest.
A recipe written for a warm kitchen will over-proof in summer and under-proof in winter. Watch the dough, run the poke test, and bake when it is ready. Results vary by kitchen and climate, so expect to adjust the first few times.
Cause #2: A Weak or Sluggish Starter
Your loaf's oven spring (the dramatic rise dough gets in the first 10–15 minutes of baking) is only as strong as the starter you built it with. A starter is the living mix of flour and water that captures wild yeast and bacteria to leaven your bread. If that starter is weak when you mix your dough, there simply aren't enough active yeast cells to produce the gas that lifts your loaf. This is the most common blind spot for beginners.
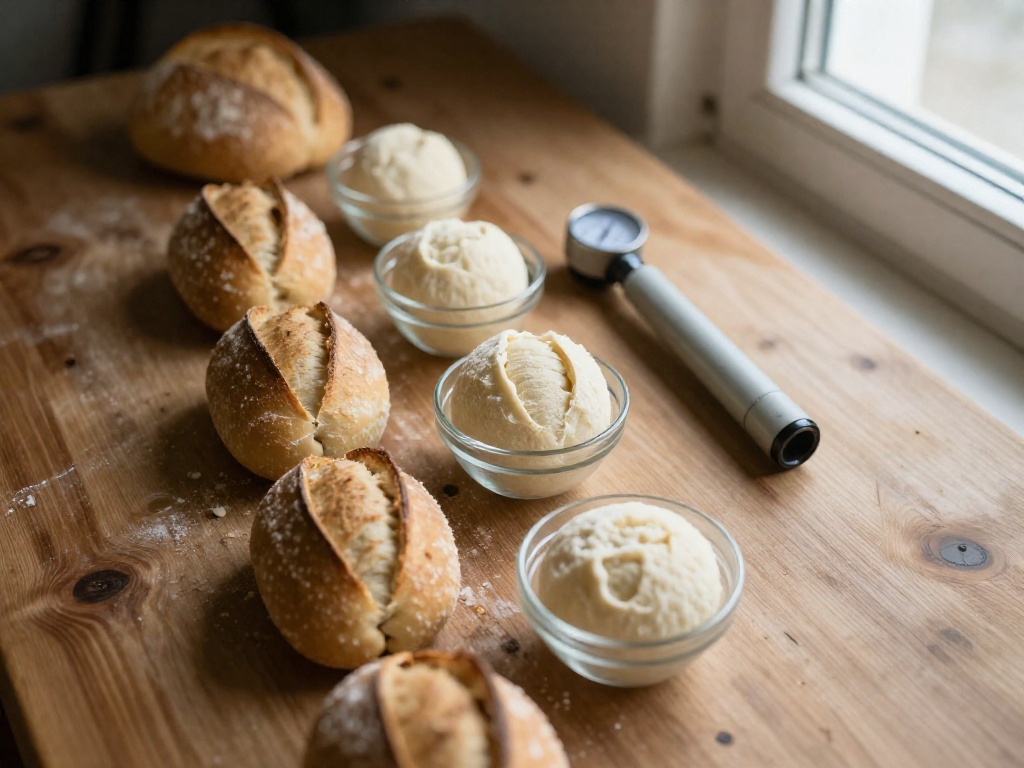
Use your starter at peak. "Peak" means the point a few hours after feeding when your starter has risen as high as it will go and looks domed and bubbly, just before it starts to deflate. Two quick checks:
- The doubling benchmark: A healthy starter should double in volume within 4–6 hours of feeding at room temperature (about 70–75°F / 21–24°C). Mark the jar with a rubber band so you can see the rise.
- The float test: Drop a small spoonful of starter into water. If it floats, it's full of gas and ready to bake with. If it sinks, give it more time.
Signs of a sluggish starter:
- Slow or barely-there rise
- Sharp, vinegary, or overly sour smell
- Thin, watery, or runny texture instead of thick and bubbly
The fix: Feed regularly (a 1:1:1 ratio of starter, flour, and water by weight works well, e.g., 50g each) and only mix dough when your starter is at peak. If your starter is cold from the fridge, warm it up with one or two feedings at room temperature before baking. Results vary by kitchen temperature, so watch your starter, not just the clock.
Cause #3: Your Oven Wasn't Hot Enough
A cool oven is one of the most common reasons a loaf stays flat, and it's one of the easiest to fix.
The quick fix: Bake at 450–500°F (230–260°C), and preheat for a full 45–60 minutes with your Dutch oven (a heavy lidded pot) or baking stone inside.
Why heat matters. Oven spring is the final burst of rise in the first 10–15 minutes of baking. High initial heat rapidly turns the water in your dough to steam and pushes the loaf up before the crust sets. Too little heat and the crust hardens early, trapping the loaf in a dense shape.
Don't trust the dial. Most home oven thermostats are off by 25–50°F. Buy an inexpensive standalone oven thermometer, hang it on the center rack, and check the real temperature before you load your dough. This single $10 fix solves a surprising number of flat loaves.
Preheat everything, not just the air. A Dutch oven or baking stone needs 45–60 minutes to fully absorb heat. If you load dough onto cold metal or stone, it pulls heat away and stalls the spring.
Use cold dough to your advantage. Baking your dough straight from the fridge (after its overnight cold proof) maximizes the temperature difference between the dough and the hot oven, giving you a stronger, taller rise.
Results vary by oven, pan, and climate, so use these as starting points and adjust.
Cause #4: Not Enough Steam in the First 15 Minutes
Quick fix: Trap steam around your loaf for the first part of the bake. The easiest way is to bake inside a preheated Dutch oven (a heavy lidded pot) with the lid on for the first 20 minutes, then take the lid off.
Why steam matters: When your dough hits a hot oven, it puffs up fast — that final burst of rise is called oven spring. Steam keeps the surface of the dough soft and stretchy so it can keep expanding. Without steam, the crust dries out and sets hard within the first few minutes, which traps the rise underneath and leaves you with a tight, low loaf.
How to add steam (pick one):
- Dutch oven (best for beginners): Preheat the empty pot with its lid for 45 minutes at your bake temperature. Lower the dough in, cover, and bake covered for 20 minutes. The loaf releases its own steam inside the sealed pot.
- Ice cubes: Toss 4–5 ice cubes onto a hot metal tray on the oven floor right after loading the bread.
- Tray of water or lava rocks: Place a metal tray (with lava rocks for more surface area) on the bottom rack while preheating, then pour in about 1 cup (240 g) of boiling water as you load the loaf.
Then crisp it: After about 20 minutes, remove the lid (or the steam tray) and bake the rest of the time uncovered. This lets the crust dry out, brown, and turn crisp.
Results vary by oven and climate, so watch your loaf rather than the clock for the deepest color.
Cause #5: Shallow, Timid, or Missing Scoring
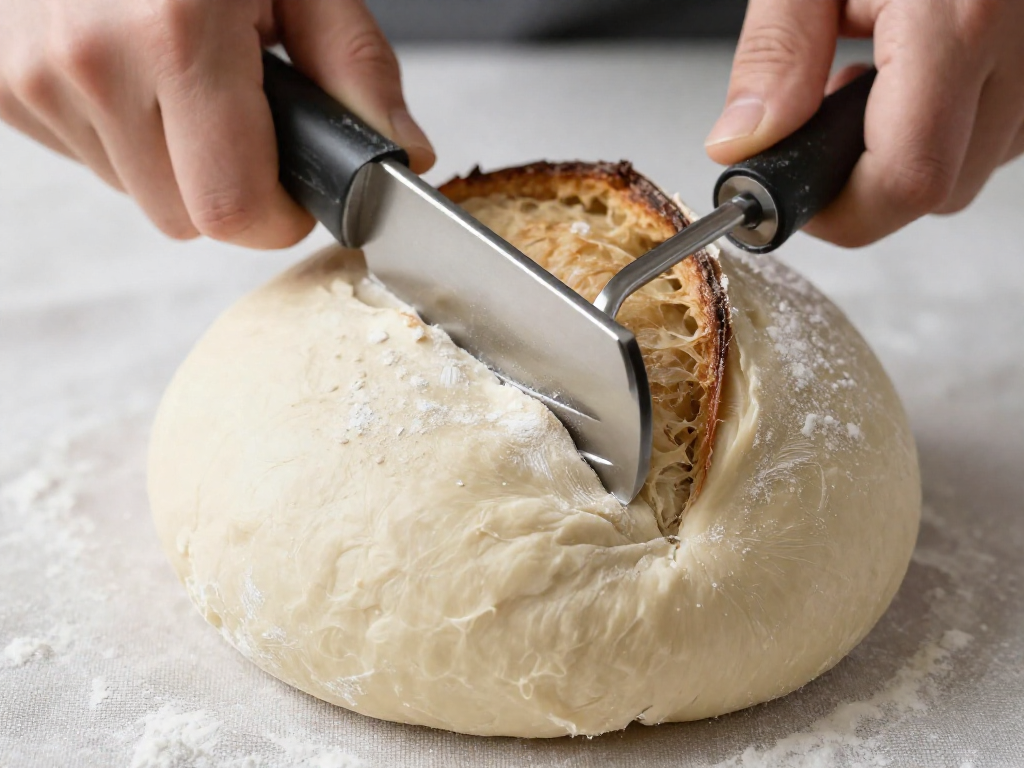
Quick fix: Make one decisive cut, 1/4 to 1/2 inch deep, held at a 45-degree angle, using a razor-sharp blade or lame (a thin curved blade on a handle, made specifically for cutting dough).
Scoring is the slash you cut into the top of your loaf right before it goes in the oven. It isn't just for looks. As the dough heats and the gases inside expand, all that pressure has to escape somewhere. Scoring gives it a planned, controlled place to open up.
Skip it, or cut too timidly, and the loaf bursts wherever it's weakest, usually along the side or bottom. The result is a squat, lopsided shape with random tearing instead of a tall, clean rise.
Here's what goes wrong and how to fix it:
- No ear (that raised, crispy lip along the cut): Your cut was too shallow. Go a full 1/4 to 1/2 inch deep and angle the blade at about 45 degrees rather than straight down.
- Random tearing or squat shape: You didn't score at all, or hesitated mid-cut. Score in one quick, confident motion.
- Blade dragging through the dough: Your blade is dull. Use a fresh razor or a sharp lame.
Score quickly and commit to the cut. A clean slash gives your loaf the best chance to climb.
Cause #6: Weak Shaping and Insufficient Dough Tension
The quick answer: If your dough spreads into a flat puddle instead of rising up, it lacks surface tension—the tight outer "skin" that traps gas and forces the loaf to rise upward in the oven.
Why tension matters: During baking, the gas bubbles inside expand. A taut skin holds that pressure in and pushes the loaf up. A loose, slack surface lets the gas escape sideways, so the dough flattens and bakes wide instead of tall.
How to build tension during final shaping:
- Lightly flour your counter and tip the dough out, smooth side down.
- Fold the edges into the center to form a rough ball.
- Flip it seam-side down. Cup your hands behind the dough and drag it toward you across the counter several times. The slight friction tightens the surface—you'll feel it firm up and see a smooth, taut top.
- The dough should hold a round shape and not slump. If it spreads immediately, repeat the drag-and-tighten step.
Then cold proof: Place the shaped loaf in the fridge, covered, for 8–16 hours. Cold dough firms up, making it far easier to score cleanly and helping it hold its shape when it hits the hot oven.
Results vary by flour, hydration, and kitchen temperature, so use these cues as a guide rather than a guarantee.
Cause #7: Hydration and Flour Issues
If your dough spread into a puddle instead of rising up, the problem may be in the recipe itself, not your technique.
The quick fix: While you're learning, use bread flour and keep hydration at 68–72%.
Hydration is just the weight of water compared to the weight of flour, written as a percentage. A dough with 500g flour and 350g water is 70% hydration (350 ÷ 500). Higher numbers mean wetter, stickier dough.
Here's why these two factors limit spring:
- Too-high hydration: Wet, slack dough (think 80%+) is hard for beginners to handle. It won't hold its shape, so it flattens instead of springing up.
- Low-protein flour: All-purpose or "low-protein" flour can't build enough gluten—the stretchy protein network that traps gas. Bread flour has more protein and gives you stronger structure.
- Underdeveloped gluten: Even good flour needs work. Not doing enough stretch-and-folds during bulk fermentation leaves the dough weak and slack.
Tighten up these three things and your loaf will hold its shape long enough to rise tall.
Quick Diagnostic Checklist
Use this to match what you see to the most likely cause—and the fastest fix. (Oven spring is the burst of rising a loaf does in the first 10–15 minutes of baking.)
| What you see | Most likely cause | One-line fix |
|---|---|---|
| Flat and spread out | Overproofed dough or weak surface tension (the tight "skin" you build when shaping) | Shorten your bulk ferment—the main rise after mixing—and re-shape tighter. |
| Dense and tight crumb | Underproofed dough or a sluggish starter | Let it rise longer, and feed your starter until it doubles in 4–6 hours. |
| Pale and squat | Oven too cool or no steam | Preheat to 475°F (245°C) for 45 min; bake covered in a Dutch oven. |
| Random tearing or bursting | Scoring too shallow or missing | Make one decisive slash, about ½ inch (1 cm) deep, at a 45° angle. |
Find the row that matches your loaf, then jump to that full section above for the detailed walk-through. Results vary by kitchen and climate, so treat this as a starting point, not a guarantee.
FAQ
Can you fix a loaf with no oven spring after it's already baked?
No, oven spring happens in the first 10–15 minutes of baking, so once a loaf is fully baked you can't add height back to it. If it's dense or gummy, you can still make it usable: slice it thin and toast it, turn it into croutons, breadcrumbs, or a bread pudding. For next time, the fixes happen before baking, mainly using a stronger, active starter, shaping with more tension, and baking covered with steam. Treat a flat loaf as data, not a failure: note what your dough looked and felt like so you can adjust the next bake.
Does cold proofing in the fridge improve oven spring?
Yes, in most home kitchens cold proofing helps. Cold proofing (also called retarding) means putting your shaped dough in the fridge for 8–16 hours instead of finishing the final rise at room temperature. The cold firms up the dough so it holds its shape and is much easier to score (slash the top), and a clean, deep score lets the loaf expand upward instead of bursting at the sides. It also slows fermentation, giving you a wider window so you're less likely to overproof. Bake the dough straight from the fridge while it's cold for the best, tallest spring.
How hot should my oven be for the best sourdough oven spring?
Preheat to 245–260°C (475–500°F) and let the oven and your baking vessel heat for a full 45–60 minutes before the loaf goes in. A high starting temperature gives the dough a fast burst of heat that drives oven spring (the rapid rise in the first 10–15 minutes of baking). Bake covered (in a Dutch oven or with another steam method) for the first 20 minutes to trap moisture, then uncover and, if you like, drop to about 230°C (450°F) to finish browning. Oven thermostats are often off, so an inexpensive oven thermometer is the single best way to confirm you're actually hitting temperature.
Why did my sourdough spread flat instead of rising up?
A loaf that spreads sideways instead of rising up usually points to one of three things. First, overproofing: the dough fermented too long and the gluten can no longer hold gas, so it deflates when handled. Watch for a slack, bubbly, slack-jiggly dough that won't spring back when poked. Second, weak shaping: without surface tension the dough has no structure to push upward, so shape it tighter and let it rest seam-side down. Third, too-high hydration for a beginner (hydration is the water weight as a percentage of flour weight); start nearer 70% rather than 80%+ until your handling improves. Cold proofing in the fridge also firms the dough so it holds its shape better.
Do I really need a Dutch oven for good oven spring?
No, you don't strictly need a Dutch oven, but you do need steam, which is what a Dutch oven provides automatically. Steam keeps the loaf's surface soft for the first 20 minutes so it can expand fully before the crust sets; a dry oven sets the crust early and limits the rise. A preheated Dutch oven (or any heavy lidded pot) is the easiest reliable method for beginners. If you don't have one, bake on a preheated tray or stone and add steam by placing a metal pan of boiling water on the bottom rack, or tossing a few ice cubes into a hot tray as you load the loaf. Results vary by oven, so try a method and adjust.
How do I know if my starter is strong enough for a good rise?
Use the float test plus timing. After you feed your starter (mix it with fresh flour and water), it should reliably double in volume within 4–8 hours and look bubbly and domed, smelling pleasantly tangy rather than like nail polish or sour milk. The float test: drop a small spoonful into a glass of water; if it floats, it's full of gas and ready to bake with. Mark the jar with a rubber band at feeding time so you can clearly see it double. A starter that only rises a little, takes longer than 12 hours, or never floats isn't strong enough yet, so feed it once or twice a day for a few days until it doubles predictably before you bake.
See also
- How to Tell When Sourdough Is Fully Proofed (The Poke Test)
- How to Feed and Maintain a Sourdough Starter for Beginners
- Beginner Sourdough Bread Recipe (Step-by-Step)
- How to Score Sourdough Bread for a Beautiful Ear
- Why Is My Sourdough Dense and Gummy?
- Sourdough Shaping Guide: Building Tension for Tall Loaves
Related articles

The Float Test Lie: Why Your Starter Might Be Ready Even If It Sinks
Is the float test a reliable way to tell if my sourdough starter is ready to use? Learn why this common test lies—and what to check instead for perfect bread every time.
Jul 20, 2026 · 8 min read
Sourdough in Summer vs. Winter: How to Adjust for Temperature Extremes
How do you adapt your sourdough baking process for very hot or cold weather?
Jul 20, 2026 · 9 min read
Beginner's Guide to Controlling Sourdough Tang: How to Make It Milder or More Sour
Learn how to control the sourness of your sourdough bread with simple beginner adjustments to fermentation time, temperature, and starter feeding.
Jul 14, 2026 · 12 min read