Under-Proofed vs. Over-Proofed Sourdough: How to Tell the Difference
How do I know if my dough is under- or over-proofed?
On this page
What Proofing Actually Is (in Plain English)
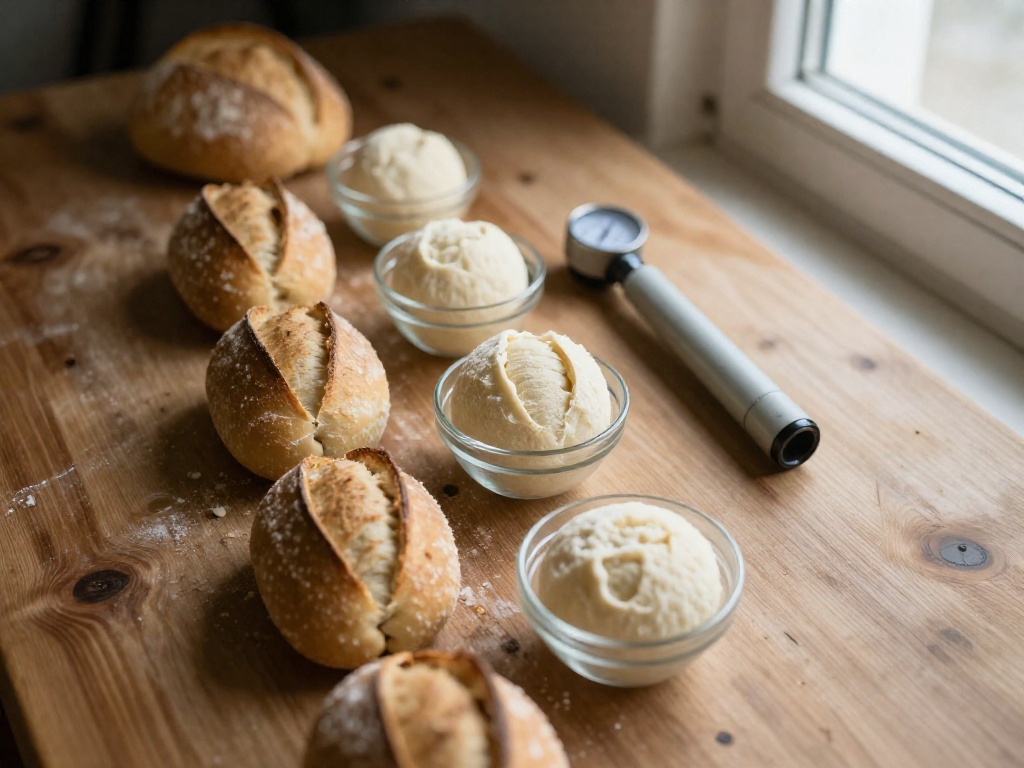
Quick answer: Proofing is the final rise your shaped dough takes before it goes in the oven. During this stage, the wild yeast and bacteria in your starter (the living mix of flour and water you feed to leaven the bread) keep eating sugars in the dough and releasing carbon dioxide gas. That gas inflates the dough like tiny balloons, and it's what gives you an airy, open crumb (the soft, holey interior of the loaf).
The goal is a balance: you want enough trapped gas for a good rise, but not so much that the dough's gluten structure stretches past its limit and collapses. Too little gas and the loaf bakes up dense and flat; too much and it deflates or turns gummy.
Don't confuse the two rises:
- Bulk fermentation (often called "bulk ferment") is the first long rise, done in a bowl with the whole batch of dough before shaping.
- Final proof happens after you shape the loaf, right before baking. This section is about the final proof.
Why the clock lies: Warmer kitchens and a strong, recently fed starter speed everything up; cool rooms and a sluggish starter slow it down. Two cooks using the same recipe can finish hours apart, so judge by how the dough looks and feels, not by the timer.
Signs Your Sourdough Is Under-Proofed
Under-proofing means you baked before the dough finished its bulk ferment (the first long rise, when the starter eats sugars and fills the dough with gas). It's the most common beginner mistake, and the good news is it's easy to spot. Here's how to read the signs.
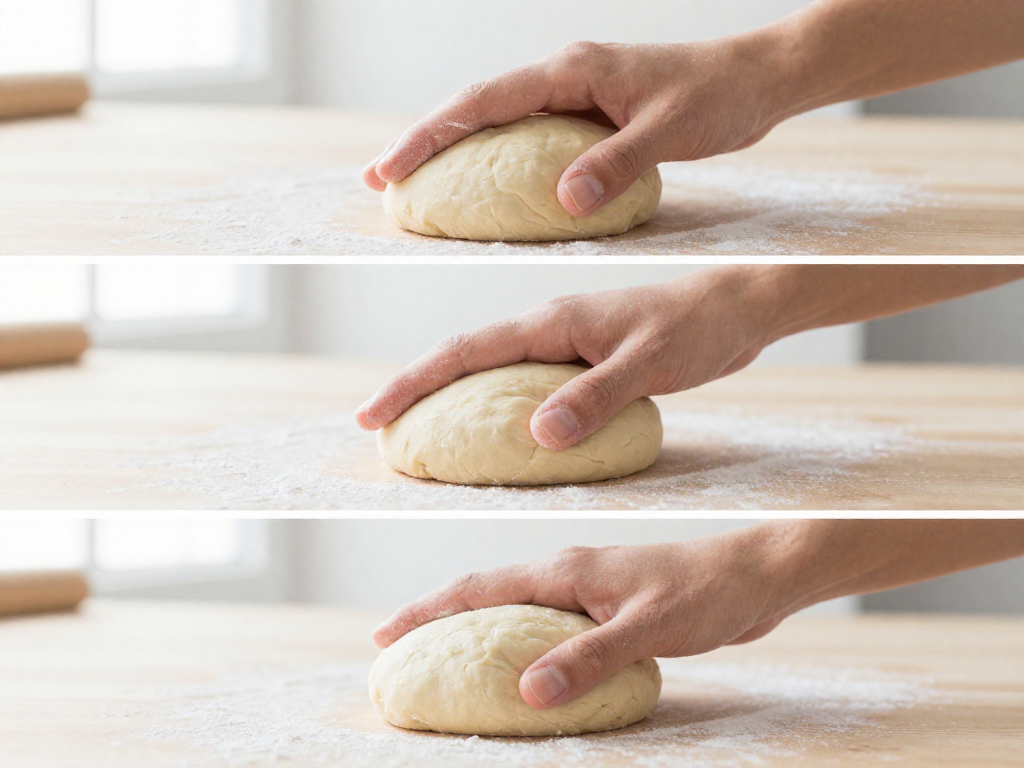
Use the poke test first. Wet one finger and gently press about 1 cm (½ inch) into the dough. If the dent springs back fast and completely, the dough is under-proofed and needs more time. (A ready dough springs back slowly and leaves a small dent; an over-proofed one stays dented.)
Symptoms before baking
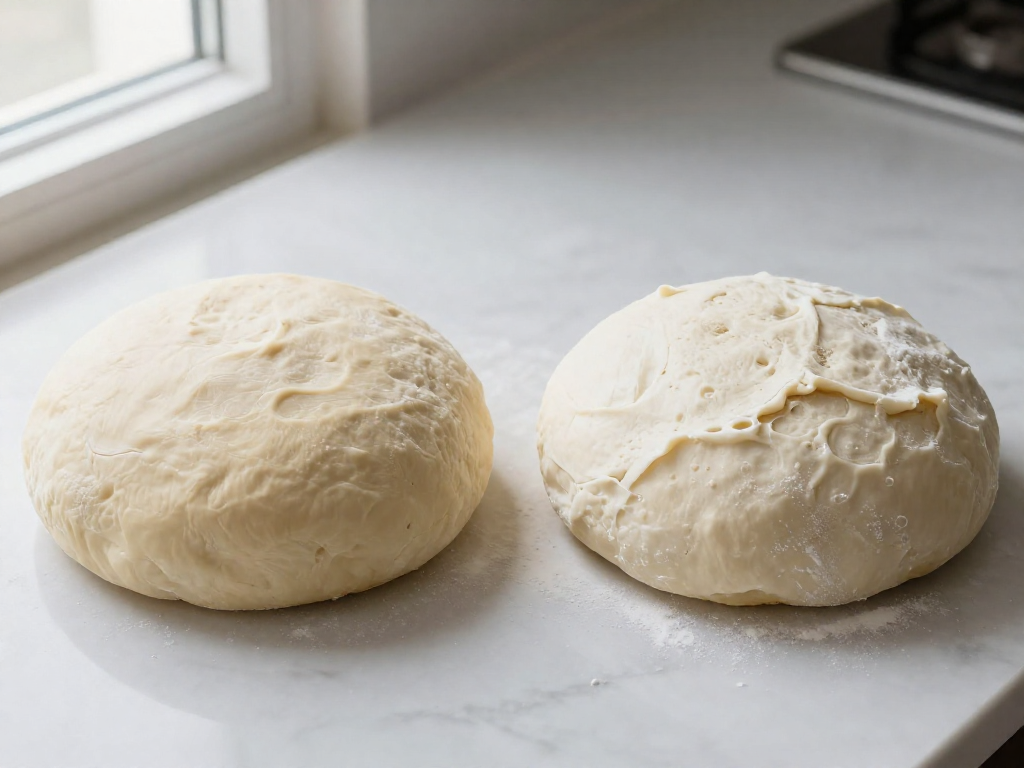
- Feels tight and dense. The dough is firm and resists shaping, with little jiggle or air.
- Pale, smooth surface. You see few or no bubbles on top. A well-proofed dough looks puffy and lightly blistered.
Symptoms during and after baking
- Bursting on the sides. The loaf tears unpredictably along the base or sides instead of opening cleanly at your score line. Tight dough still has lots of gas to release, so it blows out at the weakest point.
- Dramatic, uneven oven spring. The loaf shoots up violently and lopsided rather than rising evenly.
- Gummy band near the base ("flying crust"). A dense, wet-looking streak of crumb sits at the bottom, sometimes with a gap under the top crust.
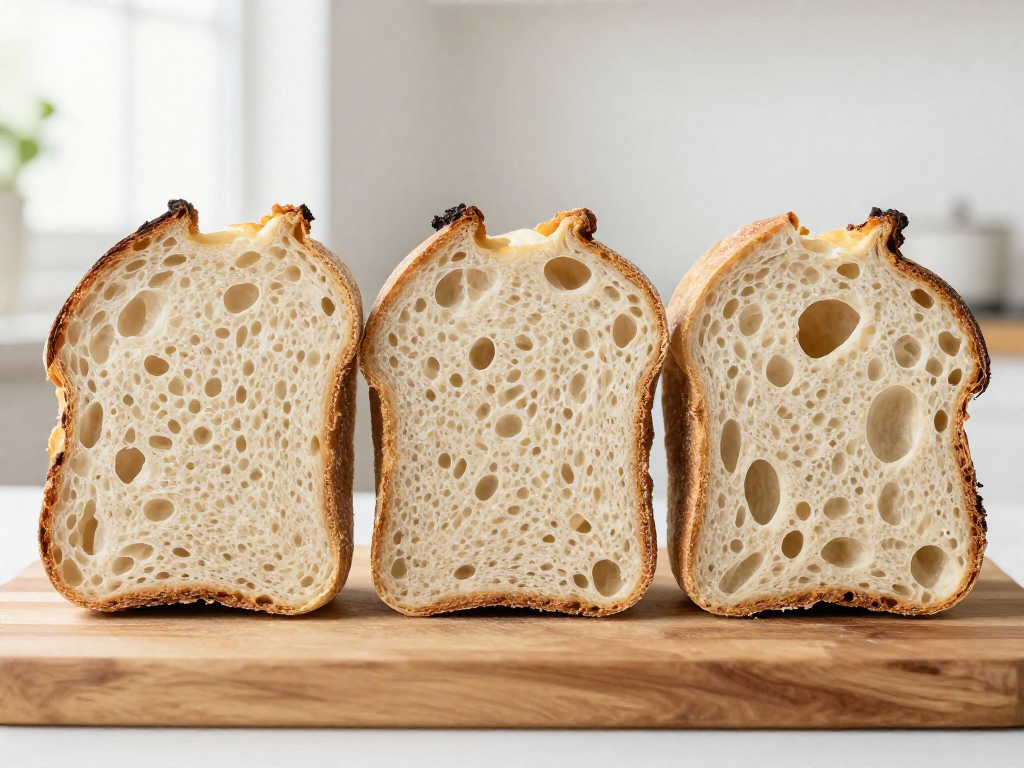
- Tight crumb or large irregular tunnels. Instead of an even, open structure, you get a dense interior or a few oversized random holes.
The quick fix
Give the dough more time. Let the bulk ferment run longer—often another 1–2 hours—until it has grown about 50% in volume, looks domed and bubbly, and jiggles when nudged. In a cool kitchen (under 21°C / 70°F) this takes longer; in a warm one it speeds up. Time is a guide, not a rule: judge by how the dough looks and feels.
Note: results vary by kitchen temperature, starter strength, and flour, so treat these cues as a starting point rather than a guarantee.
Signs Your Sourdough Is Over-Proofed
Over-proofing happens when your dough ferments too long, so the yeast and bacteria use up the available food and the gluten network (the stretchy protein web that traps gas) breaks down. The result is a loaf that has run out of "lift" before it ever hits the oven. Here is how to spot it.
The quick checks
- The poke test fails the other way. Lightly flour a finger and poke the dough about 1 cm (½ inch) deep. If the dent stays put and does not spring back at all, the dough is over-proofed. (For comparison: under-proofed dough springs back fast; perfectly proofed dough springs back slowly and leaves a small dimple.)
- The dough is slack and spreads. Instead of holding a domed shape, it relaxes into a puddle, looks loose and "soupy," and you may see lots of bubbles breaking on the surface.
- It tears or deflates when handled. During scoring (slashing the top) or the transfer to your baking pot, the dough rips easily or visibly sinks, because the gluten can no longer hold itself together.
What it looks like after baking
- Flat and wide with little oven spring. Oven spring is the final burst of rise in the first 10–15 minutes of baking. An over-proofed loaf has spent its gas, so it bakes up short, spread out, and pancake-like.
- Open but fragile crumb. The inside may have large, thin-walled holes that collapse easily rather than a springy, even structure.
- A sour or alcoholic smell. A sharp, boozy, or vinegary aroma is a sign fermentation went too far.
How to fix it next time
- Shorten the bulk ferment (the first long rise after mixing) by 30–60 minutes, or stop as soon as the dough has grown by about 50–75% and looks domed and jiggly.
- Bake in a cooler spot. Warm kitchens (above ~26°C / 78°F) speed fermentation; aim for 21–24°C (70–75°F) or use the fridge to slow things down.
- Use a less active starter ratio or a younger starter if your dough consistently over-proofs.
Results vary with your kitchen's temperature and your starter's strength, so treat these cues—not the clock—as your real guide.
The Poke Test, Step by Step
The poke test is the fastest way to read your dough. Here's exactly how to do it:
- Flour one finger. Lightly dust your index finger with flour so it doesn't stick and tear the dough's surface.
- Press gently. Push about half an inch (1.5 cm) into the dough near the edge, then pull your finger straight out.
- Watch the dent. How quickly the dough bounces back tells you everything.
Reading the Results
| What you see | What it means | What to do |
|---|---|---|
| Springs back fast and fully, dent disappears almost instantly | Under-proofed — the dough still has plenty of rising left | Give it more time (often 30–60 more minutes at room temp) and test again |
| Springs back slowly and leaves a slight, shallow dent | Ready to bake — this is your sweet spot | Shape or bake now |
| Stays fully dented and the dough sighs or deflates | Over-proofed — the gluten has overstretched | Bake right away to salvage it; next time, shorten your bulk ferment (the main rise after mixing) |
Testing Cold Dough from the Fridge
If your dough has been cold-proofing in the refrigerator (a slow, overnight rise that builds flavor), the poke test is less reliable straight out of the cold. Chilled dough is firm and will spring back faster than it really "wants" to, which can fool you into thinking it's under-proofed.
For cold dough, do the poke test, but lean on the other signs too: a domed, slightly jiggly surface and a few visible bubbles usually mean it's good to bake cold.
When to Trust Your Hands Over the Test
The poke test is a guide, not a guarantee — results vary with your flour, kitchen temperature, and starter strength. As you bake more loaves, you'll start to feel readiness: well-proofed dough feels light, airy, and pillowy rather than dense and tight. When the test and your gut disagree, note both in a baking log and compare against how the loaf turns out. That feedback loop is how beginners become confident bakers.
Side-by-Side: Under-Proofed vs. Over-Proofed at a Glance
Proofing is the final rise after you shape your dough, when the wild yeast in your starter inflates it with gas before baking. Here's how the two problems compare at a glance.
| What to check | Under-Proofed | Over-Proofed |
|---|---|---|
| Dough feel | Tight, firm, springy | Slack, wet, almost soupy |
| Poke test | Bounces back fast | Stays dented, may collapse |
| Surface | Smooth, taut | Slack, bubbly, sometimes deflated |
| Oven spring (rise in the oven) | Bursts open unevenly, may tear at the side | Little to no rise, spreads flat |
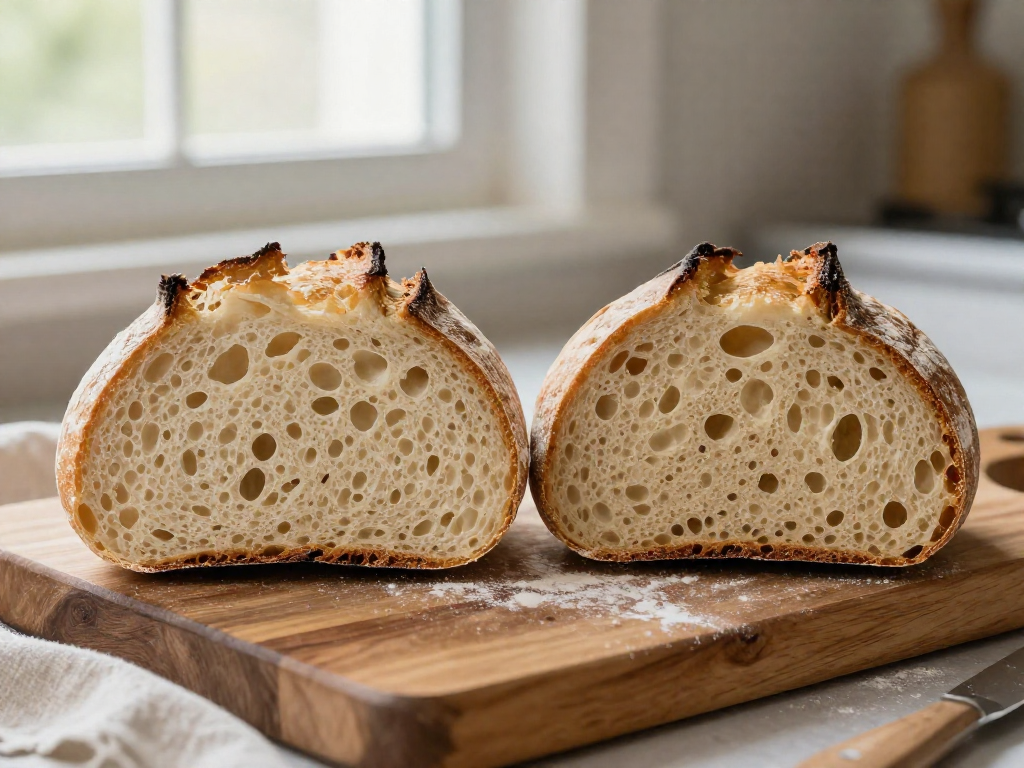
| Crumb (inside texture) | Tight, dense, gummy spots | Open but fragile, can sink or have large random holes |
| Taste | Mild, flat, doughy | Very sour, sometimes tangy-bitter |
The two most reliable tells: the poke test (press a floured finger 1 cm into the dough) and oven spring. A fast, full bounce-back plus a side-tearing burst points to under-proofed. A dent that lingers plus a flat, spread-out loaf points to over-proofed.
Which is worse? Under-proofed is usually the easier fix going forward — next time, simply let the dough rise longer or in a warmer spot. Over-proofed dough has used up most of its gas and gluten strength, so it can't be rescued mid-bake; you'd need to shorten the proof or use cooler temperatures next round.
Results vary by kitchen temperature and starter strength, so treat these as patterns to compare against your own loaf, not guarantees.
How to Fix and Prevent Proofing Problems
Once you've diagnosed the problem, here's exactly what to do next.
If your dough is under-proofed (it hasn't fermented long enough, so it's tight and barely risen):
- Extend the bulk ferment — the first rise after mixing, before shaping. Give it another 30–60 minutes and re-check.
- Warm the dough. Sourdough loves 75–78°F (24–26°C). Move the bowl somewhere warm, like an oven with just the light on.
- Strengthen your starter. Feed it twice a day for a few days until it reliably doubles within 4–6 hours before you bake again.
If your dough is over-proofed (it fermented too long, so it's slack, bubbly, and won't hold its shape):
- Shorten your timing next bake by 30–60 minutes.
- Cool the dough by moving it to a cooler spot to slow fermentation.
- Watch volume, not the clock. The clock lies because every kitchen runs at a different temperature.
Prevent both with these habits:
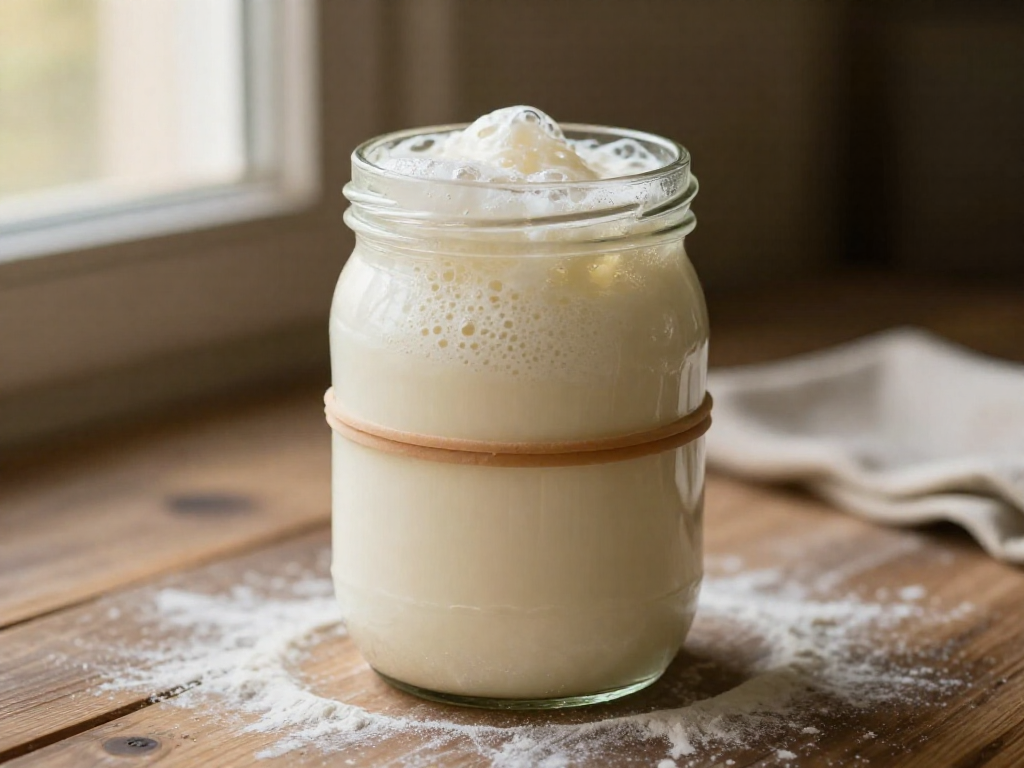
- Use the "rise by percentage" method. Mark your dough's starting level (a rubber band on the bowl works), then end the bulk ferment when it has grown about 50%, not when a timer goes off.
- Cold retard in the fridge. After shaping, refrigerate the loaf 8–16 hours. The cold slows fermentation dramatically, giving you a wide, forgiving window to bake.
- Keep a simple bake log. Jot down kitchen temperature, bulk time, and how the loaf turned out. After three or four bakes you'll know exactly what your kitchen needs.
Results vary by kitchen and climate, so treat each loaf as data, not a pass-or-fail test.
See also
- Why Is My Sourdough Gummy? Causes and Fixes
- Beginner Sourdough Starter Guide: Feeding and Strength
- How to Read Sourdough Crumb (Open vs. Tight)
- Bulk Fermentation Explained for Beginners
- Cold Retard vs. Room-Temperature Proofing
- Simple Beginner Sourdough Bread Recipe
Related articles
The Float Test Lie: Why Your Starter Might Be Ready Even If It Sinks
Is the float test a reliable way to tell if my sourdough starter is ready to use? Learn why this common test lies—and what to check instead for perfect bread every time.
Jul 20, 2026 · 8 min read
Sourdough in Summer vs. Winter: How to Adjust for Temperature Extremes
How do you adapt your sourdough baking process for very hot or cold weather?
Jul 20, 2026 · 9 min read
Beginner's Guide to Controlling Sourdough Tang: How to Make It Milder or More Sour
Learn how to control the sourness of your sourdough bread with simple beginner adjustments to fermentation time, temperature, and starter feeding.
Jul 14, 2026 · 12 min read